
Are you looking to give your plain cement bird bath a fresh, colorful makeover? Painting your bird bath is a simple way to add charm and personality to your garden while protecting it from the elements.
Imagine turning that dull, gray surface into a vibrant centerpiece that attracts birds and brightens your outdoor space. In this guide, you’ll learn exactly how to choose the right paint, prepare your bird bath, and apply the perfect finish. Keep reading, and you’ll discover easy steps that anyone can follow to transform your cement bird bath into a beautiful, lasting work of art.
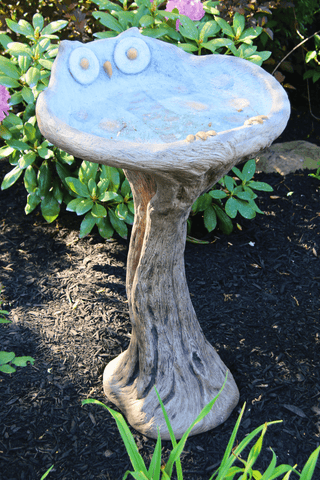
Credit: fountainful.com
Choosing The Right Paint
Choosing the right paint for your cement bird bath can make all the difference between a project that lasts and one that quickly fades or chips. The paint you pick needs to stick well, resist weather, and keep your bird bath looking fresh season after season. Let’s look at what types of paint work best and which ones stand up to outdoor conditions.
Types Of Paint For Cement
Not all paints are made for cement surfaces. Acrylic latex paint is a popular choice because it’s easy to apply and offers good adhesion on porous surfaces like cement.
Enamel paint provides a harder finish, which is great if you want extra durability. However, it can be trickier to work with and might require a primer first.
Another option is masonry paint. Specifically designed for cement and brick, it’s breathable and prevents moisture buildup that can cause peeling.
- Acrylic Latex:Water-based, easy cleanup, good color retention.
- Enamel Paint:Oil-based or water-based, hard finish, more durable.
- Masonry Paint:Designed for cement, prevents moisture damage.
Weatherproof And Durable Options
Because your bird bath lives outdoors, your paint choice needs to handle sun, rain, and temperature changes. Look for paints labeled as weatherproof or exterior-grade.
Adding a clear sealer after painting can boost durability. A water-based polyurethane sealer adds a protective layer without yellowing over time.
Think about your local climate. If you get a lot of sun, UV-resistant paint will help prevent fading. In wetter areas, moisture-resistant paint can stop mold and mildew.
- Choose exterior-gradepaints for lasting results.
- Consider a UV-resistantformula if your bird bath is in direct sunlight.
- Add a clear sealerto protect your paint job from moisture and wear.
Have you noticed certain paints peeling or fading in your garden before? Picking the right type and finish can save you from repainting every season. What kind of weather challenges does your bird bath face?
Preparing The Bird Bath Surface
Preparing the surface of your cement bird bath is a crucial step before painting. A well-prepped surface ensures the paint sticks properly and lasts longer. Taking time to clean, repair, and sand the bird bath will make your final result stand out.
Cleaning The Cement Thoroughly
Start by removing any dirt, algae, or bird droppings from the surface. Use a stiff brush and a mixture of water and mild detergent to scrub the bird bath well. Rinse it thoroughly with clean water and let it dry completely; moisture can prevent paint from adhering properly.
Have you noticed how even a small amount of grime can cause paint to peel off quickly? That’s why skipping this step can cost you time and effort later.
Repairing Cracks And Imperfections
Inspect the bird bath for cracks or chips that could affect the paint’s finish. Use a patching compound or cement filler designed for outdoor use to fill these gaps. Smooth the surface with a putty knife and allow it to dry fully before moving on.
Fixing these flaws not only improves appearance but also protects the bird bath from further damage. Would you want your paint job to highlight those cracks instead of hiding them?
Sanding For Better Adhesion
Once the repairs are dry, lightly sand the entire surface using medium-grit sandpaper. This step helps create tiny grooves that give the paint a better grip. Wipe away any dust with a damp cloth and let it dry before painting.
Sanding might seem like extra work, but think about how smooth and even your paint will look. Have you ever painted on a slick surface and had the paint peel off quickly? Sanding prevents that.
Gathering Supplies
Before you pick up a paintbrush, gathering the right supplies sets you up for success. Painting a cement bird bath requires specific tools and materials to ensure the paint adheres well and lasts through the weather. Skipping this step can lead to frustration and a finish that chips or peels quickly.
Essential Tools And Materials
Start with the basics to prepare your bird bath and paint it properly. You will need:
- Exterior-grade acrylic paint:This type of paint is designed to withstand outdoor conditions and stick well to cement surfaces.
- Primer for masonry:A good primer helps the paint bond to the porous cement and prevents flaking.
- Paintbrushes:Choose a variety of sizes, including a wide brush for large areas and smaller ones for details.
- Sandpaper (medium grit):To smooth rough spots and improve paint adhesion.
- Clean cloth or sponge:For wiping down the surface before painting.
- Sealant:A clear, waterproof sealant protects your paint job from moisture and sun damage.
Have you ever tried painting without proper primer or sealant? The results can be disappointing, so investing in quality materials pays off.
Protective Gear To Use
Your safety matters when working with paint and cleaning materials. Protect yourself with:
- Gloves:Paint and primer can irritate your skin, so wear disposable or reusable gloves.
- Mask:A dust mask keeps you safe from sanding dust and fumes from paint or sealant.
- Old clothes or apron:Wear something you don’t mind getting paint on.
- Eye protection:Safety goggles shield your eyes from splashes and dust.
Have you noticed how much easier and safer a project feels when you’re properly protected? It also lets you focus fully on the painting rather than worrying about potential hazards.
Priming The Surface
Priming the surface of your cement bird bath is a crucial step that sets the foundation for a long-lasting paint job. Without proper priming, paint may peel or fade quickly due to the porous nature of cement. Taking the time to prime ensures your colors stay vibrant and the finish remains smooth.
Choosing The Right Primer
Not all primers work well on cement. You need a primer designed to bond with porous, rough surfaces. Acrylic or latex-based primers are excellent choices because they seal the cement and provide a good base for paint.
Look for primers labeled as “masonry” or “concrete” primers. These are specifically formulated to handle the texture and moisture levels in cement. Have you checked the label on your primer lately? It can make a big difference in durability.
Applying Primer Evenly
Applying primer evenly is key to avoiding blotchy paint later on. Use a brush or roller with medium nap to cover the surface thoroughly without leaving thick patches. Thin, consistent layers work better than one heavy coat.
Allow the primer to dry completely before painting, usually a few hours depending on the weather. If you rush this step, the paint might not adhere well. Think about how an even base affects the final look—would you want your bird bath to have a smooth finish or a patchy one?
Painting Techniques
Choosing the right painting technique affects the final look and durability of your cement bird bath. Different methods offer unique textures and finishes. Understanding these techniques helps you achieve the best results for your outdoor decor.
Using Brushes Vs. Spray Paint
Brushes give control for detailed work and small areas. They help apply paint evenly on curves and edges. Brush strokes add texture to the surface, giving a handcrafted feel.
Spray paint covers large areas quickly and smoothly. It creates a uniform finish without visible brush marks. Spray paint works well for flat or simple shapes but needs careful masking to avoid overspray.
Choose brushes for precision and spray paint for speed and smoothness. Sometimes, combining both methods works best for different parts of the bird bath.
Applying Multiple Coats
Multiple coats improve color depth and paint durability. Each layer strengthens protection against weather and wear. Let each coat dry completely before adding the next.
Thin coats prevent drips and uneven textures. Light sanding between coats smooths the surface for a polished look. Two to three coats usually provide good coverage and lasting color.
Creating Patterns And Designs
Patterns add personality and charm to your bird bath. Use painter’s tape to create clean lines and geometric shapes. Stencils are great for floral or nature-inspired motifs.
Sponging or splattering paint adds texture and interest. Try contrasting colors to make designs pop. Seal the painted designs with a clear outdoor varnish for protection.

Credit: www.chairish.com
Sealing And Finishing Touches
Sealing protects the paint from water and weather damage, keeping colors bright longer. Applying a clear finish adds shine and smoothness for a polished look. Let each coat dry fully before adding the next layer to ensure durability.
Sealing and finishing your cement bird bath is a crucial step that ensures durability and enhances its visual appeal. Once your paint has fully dried, you’ll want to protect your artistic effort from weather elements. A well-sealed bird bath resists moisture, prevents cracks, and prolongs the life of your paint job. This is the moment where your bird bath transforms from a simple cement structure to a vivid garden feature.Selecting A Sealant
Choosing the right sealant is your first step towards a lasting finish. Opt for a non-toxic, waterproof sealant, ensuring it’s safe for birds and other wildlife. Acrylic or polyurethane sealants are popular choices due to their durability and water resistance. Before purchasing, check if the sealant is suitable for outdoor use and has UV protection to prevent fading.Applying Sealant For Longevity
Apply your sealant evenly across the entire surface of the bird bath. Use a brush with synthetic bristles for a smooth application. Ensure that the sealant covers all painted areas as well as the inside of the basin, where water will sit. Allow each coat to dry completely before applying the next, following the manufacturer’s instructions for drying time. Typically, two to three coats are recommended for optimal protection. Remember, taking your time with this process can dramatically increase the lifespan of your bird bath. Finally, think about how your bird bath will look in different seasons. Will it stand out among the greenery of spring or the white blanket of winter? A well-sealed bird bath can become a stunning focal point in your garden, inviting not only birds but also admiration from visitors.Maintenance Tips
Clean the bird bath thoroughly to remove dirt and old paint. Use outdoor paint designed for cement to ensure durability and waterproofing. Apply thin, even coats and let each layer dry completely before adding the next.
Maintaining your painted cement bird bath is essential to keep it looking fresh and inviting for your feathered friends. After spending time giving it a beautiful makeover, you want to ensure it stays in top condition. Regular upkeep will not only enhance its appearance but also extend its life, giving you more time to enjoy the vibrant touch it adds to your garden. Here are some practical tips to help you maintain your painted bird bath effectively.Cleaning Painted Bird Bath
To keep your bird bath clean, make it a habit to refresh the water every few days. This prevents algae buildup and keeps the bath hygienic for birds. Use a gentle, non-abrasive sponge to wipe the surfaces, ensuring you don’t damage the paint. Mix a small amount of mild dish soap with water to clean stubborn stains. Rinse thoroughly to ensure no soap residue is left, which could be harmful to birds. You might be surprised how a little regular cleaning can make a big difference.Touching Up Paint Over Time
Over time, the painted surface may show signs of wear. Keep a small tin of your original paint handy for touch-ups. This way, you can quickly cover any chips or faded areas. Before painting, clean the area thoroughly and let it dry. Apply a thin layer of paint and let it dry completely before refilling the bird bath. This quick fix will keep your bird bath looking as good as new without much effort. Taking these steps ensures your bird bath remains a beautiful and functional centerpiece in your garden. When you regularly maintain it, not only do you preserve its charm, but you also create a welcoming space for birds, encouraging them to visit more often. What could be more rewarding than watching your garden flourish with life?
Credit: www.dukemanorfarm.com
Frequently Asked Questions
How Do I Prepare A Cement Bird Bath For Painting?
Clean the bird bath thoroughly and let it dry completely. Remove dirt, mold, and loose debris using a brush or mild detergent. Ensure the surface is smooth and free of cracks before painting to achieve the best results.
What Type Of Paint Is Best For Cement Bird Baths?
Use exterior acrylic latex paint or specialized masonry paint. These paints resist moisture, weather, and UV rays, ensuring durability. Avoid oil-based paints as they may peel or crack on cement surfaces over time.
How Many Coats Of Paint Should I Apply?
Apply two to three thin coats for optimal coverage and durability. Allow each coat to dry completely before applying the next. Thin layers prevent drips and ensure a smooth, even finish on the bird bath.
Can I Seal The Painted Bird Bath For Protection?
Yes, apply a clear, waterproof sealer after the paint dries. This protects the paint from weather damage and extends its lifespan. Use a non-toxic sealer to keep the bird bath safe for wildlife.
Conclusion
Painting a cement bird bath adds color and charm to your garden. It also protects the surface from weather damage. Choose the right paint and follow each step carefully. Take your time to ensure even coats and proper drying. Enjoy the fresh look and watch birds visit more often.
This simple project makes your outdoor space more inviting. Try it yourself and see the difference it brings.


