
Have you ever wanted to create drawings that show the world from above, like a bird soaring high in the sky? Learning how to draw in bird’s eye view can change the way you see and capture scenes.
It gives your art a fresh perspective that grabs attention and makes your work stand out. In this guide, you’ll discover simple steps and tips that make mastering bird’s eye view easier than you think. Ready to take your drawing skills to new heights?
Let’s get started!
Credit: www.youtube.com
Basics Of Bird’s Eye View
Bird’s eye view shows a scene from above. It looks like you are flying over the area. This view helps to see many details at once.
Artists use bird’s eye view to draw maps, buildings, and landscapes. It gives a fresh way to show objects and their positions.
What Is Bird’s Eye View
Bird’s eye view is a perspective from high above. It looks straight down on the subject. This point of view shows the top surfaces clearly.
This view is common in drawings of cities, parks, and rooms. It helps to understand layout and space easily.
Key Features Of This Perspective
- Objects appear smaller as they get farther away.
- Only the tops of objects are mostly visible.
- Depth and height are harder to see clearly.
- Lines often converge toward a point on the horizon.
- It gives a wide view of large areas.
| Feature | Description |
| Angle | Looking straight down from above |
| Visibility | Shows tops of objects and ground |
| Scale | Objects shrink with distance |
| Use | Maps, layouts, and planning drawings |

Credit: www.youtube.com
Tools For Drawing Bird’s Eye View
Drawing a bird’s eye view needs the right tools. These tools help you see and draw from above.
Using good tools makes your drawings clear and easy to understand. Both traditional and digital tools work well.
Essential Sketching Supplies
Start with simple sketching supplies to plan your bird’s eye view. These tools help you create shapes and add details.
- Pencils with different hardness for light or dark lines
- Erasers to fix mistakes and clean lines
- Rulers and triangle rulers for straight edges and angles
- Graph paper to keep proportions correct
- Fine-tip pens for outlining your final drawing
- Colored pencils or markers to add color and depth
Use a sketchbook or large drawing paper to have enough space for your view.
Digital Tools And Software
Digital tools help you draw clean bird’s eye views quickly. They let you edit and change your work easily.
- Graphic tablets with stylus for natural drawing feel
- Vector drawing software for sharp lines and shapes
- 3D modeling software to view objects from above in detail
- Drawing apps with layers to separate different parts of your drawing
- Grid and snapping features to keep drawings aligned
Popular programs include free and paid options. Choose one that fits your skill level and needs.
Setting Up Your Drawing
Drawing from a bird’s eye view means looking down from above. This view helps to show layouts clearly. Setting up your drawing well is important for accuracy.
Start by planning your angle and perspective. These guide how your drawing will look. Use horizon and vanishing points to keep everything in place.
Choosing The Right Angle
Pick an angle that shows the scene clearly from above. The angle affects what details you can see. A steep angle shows less depth but more surface area.
- Decide how high the viewpoint is
- Consider what parts of the scene are important
- Choose an angle that balances detail and clarity
- Use a reference photo if needed
Establishing Horizon And Vanishing Points
The horizon line represents eye level in your drawing. Vanishing points help create depth. They guide how objects shrink as they move away.
| Term | Description |
| Horizon Line | Eye level line across the drawing |
| Vanishing Points | Points on the horizon where lines meet |
| Bird’s Eye View | Looking down from high above |
Sketching Simple Shapes
Drawing from a bird’s eye view means looking down from above. It helps to start with simple shapes.
Simple shapes like cubes and rectangles make complex objects easier to draw. They form the base for detailed sketches.
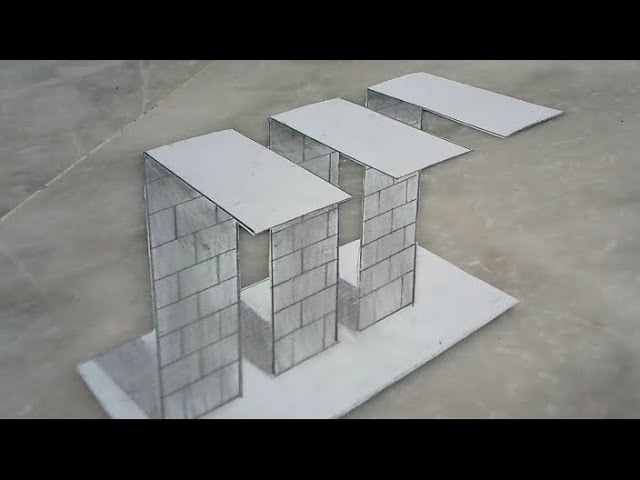
Drawing Cubes And Rectangles
Begin by sketching flat rectangles to show tops of objects. Then add vertical lines to create height.
Use straight lines to keep shapes neat. This helps represent buildings or boxes from above.
- Draw a flat rectangle for the top face
- Add vertical lines down from corners
- Connect bottom points to close the shape
- Keep edges straight and corners sharp
Adding Depth With Perspective Lines
Perspective lines help show depth and distance in your drawing. They guide the shapes to look 3D.
From the bird’s eye view, lines go toward a point on the horizon. This point is called the vanishing point.
- Start lines from edges of shapes
- Draw lines that move toward the vanishing point
- Use these lines to set shape size and angle
- Erase extra lines after drawing the shapes
Creating Complex Scenes
Drawing a bird’s eye view lets you show a wide area from above. This view helps you create detailed and complex scenes.
To make your scene interesting, you need to carefully place buildings, objects, and nature. Layering these parts adds depth and realism.
Layering Buildings And Objects
Start by drawing the largest buildings first. Place them in the main areas of your scene. Add smaller buildings around them.
Next, add objects like cars, benches, and streetlights. Layer these on top of the buildings to show they are closer to the viewer.
- Draw large shapes first
- Place smaller buildings nearby
- Add objects over buildings
- Use shadows to show layers
Incorporating Natural Elements
Include trees, rivers, and parks to balance your scene. These elements add life and color to your drawing.
Place natural elements behind or between buildings. Use lighter colors and softer shapes to show distance.
- Draw trees and plants in groups
- Place water features near buildings
- Use soft edges for far objects
- Mix natural and man-made elements
Shading And Detailing Techniques
Drawing in bird’s eye view requires careful shading to show depth. Detailing adds realism and interest.
Understanding light and texture helps create clear and engaging images from above.
Light Source And Shadows
Find the direction of your light source before shading. Shadows help show form and height.
- Decide the light angle—top-left, top-right, etc.
- Shade areas opposite the light with darker tones.
- Use soft shadows for smooth surfaces and sharp shadows for hard edges.
- Keep shadow size consistent with the light source distance.
- Add subtle gradients to show rounded objects.
Texture And Fine Details
Textures make your drawing feel real. Use fine lines and dots to add detail.
| Texture Type | Technique | Effect |
| Wood | Parallel lines with small knots | Natural grain look |
| Grass | Short, thin strokes | Soft, uneven surface |
| Metal | Smooth shading with highlights | Shiny and reflective |
| Stone | Random dots and rough strokes | Rugged, uneven surface |
Common Mistakes To Avoid
Drawing in bird’s eye view can be tricky. Many artists make simple errors that change the look of their work.
Knowing what to watch out for helps you draw better and faster. This guide covers two common mistakes.
Perspective Distortions
Perspective distortions happen when objects look stretched or squished in the bird’s eye view. This breaks the illusion of height and space.
- Avoid bending straight lines too much.
- Keep vanishing points consistent across the drawing.
- Do not place objects too close to the edges where distortion is strongest.
- Use light guidelines to check angles before finalizing shapes.
Incorrect Scale And Proportion
Many drawings look odd because the scale and proportion of objects are off in bird’s eye view.
| Common Error | Effect on Drawing |
| Too large objects near the center | Makes scene look unrealistic |
| Too small objects near the edges | Objects lose detail and importance |
| Ignoring height differences | Loses 3D feeling in the image |
| Mixing different scales | Confuses viewer about distance |

Credit: www.youtube.com
Practice Exercises
Drawing in birds eye view can be tricky at first. Practice helps you see things from above clearly.
Try these exercises to improve your skills and build confidence in this perspective.
Quick Sketch Drills
Quick sketches train your eye to capture shapes fast. Use simple objects like chairs or tables.
Draw each object from above in less than five minutes. Focus on shapes and proportions, not details.
- Choose an object and look at it from above.
- Sketch its outline quickly on paper.
- Mark key details like edges or shadows.
- Repeat with different objects each day.
Timed Perspective Challenges
Set a timer to draw scenes from a bird’s eye view. This helps you work under pressure.
Start with simple rooms or street corners. Try to include perspective lines and depth in your drawing.
- Pick a scene or photo to draw.
- Set a timer for 10 or 15 minutes.
- Draw the scene from above within the time limit.
- Check your perspective and correct mistakes.
Applying Bird’s Eye View In Art
Bird’s eye view shows a scene from above, like looking down from the sky. Artists use this view to give a unique perspective.
This view helps show large areas and complex scenes clearly. It changes how we see shapes and space in art.
Use In Landscape And Cityscape
Bird’s eye view works well for drawing landscapes and cities. It shows roads, buildings, trees, and rivers from above.
- Shows layout of streets and parks
- Highlights shapes of buildings and natural features
- Creates a sense of scale and distance
- Helps viewers understand how parts fit together
- Allows artists to play with patterns and geometry
Incorporating Into Storytelling
Bird’s eye view can add drama and context to stories in art. It gives a clear picture of where events happen.
| Story Element | How Bird’s Eye View Helps |
| Setting | Shows entire scene and surroundings |
| Action | Tracks movement across large spaces |
| Focus | Highlights key locations or objects |
| Mood | Creates feelings of distance or control |
Frequently Asked Questions
What Is A Bird’s Eye View Drawing?
A bird’s eye view drawing shows a scene from directly above. It helps visualize layouts and designs clearly. This perspective is widely used in architecture, maps, and art for better spatial understanding.
How Do I Start A Bird’s Eye View Sketch?
Begin by outlining the main shapes and structures from above. Use simple geometric forms to represent objects. Focus on proportions and positioning before adding details for accuracy.
What Tools Are Best For Bird’s Eye View Drawings?
Pencils, rulers, and graph paper are ideal for precision. Digital tools like drawing tablets and software also enhance accuracy. Choose tools based on your skill and project needs.
How Can I Improve Perspective In Bird’s Eye View Art?
Practice consistent scale and angles for all elements. Use guidelines to maintain correct proportions. Studying real aerial photos can also boost your perspective skills.
Conclusion
Creating a bird’s eye view drawing is easier than it seems. Start by sketching basic shapes. Then, add details and depth to bring life. Practice regularly to improve your skills. Remember, patience and observation are key. Nature offers endless inspiration.
Use it to enhance your drawings. Enjoy the process and watch your art evolve. Soon, you’ll create stunning bird’s eye views. Keep drawing and exploring. Your unique perspective will develop over time. Share your work and gather feedback. Art is a journey, not a destination.
Happy drawing!


