
Imagine turning your backyard into a lively haven full of colorful birds, all gathered around a simple, sturdy bird feeder pole you made yourself. You don’t need to be an expert or spend a fortune to create something that attracts nature’s beauty right to your window.
In this guide, you’ll discover easy steps to build your own bird feeder pole that’s perfect for your space and your feathered friends. Ready to bring more life and joy to your outdoor space? Let’s get started!
Choosing The Right Materials
Choosing the right materials is essential for building a strong bird feeder pole. The materials must withstand outdoor conditions and support the feeder securely. Selecting quality wood and paint ensures your pole lasts longer. Gathering the proper tools makes the assembly easier and safer.
Selecting Durable Wood
Choose wood that resists rot and insect damage. Cedar and redwood are excellent options. They handle moisture well and stay strong over time. Avoid soft woods like pine, which can decay quickly. A sturdy pole supports the weight of the feeder and birds.
Picking Weather-resistant Paint
Use paint made for outdoor use to protect the wood. Look for labels that say “weather-resistant” or “exterior paint.” These paints prevent water damage and fading. Applying a primer before painting improves durability. Paint also adds color and style to your bird feeder pole.
Gathering Necessary Tools
Prepare tools before starting your project. Common tools include:
- Drill for making holes
- Screwdriver for fastening screws
- Sandpaper to smooth rough edges
- Paintbrush for applying paint
- Measuring tape for accuracy
Having the right tools makes building easier and safer. Check all tools work well before use.
Designing Your Bird Feeder Pole
Designing your bird feeder pole is where creativity meets functionality. Your design choices will affect not only the look of your garden but also how many birds visit and how comfortably they can feed. Think about what suits your space and which birds you want to attract, then let your design reflect that.
Simple Vs. Decorative Styles
A simple bird feeder pole focuses on clean lines and basic shapes. It’s quick to build and easy to maintain, perfect if you want something that blends into your garden without drawing too much attention. On the other hand, decorative poles can be a statement piece, featuring artistic elements like carved details, painted patterns, or themed shapes.
Consider your own style—do you want the pole to be a subtle background or a focal point? Sometimes, less is more, but a unique decorative pole can invite more curious birds and compliments from visitors.
Incorporating Multiple Feeders
Adding space for several feeders on one pole can turn your setup into a mini buffet for birds. This allows you to offer different types of food, attracting a wider variety of species. You can use arms or brackets that stick out at different heights and angles to avoid crowding.
Think about balance and stability as you add feeders. Can your pole support the extra weight? Also, spacing feeders apart helps reduce competition and keeps birds comfortable. Have you noticed how birds prefer some personal space when eating?
Adding Perches And Accessories
Perches give birds a place to rest while they eat. You can add simple wooden dowels or more natural branches, depending on your design. Accessories like squirrel baffles or seed catchers not only protect your feeders but also reduce mess.
Don’t forget to add a hook or bracket for hanging additional items like suet cakes or water dishes. These small touches make your pole more inviting and useful. What kind of accessories would make your bird feeder pole more practical or fun?
Building The Pole
Building a sturdy and reliable bird feeder pole is key to attracting feathered visitors to your garden. The process involves careful preparation of materials, solid assembly, and smart placement of feeders. Let’s break down how you can create a pole that stands the test of time and invites a variety of birds.
Cutting And Preparing Wood
Start with a strong, weather-resistant wood like cedar or treated pine. Cut the pole to a height that suits your garden space and makes it easy for you to refill the feeders—usually around 6 to 8 feet works well.
Sand the wood to smooth out rough edges and prevent splinters. If you want extra durability, apply a non-toxic outdoor sealant to protect it from moisture and insects. Have you checked if your wood is straight? A crooked pole can make feeders hang unevenly and frustrate your efforts.
Assembling The Base And Pole
The base needs to be stable to keep the pole upright during wind or when birds land. Use a sturdy wooden or metal base, or embed the pole into a concrete-filled bucket for extra support.
Attach the pole securely to the base using heavy-duty screws or brackets. Make sure the connection is tight and the pole stands perfectly vertical. I found that using a level during assembly saves you from a wobbly pole later on—how about you give it a try?
Securing Feeders To The Pole
Choose hooks or brackets that can be firmly attached to the pole to hold your feeders. Space them out to prevent birds from crowding and to reduce the risk of tangled perches.
- Use S-hooks or eye bolts screwed into the pole for easy feeder hanging.
- Consider adding horizontal arms if you want to hang multiple feeders at different heights.
- Ensure all attachments are secure to avoid feeders swinging too much or falling.
Think about how easy it will be for you to remove and clean the feeders. Have you thought about adding a small platform near the top for easier refilling? This little detail can make a big difference on busy mornings.

Credit: www.amazon.com
Finishing Touches
Finishing touches can make or break your DIY bird feeder pole project. They not only improve the look but also ensure the pole lasts through changing weather. Taking time here saves you from repairs and replacements later.
Sanding And Painting
Sanding smooths the surface, removing rough spots and splinters that could harm birds or damage your paint. Use medium-grit sandpaper first, then fine-grit for a polished finish. This helps paint stick better and look more even.
Choose paint that’s safe for outdoor use and non-toxic, especially since birds will be nearby. Bright colors attract birds, but you might want natural tones to blend with your garden. Remember, multiple thin coats work better than one thick layer.
Waterproofing For Longevity
Waterproofing extends the life of your pole by protecting it from rain, snow, and moisture. Clear sealants or wood preservatives work well without hiding your paint job. Apply evenly and allow each coat to dry fully before adding another.
Consider how often your pole will face harsh weather. Would a second layer of waterproofing be worth it? This extra step can prevent wood rot and save you money in the long run.
Adding Decorative Elements
Decorations give your bird feeder pole personality and can make it a focal point in your yard. Think about attaching small wind chimes, colorful beads, or even painted bird silhouettes. These add charm without disturbing the birds.
Keep decorations lightweight and securely fastened to avoid falling hazards. Have you thought about using natural materials like pinecones or dried flowers? They can enhance the look while staying eco-friendly.
Installing Your Bird Feeder Pole
Installing your bird feeder pole correctly is key to attracting feathered friends and keeping your setup safe and stable. A well-placed, securely anchored pole ensures birds feel comfortable visiting while protecting your investment from weather and curious critters. Let’s break down how to choose the perfect spot, anchor your pole firmly, and keep it stable over time.
Choosing The Best Location
Pick a spot that offers birds easy access but also some shelter from strong winds and predators. Near shrubs or trees is ideal because birds use them as cover, but avoid spots too close to windows to prevent collisions.
Think about your viewing pleasure, too. Where do you want to watch the birds from? Placing the feeder within sight of a window or patio will bring you more joy.
Anchoring The Pole Securely
Secure anchoring prevents your pole from tipping over or wobbling when birds land. Dig a hole deep enough—usually about 12 to 18 inches—to stabilize the pole firmly in the ground.
- Use gravel at the bottom for drainage and extra stability.
- Add concrete for a permanent, sturdy hold if you don’t plan to move the pole.
- Alternatively, use a metal ground spike for easier installation and removal.
Have you tried using a level during installation? It ensures your pole stands perfectly vertical, which helps with both appearance and balance.
Maintaining Stability Over Time
Regular checks can save you from unexpected falls or damage. Look for signs of leaning, rust, or loosened anchors, especially after storms or heavy winds.
Re-tighten bolts, replace worn parts, and clear any debris around the base to keep your pole steady and inviting for birds year-round.
Do you keep a seasonal maintenance schedule? Setting reminders can help you stay on top of pole care without extra effort.

Credit: www.familyhandyman.com
Attracting Birds To Your Feeder
Building your own bird feeder pole invites birds with a personal touch. Simple materials and easy steps create a perfect spot for feathered visitors. Watch colorful birds gather while enjoying your backyard.
Attracting birds to your feeder can be a delightful experience. A well-placed bird feeder pole can create a vibrant oasis in your backyard. Birds not only bring color and life, but they also help with pest control. To make your bird feeder a popular spot, a few considerations are essential.Selecting The Right Bird Food
Choose bird food based on the species you want to attract. Sunflower seeds are a favorite for many birds. Thistle seeds attract finches and sparrows. Suet cakes are ideal for woodpeckers and nuthatches. Mix different seeds to draw a variety of birds. This diversity ensures constant bird traffic.Keeping Feeders Clean
Clean feeders regularly to prevent disease. Use hot water and mild soap for cleaning. Rinse thoroughly to remove soap residue. Let feeders dry completely before refilling. Check for moldy or wet food. Replace it immediately to keep feeders inviting.Creating A Bird-friendly Environment
Plant native shrubs and trees around your feeder. Provide shelter and nesting sites. Add a birdbath for drinking and bathing. Ensure the water is fresh and clean. Avoid using pesticides in the garden. Birds will feel safe and return often.Troubleshooting Common Issues
Common issues with DIY bird feeder poles include stability problems and weather damage. Tighten connections and use weather-resistant materials to improve durability. Regular checks help keep the feeder secure and inviting for birds.
If you’ve built your own bird feeder pole, you’ve taken a step toward inviting nature into your backyard. But like any DIY project, challenges can arise. These might include unwelcome pests, signs of wear, and seasonal shifts. Addressing these can enhance your birdwatching experience. Below, we explore common issues and their solutions.Dealing With Squirrels And Pests
Squirrels love bird seed. They often raid bird feeders. To keep them away, use squirrel baffles. These are dome-shaped devices. They block squirrels from climbing poles. Attach them below the feeder. You can also use spicy bird seed. Birds won’t mind it. Squirrels will avoid it.Repairing Wear And Tear
Over time, bird feeder poles can wear out. Weather can cause rust or bending. Regular maintenance is key. Inspect your pole monthly. Tighten loose screws. Replace any damaged parts. Use rust-resistant paint. It helps protect against rain and snow.Adjusting For Seasonal Changes
Seasons affect bird activity. Adjust your feeder’s location with seasons. In winter, place it near shelter. Birds seek warmth and protection. In summer, provide shade. This keeps bird seed fresh. Adjust the pole height to suit different birds. Some birds prefer feeders higher up. Others feed closer to the ground.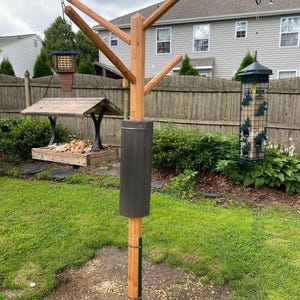
Credit: www.etsy.com
Frequently Asked Questions
What Materials Do I Need For A Diy Bird Feeder Pole?
You need sturdy wood or metal poles, screws, a drill, paint, and a bird feeder. Choose weather-resistant materials for durability. These supplies ensure your bird feeder pole is strong and safe for birds.
How High Should A Bird Feeder Pole Be Placed?
Place the bird feeder pole 5 to 6 feet above the ground. This height keeps birds safe from predators and easy to observe. It also provides stability against wind and weather.
Can I Make A Bird Feeder Pole Without Special Tools?
Yes, basic tools like a drill, screwdriver, and hammer are enough. You don’t need expensive or specialized equipment. Simple hand tools help you assemble and secure the pole easily.
How Do I Protect My Diy Bird Feeder Pole From Weather?
Use weatherproof paint or sealant on the pole surface. This prevents rust and wood rot. Regular maintenance extends the life of your bird feeder pole in all seasons.
Conclusion
Building your own bird feeder pole brings joy and fun. You can enjoy watching birds up close every day. It also helps birds find food easily, especially in winter. Making the pole yourself saves money and lets you choose the best design.
Try simple materials and tools to start your project today. Small steps lead to great results. Your garden will feel lively and full of nature’s beauty. Give it a try and see how birds brighten your outdoor space.


