
If you love watching birds up close, mounting a camera bird feeder is a game-changer. Imagine seeing every flutter, every colorful feather, and every tiny movement right from your phone or computer.
But how do you get started? You might feel unsure about where to place the feeder or how to set up the camera for the best view. Don’t worry—this guide will walk you through simple, step-by-step instructions to help you mount your camera bird feeder easily and effectively.
By the end, you’ll be ready to capture stunning bird moments that you can enjoy anytime. Keep reading to discover how to turn your backyard into a live bird-watching haven!
Choosing The Right Camera
Choosing the right camera is key to capturing clear and exciting bird feeder moments. The camera must suit your needs and environment. It should be easy to install and operate. A good camera helps you enjoy bird watching more. This section guides you through different camera types, important features, and budget options. It makes your choice simple and smart.
Types Of Cameras For Bird Feeding
- Trail Cameras:Designed for outdoor use and motion detection. They capture birds without disturbing them.
- Webcams:Connect to your computer or phone. Allow live streaming and easy remote viewing.
- Point-and-Shoot Cameras:Compact and easy to position near feeders. Great for beginners.
- Action Cameras:Small and durable. Can be mounted in tight spots and handle weather well.
Key Features To Consider
- Resolution:Higher resolution means sharper images and videos.
- Motion Sensor:Triggers the camera only when birds arrive. Saves battery and storage.
- Night Vision:Useful for capturing birds in low light or at dusk.
- Weatherproofing:Protects the camera from rain and dust.
- Battery Life:Longer battery life means less frequent charging or changing batteries.
- Storage:Check if it supports SD cards or cloud storage for easy access.
Budget-friendly Options
Affordable cameras can still deliver good quality. Look for basic trail cameras or simple webcams. Some models offer decent resolution and motion detection at low prices. Buying used or refurbished cameras can save money. Focus on essential features rather than extras. This keeps costs down without losing performance. Simple setups work well for casual bird watchers and beginners.
Selecting The Best Location
Selecting the best location for your camera bird feeder is key to capturing great footage. The right spot attracts more birds and ensures clear, beautiful shots. It also protects your equipment from damage.
Ideal Spot For Bird Activity
Place the feeder where birds naturally gather. Look for trees, bushes, or areas with plenty of seeds and water. Birds feel safe near cover but need open space to see predators. Avoid busy human traffic or loud noises. This helps birds come closer and stay longer.
Considering Lighting And Background
Good lighting makes your videos bright and clear. Morning or late afternoon sun works best. Avoid harsh midday light that creates shadows. Choose a background that contrasts with the birds. Plain or natural backgrounds highlight bird colors. Avoid cluttered or bright backgrounds that distract from the birds.
Avoiding Weather And Obstruction Issues
Protect your camera from rain, wind, and direct sun. Mount it under a porch or tree if possible. Avoid places with strong wind that shakes the camera. Keep the feeder away from branches or objects blocking the view. Clean lines of sight improve your footage quality. Check regularly for leaves or snow that might block the lens.
Mounting Techniques
Mounting a camera bird feeder requires careful thought about location and stability. The right technique ensures clear views and keeps the feeder safe. Various mounting methods suit different environments and budgets. Choose one that fits your space and equipment.
Using Poles And Stakes
Poles and stakes offer flexible placement options. Drive a sturdy stake into the ground near feeding areas. Secure the camera feeder on top with clamps or brackets. This setup keeps the feeder stable and easy to move.
- Choose weather-resistant poles for durability
- Use adjustable clamps for height control
- Ensure the stake is deep enough to prevent tipping
Attaching To Trees Or Structures
Trees and nearby structures provide natural mounting points. Attach the feeder using straps or hooks without harming the tree. This method blends well with the environment and offers good bird activity views.
- Use soft straps to protect tree bark
- Secure with hooks or brackets designed for outdoor use
- Position feeder away from heavy branches to avoid shaking
Diy Mounting Solutions
Custom solutions fit unique spaces or budgets. Create mounts from recycled wood or PVC pipes. Use simple tools like screws and zip ties for assembly. This approach allows creativity and personal touch in placement.
- Build a frame to hold camera and feeder together
- Use waterproof materials for outdoor protection
- Test stability before leaving camera unattended
Credit: www.perchme.com
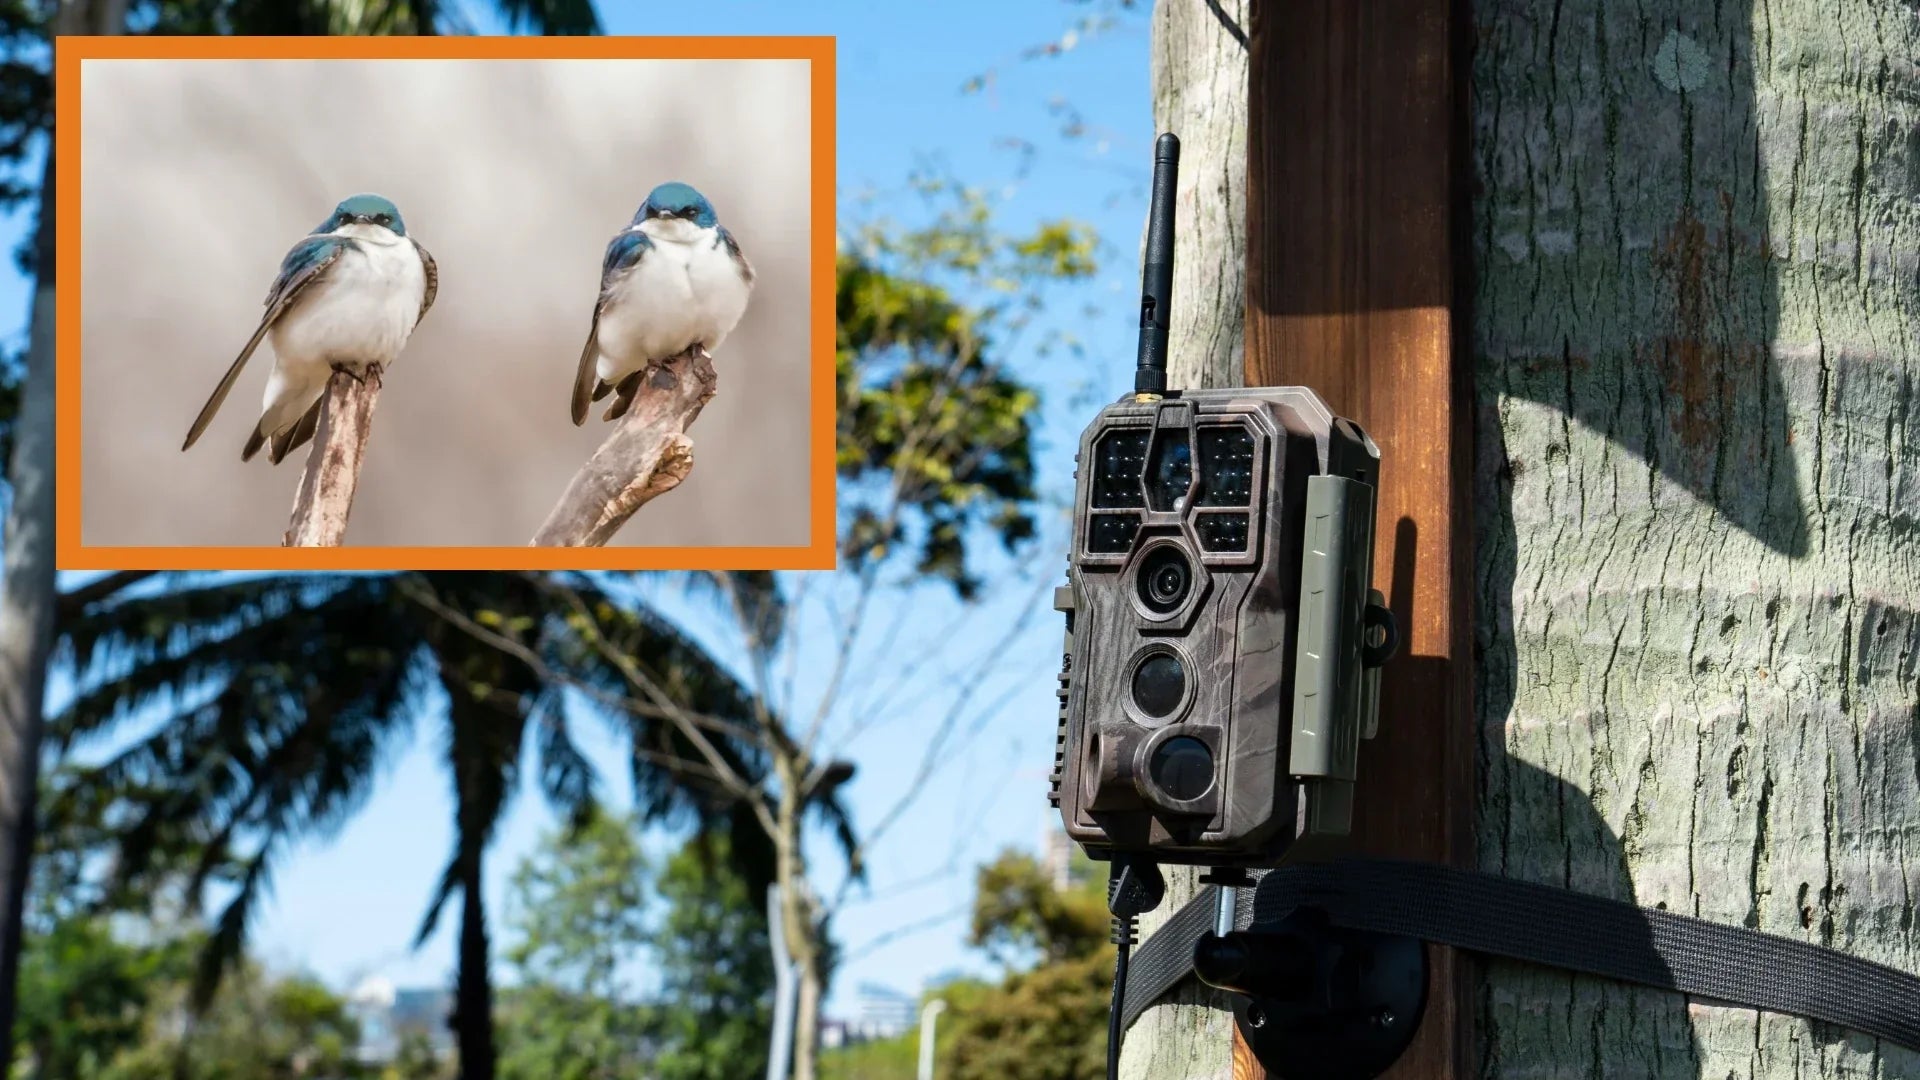
Camera Setup And Angles
Mount the camera at eye level with the bird feeder for clear and close views. Choose angles that avoid glare and capture birds from the side or front. Secure the camera firmly to prevent shaking or falling during wind or bird visits.
Setting up your camera bird feeder is an exciting task that can transform your backyard into a birdwatcher’s paradise. However, to capture those stunning close-ups of your feathered friends, you need to focus on your camera’s setup and angles. The right setup can make all the difference between a blurry shot and a breathtaking image. Let’s delve into the nuances of positioning and adjustments to maximize your birdwatching experience.Positioning For Clear Views
Position your camera where it can capture the birds without obstruction. Choose a spot that offers a direct line of sight to the feeder. Avoid placing the camera too high or too low, which can lead to distorted images. Consider the natural light in the area. Morning or late afternoon light can enhance your photos with a warm glow. Make sure to avoid direct sunlight that can cause glare or harsh shadows.Adjusting Focus And Zoom
Adjust your camera’s focus to ensure sharp images. Use manual focus if your camera allows it for more precise control. This is particularly useful if the birds are small or move quickly. Experiment with the zoom setting. Zooming in can help capture intricate details like feather patterns. Be cautious not to zoom too much, as this might reduce the image quality.Testing Different Perspectives
Try different angles to see what works best for your setup. Sometimes, a slight tilt of the camera can offer a more dynamic view. You might discover a unique perspective that highlights the birds’ interactions. Test various backgrounds. A colorful backdrop of flowers or greenery can make your images pop. Remember, a clutter-free background ensures the birds are the focal point of your photos. Have you considered how the weather might affect your shots? Rain or snow can add a dramatic effect, but ensure your camera is protected. Embrace the elements to capture truly unique bird photos. Each adjustment you make brings you closer to capturing the perfect shot. How will you set up your camera to get the most out of your bird feeder?Power And Connectivity
Power and connectivity are the backbone of any camera bird feeder setup. Without reliable energy and a stable network, your camera might miss those perfect bird moments. Understanding your options helps you keep your camera running smoothly and ensures you never lose sight of your feathered visitors.
Wired Vs. Wireless Cameras
Choosing between wired and wireless cameras depends on your setup location and convenience. Wired cameras offer consistent power and often better video quality, but they require a nearby outlet and careful cable management to avoid disturbing the birds.
Wireless cameras give you flexibility in placement and easier installation. However, they rely on batteries or solar power and may experience occasional signal drops. Ask yourself: is ease of installation more important, or do you prefer the reliability of a constant power source?
Solar And Battery Options
Battery-powered cameras allow you to place feeders far from power outlets, but you’ll need to recharge or replace batteries regularly. Solar-powered options reduce maintenance by charging during daylight, making them eco-friendly and cost-effective over time.
Keep in mind, solar panels work best in sunny areas. If your feeder spot is shaded or you live in a cloudy region, batteries might be more reliable. Think about your local environment before selecting your power source.
Ensuring Stable Network Connection
A steady internet connection is crucial for streaming and recording bird activity. Position your camera within strong Wi-Fi range or consider Wi-Fi extenders to boost signal strength if needed.
Test the connection before final mounting to avoid frequent adjustments. If your feeder is far from your router, a mesh network can provide seamless coverage. Have you checked your network speed lately? A slow connection can cause frustrating delays in live feed.
:max_bytes(150000):strip_icc()/netvue-smart-bird-feeder--3cdcc136ce474f05957ad4ab3e90b527.jpg)
Credit: www.realsimple.com
Maintenance Tips
Ensuring the longevity of your camera bird feeder requires consistent maintenance. This will keep it in optimal condition, allowing you to capture clear and delightful birdwatching moments. Regular upkeep can prevent issues and extend the life of your equipment.
Cleaning The Lens
Dirt and debris can quickly accumulate on the lens. Regular cleaning ensures clear images. Use a microfiber cloth for the best results. Avoid harsh chemicals that may scratch the lens. A gentle lens cleaner spray is ideal for tougher spots.
Protecting From Weather Damage
Weather can harm your bird feeder camera. Use weatherproof covers to shield it from rain. Placing the camera under a roof or awning adds extra protection. Ensure all electrical components are sealed and secure. This prevents moisture from causing damage.
Regularly Checking Mount Stability
A stable mount is crucial for clear footage. Check the mount every few weeks. Tighten screws that may have loosened over time. Ensure the camera remains firmly in place. This stability helps in capturing steady shots. Regular checks can prevent unexpected falls.
Troubleshooting Common Issues
Troubleshooting common issues with your camera bird feeder can save you time and frustration. Understanding typical problems helps you keep your setup running smoothly and ensures you don’t miss capturing those beautiful bird moments. Let’s look at how to tackle some frequent challenges effectively.
Dealing With Blurry Images
Blurry images can ruin your bird feeder photos. Check if the camera lens is clean; dirt or smudges often cause blur. Use a soft cloth to gently wipe the lens without scratching it.
Another cause is improper focus settings. Many cameras allow manual focus—try adjusting it to match the feeder’s distance. If your camera has autofocus, make sure nothing is blocking the sensor or confusing it, like moving branches or leaves.
Have you noticed blur only during certain times? Lighting plays a big role. Too little light forces slower shutter speeds, leading to motion blur. Adding a small external light source might help, but be careful not to scare the birds away.
Fixing Connection Problems
Your camera might lose connection to your phone or computer frequently. Start by checking the Wi-Fi or Bluetooth settings on both devices. Sometimes a simple restart of your camera or router clears glitches.
Distance matters. Keep your devices within the recommended range—walls and obstacles can weaken signals. If your camera supports it, try switching to a less crowded Wi-Fi channel to avoid interference.
Do your connection issues appear only during bad weather? Moisture or extreme temperatures can affect signal strength. Consider placing your feeder and camera in a more sheltered spot or using weatherproof equipment.
Preventing Animal Interference
Curious squirrels or larger animals may disturb your camera or feeder, causing damage or misalignment. Secure the camera firmly using clamps or brackets designed for outdoor use.
Try adding physical barriers like metal guards or cages around the feeder to keep unwanted visitors away. You can also use scent repellents safe for wildlife, but test a small area first to avoid deterring birds.
Have you thought about timing? Setting your camera to activate only during certain hours can reduce disturbances from nocturnal animals. This also saves battery life and storage space.
Credit: gardepro.com
Frequently Asked Questions
How Do I Choose The Right Camera For A Bird Feeder?
Select a camera with good resolution and night vision. Choose weatherproof models for outdoor use. Wireless cameras offer easy installation and remote viewing. Ensure the camera has a wide-angle lens to capture all bird activity.
What Is The Best Location To Mount A Camera Bird Feeder?
Mount the feeder where birds feel safe, near natural cover like trees. Avoid direct sunlight to reduce glare. Position the camera at bird eye-level for clear close-up shots. Ensure easy access for refilling and cleaning.
How High Should I Mount A Camera Bird Feeder?
Mount the feeder 4 to 6 feet above ground. This height deters predators and allows comfortable bird viewing. Adjust based on local wildlife and your yard’s layout. Ensure the camera angle captures birds clearly at this height.
How Do I Prevent Squirrels From Damaging The Camera Feeder?
Use squirrel baffles or mount feeders on poles with guards. Choose feeders with weight-sensitive perches that close for heavy animals. Position the camera and feeder away from tree branches squirrels use to jump. Regular maintenance helps keep pests away.
Conclusion
Mounting a camera bird feeder can bring nature closer to you. Choose a good spot with clear views of birds. Secure the camera firmly to avoid shaking or falling. Check the angle so you capture the best bird activity. Regularly clean the feeder and camera lens for clear pictures.
Enjoy watching birds and capturing their moments easily. This simple setup makes bird watching more fun and rewarding. Keep experimenting to find your perfect view. Happy bird watching!


