
Are you looking to give your cement bird bath a fresh, eye-catching look? Painting your bird bath is a simple way to add color and personality to your garden.
But where do you start? With the right steps, you can transform a plain, weathered bird bath into a vibrant centerpiece that attracts birds and beautifies your outdoor space. Keep reading, and you’ll discover easy tips and tricks to make your painting project a success—no experience needed!
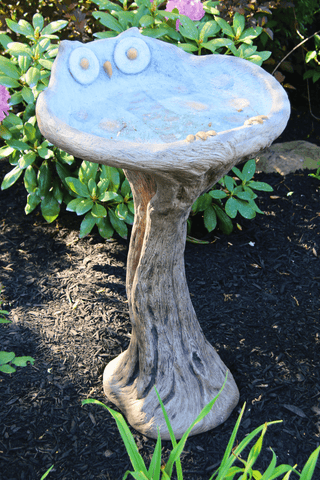
Credit: fountainful.com
Choosing The Right Paint
Choosing the right paint is key to a beautiful and lasting finish on your cement bird bath. The paint must stick well and resist weather changes. It should also protect the cement from damage and make cleaning easy. Picking the correct paint type and color will bring your bird bath to life.
Types Of Paint Suitable For Cement
Cement needs special paint that can hold up outdoors. Here are the best options:
- Acrylic Latex Paint:Water-based, easy to apply, and dries quickly. It is flexible and resists cracking.
- Epoxy Paint:Very durable and waterproof. Great for areas with lots of moisture.
- Concrete Stain:Penetrates the cement instead of sitting on top. Gives a natural look and lasts long.
- Elastomeric Paint:Thick and elastic, it covers cracks well and protects from water.
Choose paint made for outdoor masonry to ensure a strong bond and long life.
Color Selection Tips
Color impacts both beauty and heat absorption. Light colors keep water cooler for birds. Dark colors may fade faster in sunlight.
Match your garden style or choose bright colors to attract attention. Consider how the paint color will look when wet.
Test a small area first. Check for color change after drying. This step avoids surprises later.
Use a satin or semi-gloss finish. It is easier to clean and shows less dirt.

Credit: www.dukemanorfarm.com
Preparing The Bird Bath
Preparing your cement bird bath before painting is crucial for a smooth, long-lasting finish. Skipping these steps can lead to peeling paint and an uneven surface. Proper preparation not only improves adhesion but also enhances the overall appearance of your bird bath.
Cleaning The Surface
Start by removing dirt, moss, and algae from your bird bath. Use a stiff brush and a mixture of water and mild detergent to scrub the surface thoroughly.
Rinse the bird bath with clean water and let it dry completely. A clean surface ensures that the paint sticks properly without peeling or bubbling later.
Sanding And Repairing
After cleaning, sand the bird bath with medium-grit sandpaper to smooth out rough patches and dull the surface slightly. This step helps the paint grip better.
If you notice cracks or chips, fill them with exterior-grade cement patch or waterproof filler. Let the repairs dry fully before sanding again to achieve an even surface.
Have you checked your bird bath closely for any hidden damage? Taking the time to fix these imperfections now will save you from repainting sooner than expected.
Priming The Cement
Priming the cement bird bath is a crucial step before you start painting. It creates a smooth surface that helps the paint stick better and last longer. Skipping this can lead to peeling and uneven color, which nobody wants after all the effort you put in.
Benefits Of Priming
Priming seals the porous surface of cement, preventing the paint from soaking in unevenly. This means you get a richer, more vibrant finish that holds up against weather changes.
It also adds a protective barrier against moisture, reducing the risk of cracks and damage. Think about your bird bath standing outside—rain, sun, and temperature swings can wear it down fast without that extra layer of defense.
Have you ever noticed paint bubbling or flaking off outdoor surfaces? Proper priming helps you avoid that frustrating outcome by improving adhesion. It saves you time and money on touch-ups later.
Best Primers For Cement
Choosing the right primer makes a big difference. Look for primers specifically formulated for masonry or concrete, as these contain ingredients that bond well with cement.
- Latex-based primers:Easy to apply and clean up, these dry quickly and provide a flexible coat that withstands outdoor conditions.
- Oil-based primers:Offer excellent adhesion and moisture resistance but take longer to dry and require mineral spirits for cleanup.
- Epoxy primers:Highly durable and waterproof, perfect if your bird bath will be exposed to a lot of water or harsh weather.
In my experience, a high-quality latex primer strikes the best balance between ease and durability. It helped my own bird bath paint job last through multiple seasons without peeling or fading.
Painting Techniques
Painting a cement bird bath requires careful technique for a smooth, lasting finish. Choosing the right method affects the look and durability. Proper painting makes the bird bath resist weather and stay vibrant longer. Use tools and steps that suit your project and skill level.
Brush Vs. Spray Application
Brush painting gives control for detailed areas and edges. It works well on rough surfaces and small spots. Brushes help spread paint evenly but may leave brush marks.
Spray painting covers large areas quickly and smoothly. It creates a fine mist that reaches tight spots easily. Spraying can reduce brush strokes but needs good ventilation and protection for nearby objects.
- Brush: precise, good for edges, slower process
- Spray: fast, smooth finish, needs careful setup
Applying Multiple Coats
Applying several thin coats beats one thick coat. Thin coats dry faster and reduce drips or clumps. Each coat builds color depth and strength.
Wait for each coat to dry before adding another. Light sanding between coats smooths the surface and helps paint stick better. Two to three coats usually give the best coverage.
- Use thin layers
- Let paint dry fully
- Sand lightly between coats
- Repeat until color is even
Sealing And Finishing
Sealing and finishing your cement bird bath is essential to keep your hard work looking fresh and vibrant for years. Without proper sealing, paint can peel, fade, or wash away due to exposure to the elements. Taking time to choose the right sealant and apply it correctly protects both the paint and the cement, extending the life of your bird bath.
Choosing A Sealant
Not all sealants work well on cement, so pick one designed for outdoor masonry surfaces. Acrylic sealants are popular because they dry clear and provide a durable, waterproof layer without yellowing over time.
Look for sealants labeled as UV-resistant to prevent paint colors from fading in the sun. You might also consider a breathable sealant to allow moisture trapped in the cement to escape, reducing the risk of cracking.
Personal tip: I once used a generic sealant that wasn’t meant for outdoor use, and the paint bubbled within weeks. Investing in a high-quality product pays off.
Protecting Against Weather
Weather is the biggest enemy of painted outdoor items. Rain, freezing temperatures, and direct sunlight all work against your bird bath’s finish.
Apply at least two coats of sealant, allowing each coat to dry fully before adding the next. This builds a strong barrier against moisture and sun damage.
Consider placing your bird bath in a partially shaded area to reduce direct sun exposure, which can help preserve the paint and sealant longer.
Ask yourself: How much time do you want to spend repainting? Proper sealing and thoughtful placement can save you effort in the long run.
Maintenance Tips
Choose outdoor paint for cement bird baths. Clean the surface thoroughly. Apply a primer for better paint adhesion. Use a brush for detailed areas and a roller for larger sections. Finish with a sealant to protect the paint from weather.
Keep your bird bath looking vibrant and inviting.
Maintaining a freshly painted cement bird bath is essential to ensure its beauty and functionality over time. Proper maintenance not only enhances its aesthetic appeal but also extends its lifespan. By dedicating a little time and effort to cleaning and touch-ups, you can keep your bird bath looking as stunning as the day you painted it.Cleaning Painted Surfaces
Regular cleaning helps preserve the vibrant colors of your painted bird bath. Start by gently rinsing the surface with a hose to remove any loose debris or dirt. Use a soft brush or cloth dipped in a mild detergent solution to scrub the bird bath gently. Avoid using harsh chemicals or abrasive materials that can damage the paint. If you notice any algae or mildew, a mixture of vinegar and water can be effective in removing these without harming the paint. Rinse thoroughly to ensure no soap or vinegar residue remains.Touching Up Paint
Over time, you might notice small chips or fading in the paint. Addressing these issues promptly keeps your bird bath looking pristine. Keep a small amount of the original paint used on hand for touch-ups. Before repainting, clean the area and lightly sand any rough edges around the chip. Apply the paint carefully with a small brush, ensuring you blend it with the surrounding area. Allow the paint to dry completely before filling the bird bath with water again. Regular maintenance and touch-ups can transform your bird bath into a long-lasting garden centerpiece. How do you plan to maintain the beauty of your painted masterpiece?
Credit: www.chairish.com
Frequently Asked Questions
How Do I Prepare A Cement Bird Bath For Painting?
Clean the bird bath thoroughly and let it dry completely. Remove dirt, moss, and debris with a stiff brush. Sand any rough spots to ensure a smooth surface. Proper prep helps paint adhere better and last longer.
What Type Of Paint Is Best For Cement Bird Baths?
Use exterior acrylic paint or masonry paint designed for outdoor use. These paints resist moisture and weather damage. Avoid regular indoor paint as it may peel or chip quickly on cement surfaces.
How Many Coats Of Paint Should I Apply?
Apply two to three thin coats for even coverage. Allow each coat to dry fully before applying the next. Multiple coats improve durability and enhance the color’s vibrancy on the bird bath.
Can I Seal The Painted Bird Bath For Protection?
Yes, apply a clear waterproof sealer after painting. This protects the paint from water damage and UV rays. Use a sealer compatible with your paint type for best results.
Conclusion
Painting a cement bird bath adds charm to your garden. It protects the surface from weather damage. Choose the right paint and tools for the best results. Take your time and apply paint evenly. Let each coat dry fully before the next.
A well-painted bird bath invites birds and brightens outdoor space. Enjoy your handiwork and watch nature come closer. Simple steps bring lasting beauty to your garden. Try it yourself and see the difference.


