
If you love watching birds up close, mounting a bird feeder with a camera is a game-changer. Imagine capturing every flutter, every chirp, and every colorful feather right from your phone or computer.
But how do you set it up so that your camera gets the best view without scaring the birds away? In this guide, you’ll discover simple, practical steps to mount your bird feeder with a camera perfectly. By the end, you’ll be ready to enjoy stunning birdwatching moments anytime you want.
Keep reading to unlock the secrets of creating your own birdwatching paradise.

Credit: www.amazon.com
Choosing The Right Bird Feeder
Choosing the right bird feeder is key to a successful camera setup. The feeder must attract birds while allowing clear camera views. It should also hold up well outdoors and fit your space.
Types Of Feeders For Camera Mounting
Tube feeders are common and easy to mount cameras on. They offer multiple feeding ports for various birds. Platform feeders give wide views but expose the camera more. Hopper feeders hold more seed and provide good perch space. Choose a type that suits your birdwatching goals and camera angle needs.
Material And Durability
Feeders come in plastic, metal, and wood. Metal feeders resist weather and squirrels best. Plastic is lightweight and budget-friendly but less durable. Wood blends with nature but may need more care. Pick a material that stands up to rain, sun, and wildlife interference.
Size And Capacity Considerations
Smaller feeders suit compact camera mounts and less seed waste. Larger feeders attract more birds and need less refilling. Balance feeder size with camera placement and how often you want to fill seed. Ensure the feeder size fits your yard and bird population.
Selecting A Suitable Camera
Selecting the right camera for your bird feeder setup can make all the difference in capturing stunning footage of your feathered visitors. It’s not just about getting any camera, but one that fits your specific bird watching needs and environment. Think about how you want to observe the birds and what features will help you get the clearest, most detailed shots.
Camera Types For Bird Watching
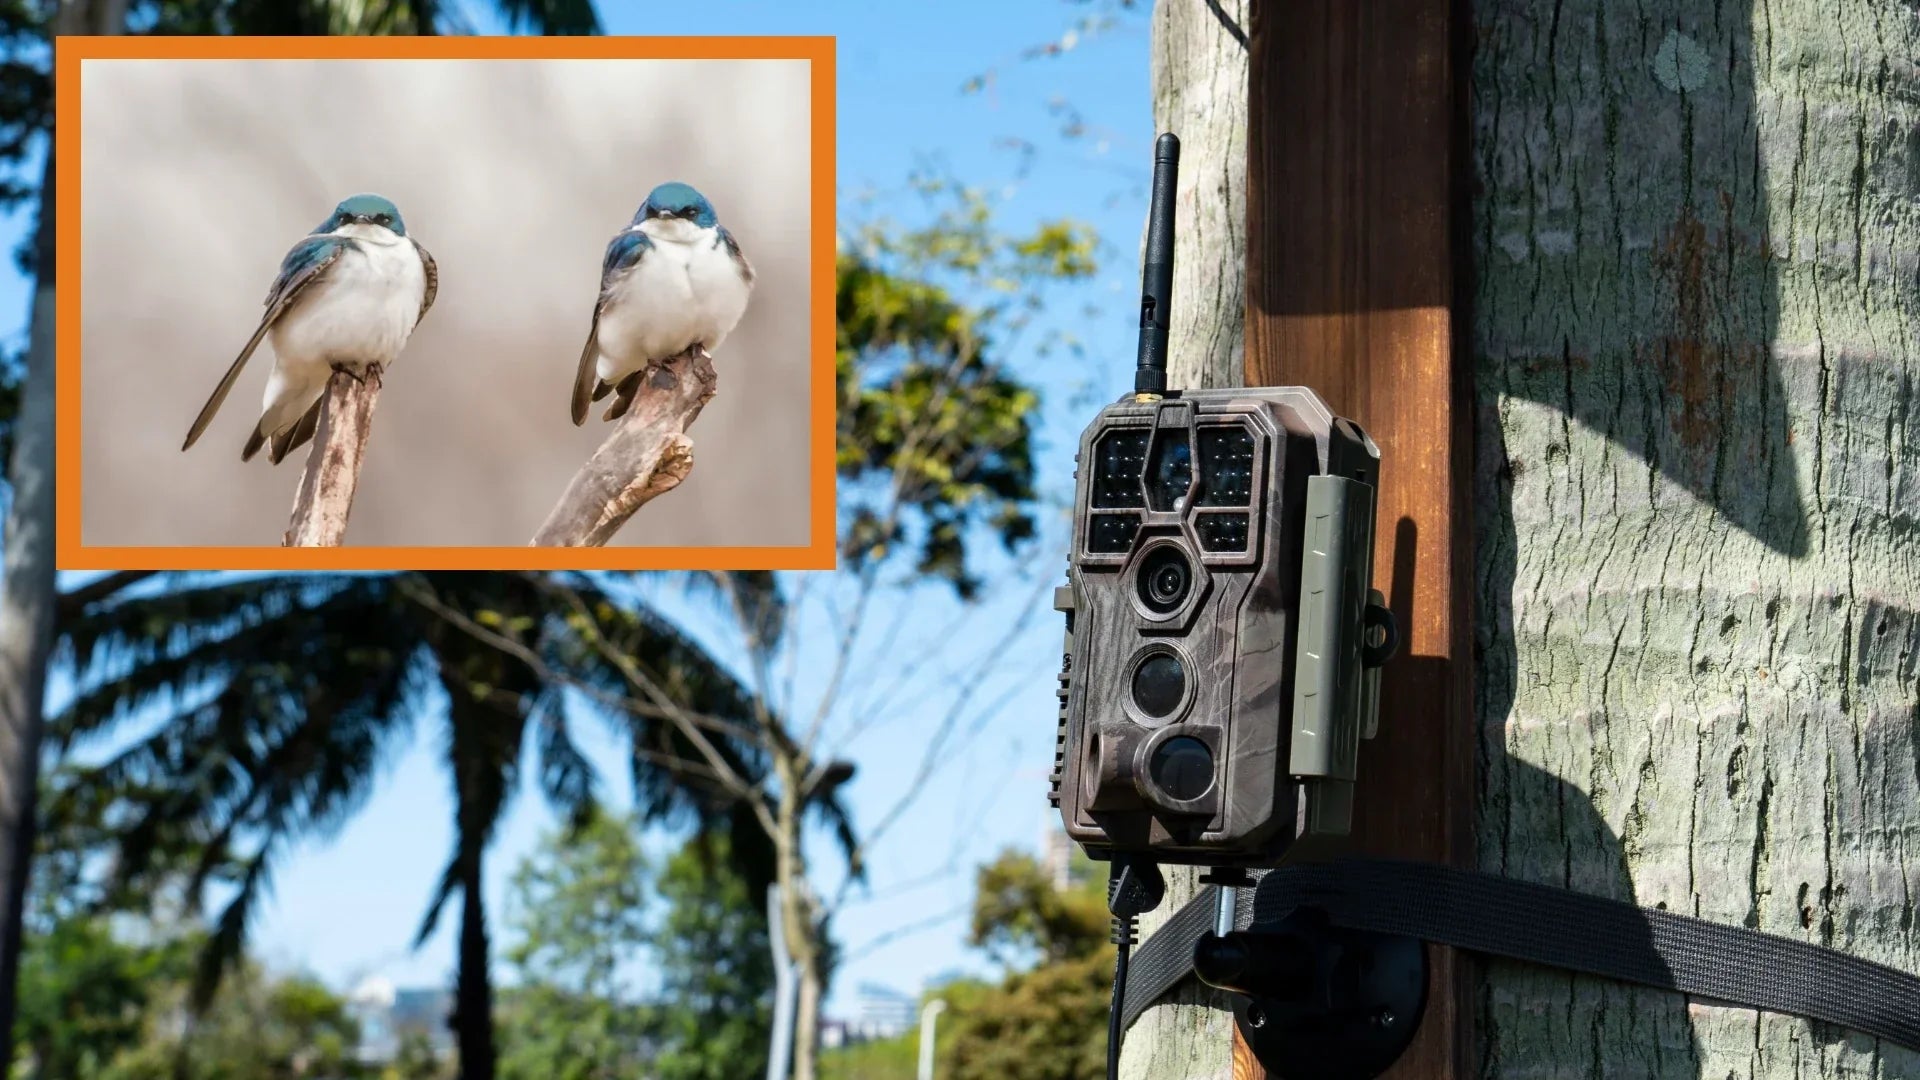
There are several camera types suited for bird feeders, each with its own pros and cons. Trail cameras are popular because they’re built to withstand outdoor conditions and often have motion sensors to start recording when birds arrive.
Alternatively, wildlife cameras with infrared capabilities capture night activity without disturbing the birds. For those who want live streaming, Wi-Fi or IP cameras offer real-time viewing and recording directly to your smartphone or computer.
Think about your location and how often you want to check the footage. Would you prefer a simple setup that records automatically, or something more advanced that lets you watch birds live?
Features To Look For
Focus on cameras with high resolution to capture sharp images and clear videos. A camera with adjustable zoom helps you get close-ups without scaring the birds away. Weatherproofing is essential since your camera will be exposed to rain, wind, and sun.
Motion detection is a key feature that saves storage space and battery by recording only when birds are present. Some cameras also offer audio recording, which can add an extra layer of experience by capturing bird calls. Don’t forget to check if the camera supports night vision if you want to observe early morning or late evening visits.
Battery Life And Storage
Long battery life is crucial, especially if your bird feeder is far from power sources. Consider cameras with rechargeable batteries or options for solar power to reduce maintenance. Some models offer power-saving modes that extend battery life by shutting off when no movement is detected.
Storage options vary widely. Cameras with SD card slots give you physical backups, while cloud storage provides easy access from anywhere. Think about how often you want to retrieve footage and whether you prefer automatic uploads or manual downloads.
Have you thought about how long you want to record without interruption? Balancing battery life and storage capacity will keep your setup running smoothly and your bird watching uninterrupted.
Best Locations For Mounting
Choosing the best location to mount a bird feeder with a camera is key to capturing great footage. The right spot attracts birds and offers clear views. It also keeps your equipment safe and easy to reach. Think about where birds visit often and how light and background will affect your shots.
Ideal Spot For Bird Activity
Place the feeder where birds naturally gather. Near trees, shrubs, or water sources works well. Birds feel safe in areas with cover. Avoid open spaces that expose them to predators. Watch for frequent visits before mounting the camera.
Lighting And Background
Good lighting makes bird colors stand out. Mount the feeder facing east or west for soft morning or evening light. Avoid harsh midday sun that causes shadows. Choose a simple background like green leaves or sky. Busy backgrounds distract from the birds.
Accessibility And Safety
Pick a spot easy to reach for refilling and cleaning. The camera should be secure from weather and animals. Avoid placing it where wind or rain can damage it. Use sturdy mounts and check them regularly. Keep your distance so birds stay comfortable.
Credit: gardepro.com
Mounting Techniques
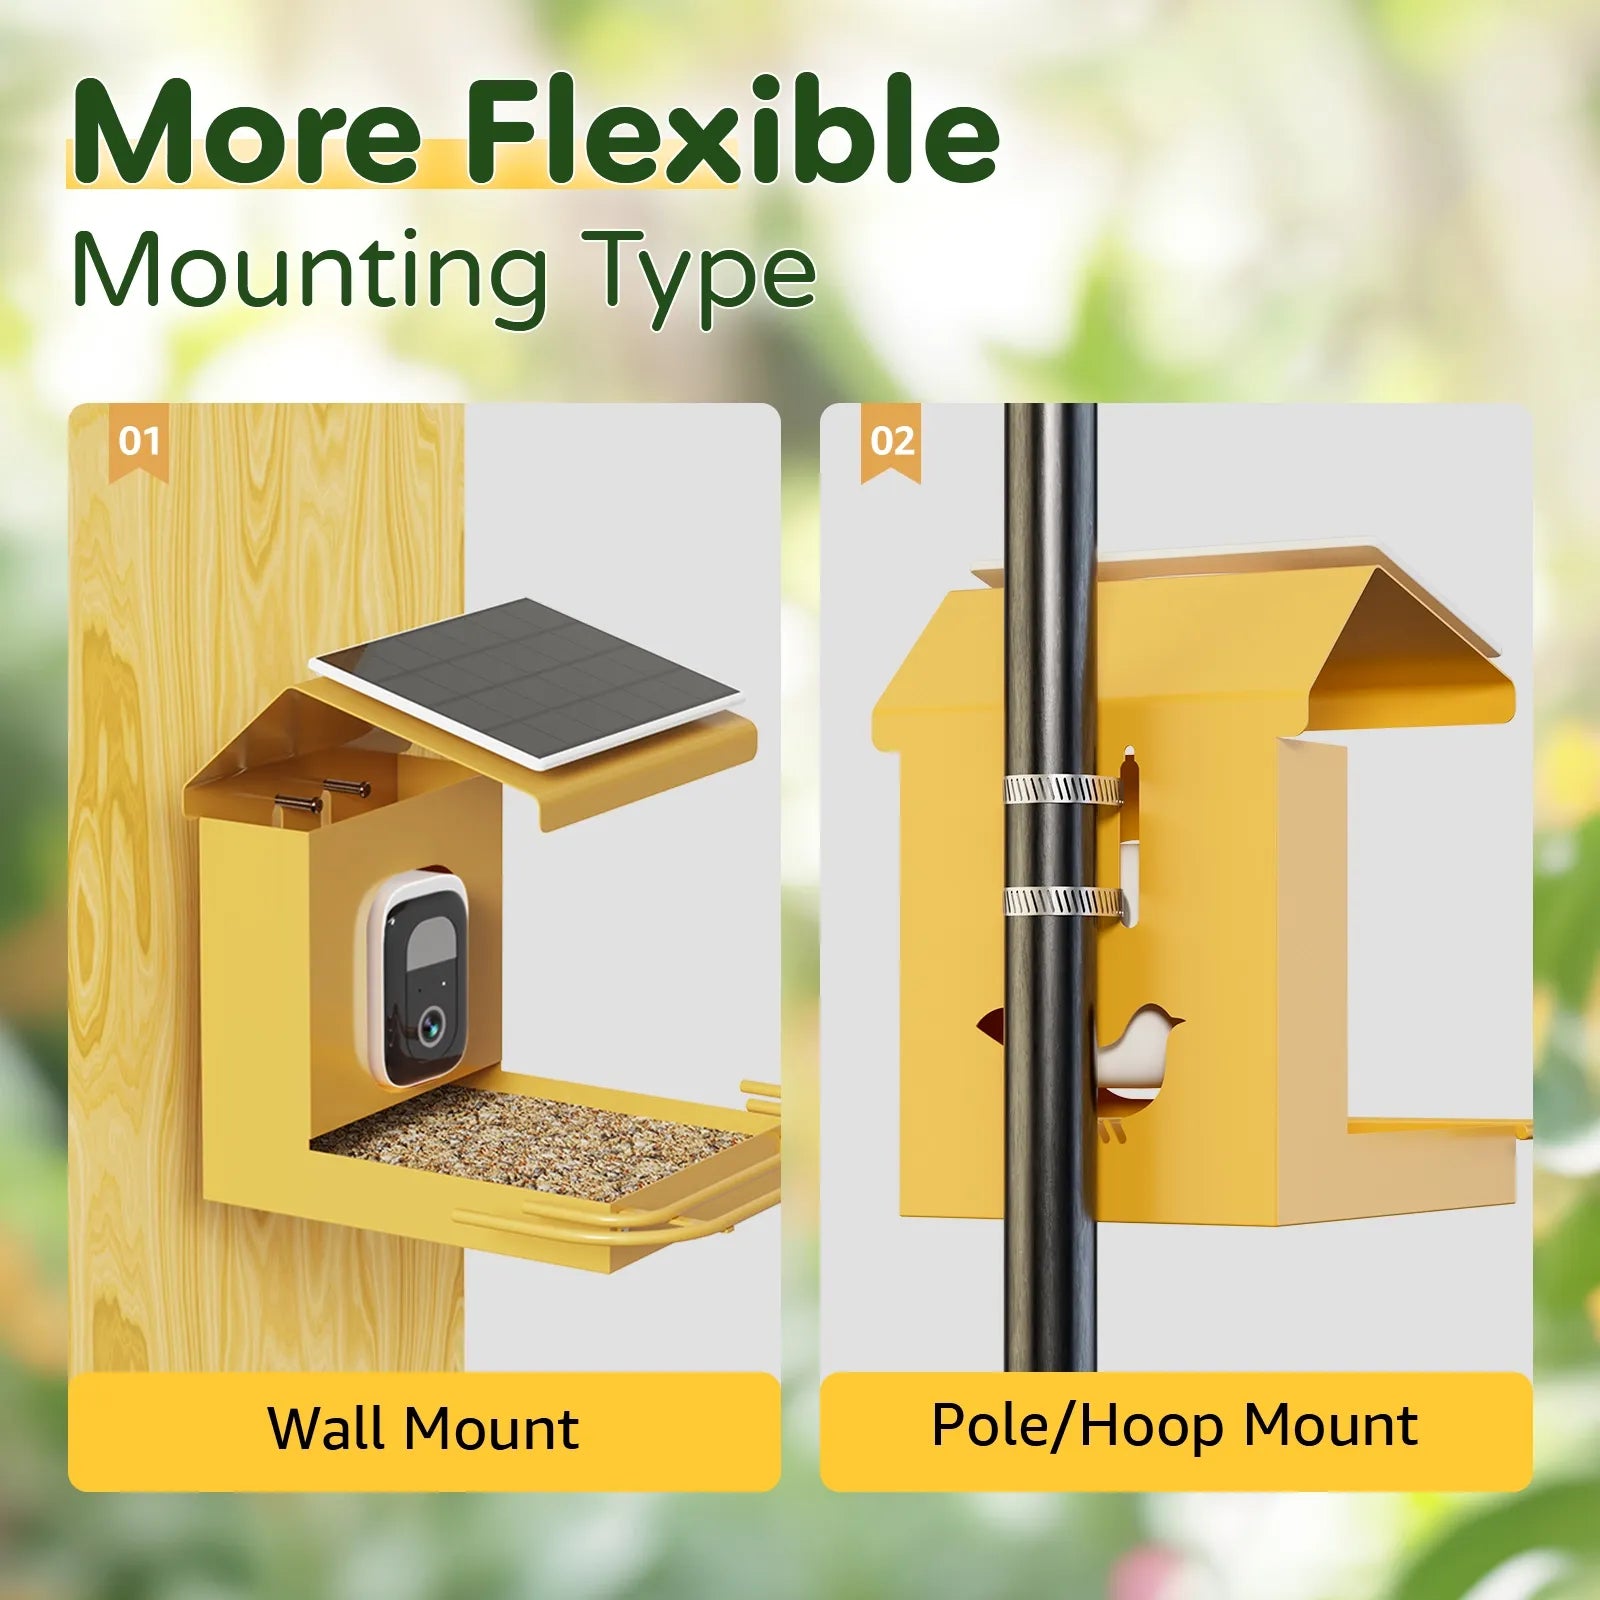
Mounting a bird feeder with a camera requires careful planning. The right technique keeps the camera stable and safe. It also ensures clear, close-up shots of visiting birds. Different mounting options suit different locations and equipment. Choose one that matches your feeder and camera setup.
Attaching Camera To Feeder
Attach the camera directly to the bird feeder for close views. Use small screws or strong adhesive pads to fix the camera. Make sure the camera lens faces the feeding area. Avoid blocking the feeder’s openings. Check that the camera stays steady during windy days.
Using Tripods And Stands
Tripods and stands offer flexible camera positioning. Place the tripod near the feeder at bird height. Adjust the tripod legs for a stable base. Use a lightweight camera to avoid tipping. Tripods allow easy angle changes without moving the feeder.
Securing With Brackets And Clamps
Brackets and clamps provide firm support for the camera. Attach a bracket to a nearby tree or pole. Clamp the camera securely to avoid shaking. Use rubber padding to prevent damage to surfaces. This method works well when the feeder hangs or stands on poles.
Optimizing Camera Settings
Optimizing your bird feeder camera settings ensures clear, sharp images of visiting birds. Proper adjustments capture every detail, making your birdwatching more enjoyable. Fine-tuning focus, exposure, and motion detection helps to get the best results from your setup.
Focus And Exposure
Set the camera focus to keep birds sharp and clear. Use manual focus if the auto focus struggles with small, moving birds. Adjust exposure to avoid overly bright or dark pictures. Bright sunlight can cause glare, so lower exposure in such cases. On cloudy days, increase exposure for brighter images.
Motion Detection And Timers
Enable motion detection to capture bird activity automatically. Set sensitivity levels to avoid false triggers from wind or insects. Use timers to schedule recording during peak bird activity times. This saves battery and memory space. Timers also help capture early morning or late afternoon visits.
Remote Control Options
Choose a camera with remote control for easy adjustments. Use apps or remote devices to change settings without disturbing birds. Remote access allows live viewing and quick changes to focus or exposure. It makes monitoring simpler and more flexible from any location.
Credit: www.bilantan.com
Maintaining The Setup
Regularly check the bird feeder and camera for dirt and damage. Keep the camera lens clean to capture clear bird images. Secure all parts firmly to avoid falls or misalignment.
Mounting a bird feeder with a camera is just the beginning. To capture the best moments, regular maintenance is essential. Ensuring both the feeder and camera function optimally will enhance your bird-watching experience. This section focuses on key areas for maintaining your setup effectively.Cleaning The Feeder And Lens
Keep the feeder clean to attract more birds. Dirty feeders can spread disease among birds. Use warm soapy water to scrub away residue. Rinse thoroughly and let it dry before refilling. Also, wipe the camera lens gently with a soft cloth. This ensures clear images and protects the lens from scratches.Checking Battery And Memory
Regularly check the camera’s battery level. Replace or recharge batteries before they run out. This prevents missing any bird activity. Monitor the memory card space as well. Transfer photos frequently to avoid running out of space. Keeping the camera ready ensures you capture every chirp and flutter.Adjusting Position For Better Shots
Position adjustments can improve your shots significantly. Observe the birds’ behavior and adjust the angle accordingly. Ensure the feeder is in the frame without obstruction. Experiment with different heights for varied perspectives. Regular adjustments help in capturing diverse and interesting bird activities.Troubleshooting Common Issues
Common problems like shaky mounts or poor camera angles can affect bird feeder footage. Checking the stability and adjusting the camera position often solves these issues quickly. Ensure the feeder is secure and the camera lens is clean for clear bird views.
Mounting a bird feeder with a camera can be a thrilling way to observe and photograph wildlife right from your backyard. However, it’s not always smooth sailing. You might encounter some common challenges that can hinder your bird-watching experience. Addressing these issues promptly ensures you capture every flutter and tweet without missing a moment.Dealing With Weather Conditions
Weather can play a big role in the performance of your bird feeder camera. Rain, snow, and extreme temperatures can cause problems. To protect your equipment, consider using a weatherproof housing or placing the feeder under a shelter. If strong winds are common in your area, secure the camera and feeder tightly to prevent them from being blown away. You can use sturdy brackets or bungee cords for extra stability. Regularly check for moisture build-up on the lens and wipe it clean to maintain clear footage.Preventing Animal Interference
Unwanted visitors like squirrels or raccoons can interfere with your bird feeder setup. These critters can jostle the camera, causing it to misalign or even damage it. Installing a baffle or guard can deter these animals from reaching the feeder. Position the feeder and camera at a height and location less accessible to non-feathered friends. You might also consider motion-activated deterrents, which can help keep the area clear for birds only. Have you thought about adding a squirrel-proof feeder design to your setup?Fixing Blurry Or Dark Images
Blurry or dark images can spoil the joy of bird-watching. If your images are blurry, check if the camera lens is clean. Dust or smudges can easily affect the image quality. For dark images, ensure that the camera is positioned to take advantage of natural light. Adjust the angle or location if necessary. Some cameras come with night vision or low-light settings, so explore these options if you frequently encounter low-light conditions. By addressing these common issues, you can enhance your bird-watching experience and ensure your camera captures clear, vibrant images of your feathered visitors. What improvements can you make to your setup today for better results tomorrow?Frequently Asked Questions
How Do I Securely Mount A Bird Feeder With Camera?
Choose a sturdy pole or tree branch for mounting. Use strong brackets or straps to fix the feeder. Ensure the camera faces the feeding area clearly. Check stability to prevent shaking or falling.
What Is The Best Height For Mounting Bird Feeders?
Mount bird feeders 4 to 6 feet above ground. This height keeps birds safe from predators. It also allows easy access for cleaning and refilling. Adjust height based on local bird species and environment.
How Can I Protect My Bird Feeder Camera From Weather?
Use weatherproof cameras or protective housing. Mount the camera under eaves or sheltered spots if possible. Regularly check and clean the camera lens. Protect cables with waterproof coverings to prevent damage.
What Type Of Camera Is Ideal For Bird Feeders?
Choose a camera with high resolution and night vision. Wireless cameras offer easy installation and remote viewing. Look for cameras with motion detection to capture bird activity. Battery-powered options provide flexible placement.
Conclusion
Mounting a bird feeder with a camera lets you enjoy nature up close. Place the feeder where birds feel safe and cameras get a clear view. Keep the setup steady to avoid blurry footage. Check the camera regularly to ensure it works well.
Watching birds daily brings joy and teaches patience. Give it a try and see the beauty outside your window. Simple steps create great moments with feathered friends.


