
If you want a beautiful, low-maintenance plant that adds a touch of green to your space, the Bird’s Nest Fern is a perfect choice. But how do you make sure your fern stays healthy and vibrant?
You might wonder what kind of light it needs, how often to water it, or the best way to keep its leaves shiny and fresh. In this guide, you’ll discover simple, practical tips that make caring for your Bird’s Nest Fern easy and enjoyable.
Keep reading, and soon your fern will thrive like never before.

Credit: www.thesill.com
Choosing The Right Location
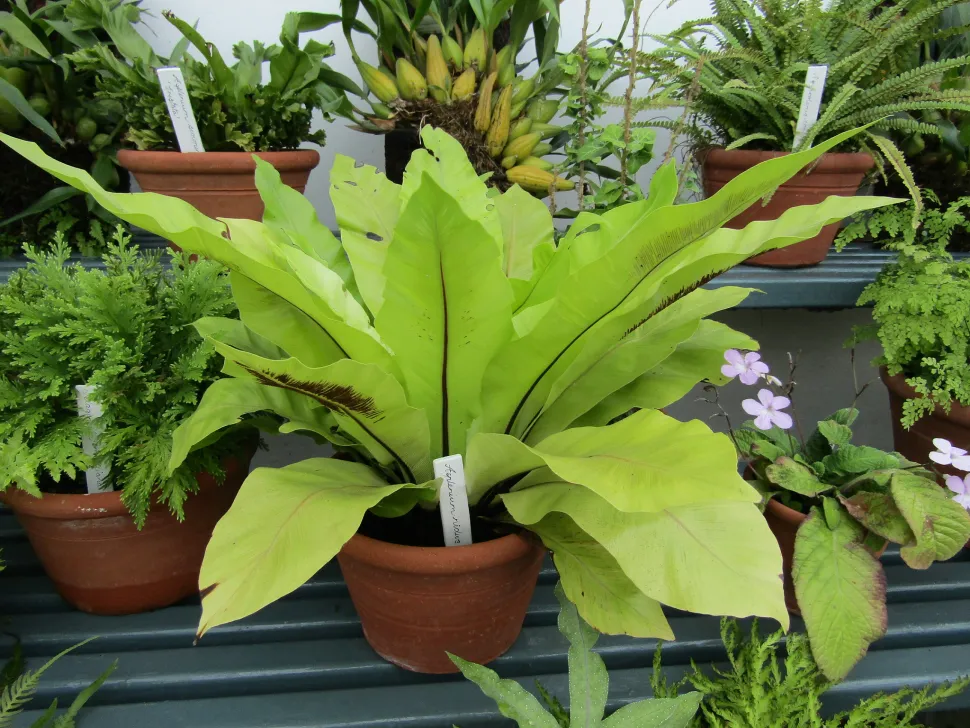
Choosing the right location for your Bird’s Nest Fern is key to its health and vibrant growth. This plant thrives when its environment matches its natural tropical habitat. Picking a spot with the right light, temperature, and humidity will help your fern flourish and show off its lush green leaves.
Ideal Light Conditions
Bird’s Nest Fern prefers bright, indirect light. Direct sunlight can scorch its fronds, leaving brown spots and damaging the plant. A north or east-facing window works well, or a few feet away from a south or west window with sheer curtains to filter the light.
Have you noticed how your fern reacts to different light spots? Moving it around your home and observing changes in leaf color can guide you to the perfect location.
Temperature Preferences
This fern enjoys warmth but dislikes sudden temperature changes. Keep it in a room where temperatures stay between 60°F and 80°F (15°C to 27°C). Avoid placing it near drafts, air conditioners, or heaters that can cause stress.
Think about your home’s daily temperature fluctuations—does your chosen spot maintain steady warmth? Consistency is better than extremes for your fern’s comfort.
Humidity Needs
Bird’s Nest Fern loves humidity. In dry indoor environments, especially during winter, its leaves may brown at the edges. You can increase humidity by misting the plant regularly, using a pebble tray with water, or placing a humidifier nearby.
Ask yourself if your room feels dry or moist most of the time. If it’s dry, your fern will thank you for extra humidity efforts.
Planting And Potting Tips
Planting and potting Bird’s Nest Fern correctly helps it thrive indoors. These ferns need care in soil choice, pot selection, and repotting. Proper steps create a healthy environment for growth. Follow these tips to keep your fern lush and vibrant.
Selecting Suitable Soil
Choose soil that drains well but holds moisture. A mix of peat moss, pine bark, and perlite works best. This blend mimics the fern’s natural forest floor habitat. Avoid heavy or clay soils that trap water. Good soil prevents root rot and allows air flow.
Choosing The Right Pot
Pick a pot with drainage holes at the bottom. This helps excess water escape easily. Use a pot size slightly larger than the root ball. Too big a pot holds extra water and can harm roots. Choose plastic, ceramic, or terracotta pots based on your space and style.
Repotting Guidelines
Repot your Bird’s Nest Fern every 1-2 years. Do this in spring or early summer. Gently remove the plant from its pot. Check roots for damage or rot and trim if needed. Place the fern in fresh soil, filling around roots firmly but not tightly. Water well after repotting to settle soil.
Watering Techniques
Watering your Bird’s Nest Fern properly can make a big difference in how healthy and vibrant it looks. This plant prefers a balance—not too dry, not too soggy. Understanding the right watering techniques will help you avoid common problems and keep your fern thriving.
Frequency And Amount
Water your Bird’s Nest Fern about once a week, but always check the soil first. The top inch should feel slightly dry before you water again. Too much water can drown the roots, while too little will cause the leaves to curl and brown.
Use lukewarm water and pour slowly around the base of the plant. Avoid watering the center rosette directly since water can get trapped and cause rot. Adjust frequency based on the season—less in winter, more in warm, dry months.
Signs Of Overwatering
Overwatering is a common issue with Bird’s Nest Ferns. Watch for yellowing leaves, mushy stems, or a musty smell coming from the soil. These signs mean the roots might be sitting in water too long.
If you notice these symptoms, reduce watering immediately and check if the pot has proper drainage. Repotting in fresh, well-draining soil can save your plant if root rot has started.
Handling Underwatering
Underwatered ferns show dry, crispy edges and leaves that look wilted or droopy. If your fern looks thirsty, increase watering gradually. Suddenly giving it a lot of water can shock the roots.
Try misting the leaves regularly to add humidity and help the plant recover faster. Remember, consistent care beats occasional heavy watering when it comes to keeping your Bird’s Nest Fern happy.
Feeding Your Fern
Feeding your bird’s nest fern supports healthy growth and vibrant leaves. Proper nutrition helps the plant resist pests and stay lush. Knowing the right fertilizers and feeding times keeps your fern thriving.
Best Fertilizers To Use
Choose a balanced fertilizer with equal nitrogen, phosphorus, and potassium. A 10-10-10 or 20-20-20 formula works well. Liquid fertilizers allow easy absorption. Slow-release pellets also provide steady nutrients over time.
- Water-soluble balanced fertilizers
- Slow-release granular fertilizers
- Organic fertilizers with balanced nutrients
Feeding Schedule
Feed your fern every 4 to 6 weeks during spring and summer. These seasons boost growth and nutrient needs. Reduce feeding in fall and winter. Overfeeding can harm roots and leaves.
Natural Fertilizing Options
Use natural fertilizers for gentle feeding. Compost tea enriches soil with nutrients and microbes. Diluted fish emulsion provides nitrogen and trace minerals. Worm castings improve soil texture and nutrient content.
- Compost tea diluted in water
- Diluted fish emulsion
- Worm castings mixed into soil
Pruning And Maintenance
Keeping your Bird’s Nest Fern healthy involves regular pruning and maintenance. These tasks help the plant look its best and support continuous growth. Let’s explore simple ways to care for your fern through careful pruning and cleaning.
Removing Dead Leaves
Dead leaves can drain your fern’s energy and make it look untidy. Snip off any brown or yellow leaves close to the base using clean scissors or pruning shears.
Removing these leaves prevents diseases and pests from taking hold. Do you check your fern for dead leaves every week? Making this a habit keeps your plant vibrant and healthy.
Encouraging New Growth
Trimming older leaves encourages your Bird’s Nest Fern to produce fresh, new fronds. Cut back any damaged or overly large leaves to allow light to reach the center of the plant.
This creates space for new growth, keeping your fern lush and full. Have you noticed how pruning can actually boost the energy your plant puts into growing?
Cleaning The Fronds
Dust and dirt can block sunlight and reduce photosynthesis. Gently wipe the fronds with a soft, damp cloth every couple of weeks to keep them clean.
A light spray of water can also refresh the leaves and mimic the fern’s natural humid environment. When was the last time you gave your fern a gentle clean? It might surprise you how much this simple step improves its health.
Credit: www.monstera-app.com
Managing Common Problems
Yellowing leaves often signal overwatering or poor drainage in bird’s nest ferns. Watch for pests like scale or mealybugs and treat them early to prevent damage. Keeping humidity steady helps avoid brown leaf tips and keeps the plant healthy.
Caring for a Bird’s Nest Fern can be a rewarding experience, but it does come with its set of challenges. Understanding and managing common problems can make a significant difference in the health and growth of your fern. Let’s explore some practical tips to keep your plant thriving.Pests To Watch For
Bird’s Nest Ferns are relatively resilient, but they can occasionally fall prey to pests. Keep an eye out for scale insects and mealybugs. Regularly inspect the fronds and undersides for any signs of these pests. If you spot them, gently wipe the leaves with a damp cloth or use insecticidal soap for more severe infestations. Maintaining a clean environment reduces the likelihood of pest problems.Disease Prevention
Healthy Bird’s Nest Ferns are less likely to succumb to diseases. Ensure your plant has proper air circulation to prevent fungal infections. Overwatering is a common mistake that can lead to root rot, so allow the top inch of soil to dry out before watering again. If you notice dark spots on the leaves, it might be a sign of a fungal issue. Removing affected leaves and adjusting the watering schedule can often remedy this problem.Troubleshooting Growth Issues
Is your Bird’s Nest Fern not growing as expected? Check the light conditions. These ferns prefer indirect light, so make sure they aren’t in direct sunlight, which can scorch the leaves. Another common growth issue is nutrient deficiency. Consider using a balanced liquid fertilizer every month during the growing season. Ensure the soil is well-draining and not compacted, as poor soil can stunt growth. Engage with your fern—notice its subtle signals. Are the leaves curling or yellowing? Each symptom tells a story about what the plant needs. What adjustments can you make today to ensure it flourishes tomorrow?Propagation Methods
Propagating Bird’s Nest Fern can enhance your indoor garden. Two effective methods are division and growing from spores. Each method has its own unique approach and benefits. Whether you’re a novice or an experienced gardener, these techniques are simple to follow.
Division Technique
The division method is straightforward. Carefully remove the fern from its pot. Gently shake off excess soil to reveal the roots. Look for natural separations in the root ball. Using a clean knife, divide the plant into sections. Each section should have healthy roots and fronds. Plant each division in its own pot with fresh soil. Water lightly and place in a shaded area. Ensure consistent moisture for new growth.
Growing From Spores
Growing from spores requires patience. First, locate the spores on the underside of mature fronds. They appear as brownish spots. Cut the frond and place it in a paper bag. Allow the spores to fall out naturally. Prepare a tray with a mix of peat and sand. Sprinkle the spores evenly on the surface. Cover the tray with plastic to retain moisture. Place in a warm, indirect light location. Mist regularly to keep the surface damp. Germination may take several weeks. Once seedlings appear, remove the cover. Transplant seedlings to individual pots when they are big enough.
Seasonal Care Adjustments
Bird’s Nest Ferns thrive best with care that changes through the seasons. Adjusting water, light, and temperature needs helps keep the plant healthy year-round. Seasonal care prevents stress and promotes lush, green fronds.
Each season brings unique conditions. Knowing how to adapt care routines ensures your fern stays vibrant and strong.
Winter Care Tips
- Reduce watering to avoid soggy soil.
- Keep the plant away from cold drafts.
- Maintain indoor temperatures above 60°F (15°C).
- Increase humidity with a tray of water or misting.
- Provide indirect, low light to match shorter days.
Summer Maintenance
- Water more frequently to match warmer temperatures.
- Place fern in bright, indirect light to avoid leaf burn.
- Use a humidifier or mist daily to keep humidity high.
- Fertilize monthly with a balanced, diluted fertilizer.
- Check for pests that thrive in warm weather.
Adapting To Environmental Changes
Notice changes in leaf color or growth speed. These signal the need to adjust care. Move the fern if light levels change due to window coverings or tree growth.
Shift watering habits during dry or rainy seasons. Keep humidity stable by using humidifiers or pebble trays. Monitor temperature swings and relocate the plant as needed to avoid stress.

Credit: www.thesill.com
Frequently Asked Questions
How Often Should I Water Bird’s Nest Fern?
Water Bird’s Nest Fern once a week or when the soil feels dry. Avoid waterlogging to prevent root rot. Maintain consistent moisture for healthy growth.
What Light Conditions Are Best For Bird’s Nest Fern?
Place Bird’s Nest Fern in bright, indirect light. Avoid direct sunlight, which can scorch its leaves. Low light conditions also work but slow growth.
How Do I Fertilize Bird’s Nest Fern Properly?
Feed Bird’s Nest Fern monthly during spring and summer with a balanced liquid fertilizer. Dilute to half strength to avoid leaf burn and encourage lush growth.
Can Bird’s Nest Fern Survive In Low Humidity?
Bird’s Nest Fern prefers high humidity but can tolerate moderate levels. Mist leaves regularly or use a humidifier to keep humidity above 50% for optimal health.
Conclusion
Caring for your Bird’s Nest Fern brings joy and green beauty. Keep its soil moist but not wet. Place it where it gets bright, indirect light. Trim dead leaves to help new growth. Watch for pests and remove them quickly.
This plant thrives with simple care and patience. Enjoy the fresh, natural look it adds to your space. Your fern will stay healthy and vibrant with these steps. Easy care makes your home feel lively and calm.


