
Have you ever wanted to invite more birds into your garden and enjoy their cheerful presence every day? Building your own wooden bird feeder is a simple and rewarding way to do just that.
Not only will you create a cozy spot for birds to eat, but you’ll also add charm and warmth to your outdoor space. In this guide, you’ll discover easy steps to craft a beautiful bird feeder, even if you’ve never worked with wood before.
Ready to bring nature closer and feel a sense of accomplishment? Let’s get started!
Choosing The Right Wood
Choosing the right wood is crucial when building wooden bird feeders. The wood you pick affects not just the feeder’s look but also its durability and safety for the birds. The right choice helps your feeder last through seasons while keeping birds comfortable and healthy.
Types Of Wood Suitable For Bird Feeders
Not all woods are safe or practical for bird feeders. Softwoods like pine and cedar are popular because they are easy to work with and relatively lightweight. Cedar, in particular, naturally resists insects and decay, making it a top choice.
Hardwoods such as oak, maple, and cherry are also options if you want a sturdy feeder. However, they can be harder to cut and may require more tools. Avoid treated wood or woods that release toxins, since they can harm birds.
Wood Durability And Weather Resistance
Your feeder will face sun, rain, wind, and cold. Wood durability is key to keeping it intact over time. Cedar and redwood stand out for their natural resistance to moisture and insects, so they hold up well outside.
Think about sealing your feeder with a bird-safe finish to extend its life. Untreated wood may absorb water, swell, and crack. How often are you willing to repair or replace your feeder? That question can guide your wood choice.
Sourcing Eco-friendly Materials
Where your wood comes from matters. Using reclaimed or sustainably harvested wood reduces environmental impact. Check for certifications like FSC (Forest Stewardship Council) when buying new wood.
Local wood sources can cut down on transport emissions and help your community economy. You might even find scrap wood from nearby workshops or old furniture to repurpose. Have you considered how your feeder’s materials affect the environment beyond your backyard?
Credit: www.familyhandyman.com
Essential Tools And Supplies
Building a wooden bird feeder is a rewarding project that brings nature closer to your home. To make your experience smooth and enjoyable, having the right tools and supplies is crucial. They not only ensure your feeder looks great but also stands the test of time.
Basic Carpentry Tools
Your wooden bird feeder starts with simple carpentry tools. A handsaw or a jigsaw will help you cut wood accurately. A hammer or a drill is essential for assembling the pieces securely.
Don’t forget a measuring tape or ruler to get precise cuts. Sandpaper or a sanding block smooths rough edges, protecting birds from splinters. Clamps are handy to hold wood steady while you work, making your cuts and joins cleaner and safer.
Safety Equipment
Safety cannot be overlooked, even in small projects. Eye protection, like safety goggles, shields your eyes from dust and flying wood chips. Gloves protect your hands from splinters and accidental nicks.
A dust mask is useful when sanding to avoid inhaling fine wood particles. If you’re using power tools, ear protection helps guard against loud noise. Being prepared with safety gear keeps your focus on the job and reduces the risk of injury.
Additional Materials Needed
Besides tools, gather the right materials to build a durable feeder. Choose untreated, weather-resistant wood like cedar or pine to ensure the feeder lasts outdoors. You’ll also need nails or screws to hold everything together tightly.
Wood glue adds extra strength to joints and prevents wobbling. Consider using non-toxic paint or sealant to protect the wood from rain and sun without harming the birds. Small hardware like hooks or chains may be needed if you plan to hang your feeder.
What kind of bird feeder do you want to build? Your choice will influence the materials and tools you need. Planning ahead saves time and helps you avoid last-minute trips to the hardware store.
Designing Your Bird Feeder
Designing your bird feeder is where creativity meets function. The shape, size, and features you choose will determine which birds visit and how often. Think about what will work best for your backyard and the birds you want to attract.
Simple Vs. Complex Designs
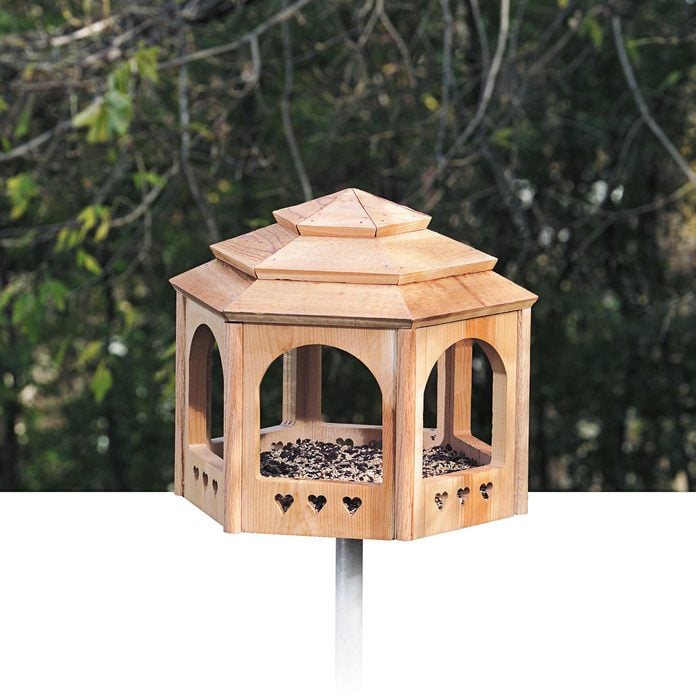
Simple bird feeders often use basic shapes like boxes or trays. These are easier to build and clean, making them perfect if you want quick results. Complex designs, such as multi-tiered feeders or those with decorative elements, can attract more species but require more skill and time.
If you’re new to woodworking, starting with a simple design helps you focus on quality and durability. Have you noticed how some birds prefer open feeders while others like enclosed ones? Your design choice can make a big difference in bird visits.
Size And Shape Considerations
The size of your feeder should match the birds you want to attract. Small feeders suit finches and chickadees, while larger ones accommodate cardinals or woodpeckers. Keep the shape practical; a wide base prevents tipping, and sloped roofs help keep seed dry.
Think about where you’ll hang or place the feeder. Will it fit in a small corner or need to stand out in an open space? The shape can also influence how easy it is for birds to perch and feed comfortably.
Incorporating Bird-friendly Features
Adding bird-friendly features encourages longer visits. Include perches that are sturdy and sized for different birds. Make sure the feeding ports are easy to access but protect seeds from rain and squirrels.
- Use non-toxic wood and paint to keep birds safe.
- Add drainage holes to prevent moldy seed.
- Consider a roof overhang to shield from weather.
Have you thought about how birds’ natural behaviors affect your feeder’s design? Small touches like these can turn your feeder into a favorite spot for your feathered friends.
Step-by-step Building Process
Begin by gathering basic materials like wood, nails, and glue. Cut and assemble pieces carefully to form the bird feeder’s shape. Finish with sanding and painting for durability and a neat look.
Building a wooden bird feeder is not just a fun weekend project, but it’s also a fantastic way to bring nature closer to your home. With a few basic tools and materials, you can create a charming feeder that will attract a variety of birds to your garden. Let’s dive into the step-by-step building process to transform your backyard into a lively bird haven.Measuring And Cutting Wood
Before you start, gather your materials: wood planks, a saw, a measuring tape, and a pencil. Measure twice to ensure accuracy, as precise cuts make for a sturdy feeder. A typical feeder might require a base of 8 inches by 8 inches, with sides standing about 6 inches high. Mark your measurements clearly on the wood. Use a saw to carefully cut along your lines. Remember, patience is key—rushing can lead to uneven cuts.Assembling The Feeder
With your pieces cut, it’s time to assemble. Use wood glue or screws to attach the sides to the base. This step might remind you of building with blocks as a child, a simple yet rewarding task. Ensure each piece is flush and secure. You might find it helpful to use a clamp to hold the pieces together while the glue dries. Ask yourself: does everything look aligned? A well-balanced feeder not only looks better but lasts longer.Sanding And Finishing Touches
Sanding is crucial. It smooths out rough edges and prepares the surface for finishing. Use medium-grit sandpaper to start, followed by a finer grit for a polished look. Consider adding a protective finish to shield the wood from the elements. Whether you choose a clear sealant or a vibrant paint, ensure it’s safe for wildlife. Personalize your feeder with colors or patterns. This is your chance to make it uniquely yours. What story will your feeder tell?Painting And Sealing
Painting and sealing your wooden bird feeder is crucial to protect it from weather damage and to keep it safe for the birds. The right paint and finish will not only enhance the look of your feeder but also extend its life. Let’s look at how to choose the best materials and apply them correctly.
Choosing Safe Paints And Finishes
Not all paints are safe for birds. Avoid paints that contain harmful chemicals like lead or heavy metals. Look for water-based, non-toxic, and eco-friendly paints labeled as safe for outdoor use.
Consider using natural oils or stains that penetrate the wood without forming a hard surface. These options repel water but allow the wood to breathe, reducing the chance of cracking or peeling. Have you checked the label to ensure your paint is bird-friendly?
Applying Protective Coatings
Start by cleaning the wood surface to remove dust and dirt. Use a brush or spray to apply the paint evenly, covering all edges and corners where moisture could seep in. Two to three thin coats work better than one thick layer.
After painting, add a clear, non-toxic sealant to protect the paint and wood from rain and sun. Polyurethane or spar varnish designed for outdoor use is a good choice. Make sure to seal the underside and inside edges, too.
Drying And Curing Tips
Allow your bird feeder to dry in a well-ventilated, shaded area to prevent paint from blistering or fading. Each coat might take several hours to dry, so be patient. Avoid rushing this step—improper curing can ruin your hard work.
Once all coats are applied, let the feeder cure for at least 24-48 hours before hanging it outside. Have you ever noticed paint peeling quickly? It’s often due to skipping this important drying phase.

Credit: www.familyhandyman.com
Mounting And Placement
Mounting and placement are key to attracting birds to your wooden feeder. Proper placement ensures birds feel safe and enjoy easy access to food. Mounting securely keeps the feeder stable in wind and weather. Thoughtful placement also helps keep the feeder clean and reduces mess.
Best Locations For Bird Feeders
Choose spots near trees or shrubs for shelter and perches. Place feeders where birds can watch for predators easily. Avoid locations too close to windows to prevent collisions. Sunlit areas help keep seed dry and fresh. Keep feeders away from busy paths or loud noises to reduce bird stress.
Mounting Options And Techniques
- Hang feeders from sturdy tree branches using strong wire or rope.
- Attach feeders to poles with mounting brackets for stability.
- Mount feeders on walls or fences using hooks or screws.
- Use shepherd hooks for easy moving and repositioning.
- Ensure mounts are secure to withstand wind and animal visits.
Keeping Feeders Clean And Maintained
Regular cleaning prevents mold and bacteria that harm birds. Remove old seed and debris weekly. Wash feeders with warm soapy water and rinse well. Dry completely before refilling to avoid clumping. Check mounts for wear or damage and repair as needed. Keep the area under feeders clear of seed hulls and droppings.
Attracting Birds To Your Feeder
Attracting birds to your wooden bird feeder requires more than just placing it outside. Birds need the right food and a safe, welcoming space to visit regularly. Creating a bird-friendly environment encourages birds to return day after day. Adjusting your feeder and feed according to the seasons also helps keep birds coming throughout the year.
Selecting The Right Bird Seed
Different birds prefer different seeds. Black oil sunflower seeds attract many species like finches and cardinals. Nyjer seed is excellent for small birds such as goldfinches. Millet and cracked corn are favorites for ground feeders like sparrows. Avoid using old or moldy seeds that can harm birds.
Creating A Bird-friendly Environment
Place your feeder near trees or shrubs for shelter and protection. Birds feel safer with nearby cover to escape predators. Keep the area clean to prevent disease and pests. Adding a birdbath with fresh water encourages birds to stay longer. Avoid using pesticides in the area to protect bird health.
Seasonal Feeding Tips
Offer high-fat seeds like sunflower or peanuts in winter for energy. Switch to softer seeds or fruits in spring and summer when birds eat insects. Remove feeders during the hottest months if not cleaned often. Refill feeders regularly to keep food fresh and attractive. Watch local bird habits and adjust feeding accordingly.

Credit: www.familyhandyman.com
Frequently Asked Questions
What Materials Do I Need To Build Wooden Bird Feeders?
You need untreated wood, screws, nails, wood glue, sandpaper, and non-toxic paint or sealant. Also, gather tools like a saw, drill, and screwdriver.
How Do I Protect Wooden Feeders From Weather Damage?
Use non-toxic, water-resistant sealant or paint. Ensure proper drainage holes and place feeders in shaded areas to reduce exposure to rain and sun.
Which Wood Type Is Best For Bird Feeders?
Cedar, pine, and redwood are ideal. They resist rot, are lightweight, and safe for birds, ensuring durability and safety in outdoor conditions.
How Can I Attract Birds To My Wooden Feeder?
Fill it with fresh seeds, place it near trees or shrubs, and keep it clean. Regular refilling encourages frequent bird visits.
Conclusion
Building wooden bird feeders brings joy and helps nature thrive. Use simple tools and follow clear steps for best results. Choose safe wood and protect it from rain. Place feeders where birds feel safe and can find food easily. Enjoy watching birds visit your garden every day.
Small efforts create a big difference for local wildlife. Start your project today and connect with nature simply.


