
Imagine having a clear, top-down view of your entire game scene, just like a bird soaring high above. That’s exactly what a Birds Eye View Camera can do for your Unity projects.
If you want to give your players a fresh perspective or improve navigation in your game, mastering this camera setup is essential. You’ll discover simple, step-by-step ways to create and customize a Birds Eye View Camera in Unity. By the end, you’ll have the tools to make your game look sharper and feel more immersive.
Ready to transform your camera skills? Let’s dive in!

Credit: medium.com
Setting Up Your Unity Project
Setting up your Unity project correctly is crucial for creating a smooth and efficient Birds Eye View camera system. It ensures that your game environment supports the camera mechanics without hiccups. Taking time here saves you from frustrating bugs and performance issues later on.
Installing Required Packages
Start by opening Unity’s Package Manager from the Window menu. You need to add packages that support advanced camera controls and input handling.
- Cinemachine:This is a powerful camera system that simplifies camera behavior setup.
- Input System:Enables flexible input management, essential if you want user control over the camera.
Installing these packages is straightforward. Just search for their names, then click “Install.” Have you checked if your Unity version supports the latest Cinemachine? Sometimes, older versions might cause compatibility issues.
Configuring Project Settings
Once packages are installed, tweak your project settings to optimize the camera behavior. Navigate to Edit > Project Settings.
- Graphics:Adjust your rendering settings to balance quality and performance, especially if your scene is large.
- Input:Switch your active input handling to the new Input System if you installed it. This helps in smoother camera controls.
- Physics:Set the fixed timestep carefully to ensure consistent camera updates without lag.
Did you know that small changes in fixed timestep can drastically affect camera smoothness? Experiment with values between 0.01 and 0.02 seconds to find what feels right for your game.
Creating The Birds Eye Camera
Creating a birds eye camera in Unity is a straightforward process, but it requires careful attention to detail. The camera must capture the entire scene from above without distortion, giving you a clear and functional top-down view. Your setup will impact how players perceive and interact with the game world, so choosing the right camera type and positioning it correctly are crucial steps.
Choosing The Right Camera Type
Unity offers multiple camera types, but for a birds eye view, the Orthographic camera is often the best choice. It removes perspective distortion, keeping objects the same size regardless of their distance from the camera. This creates a clean, flat look ideal for strategy games or map overviews.
Alternatively, a Perspective camera can work if you want some depth, but you must adjust the field of view carefully. Too wide, and you’ll get unwanted distortion; too narrow, and the scene may feel cramped. Think about your game’s style and how you want players to experience the scene before deciding.
Positioning The Camera Above The Scene
Once you’ve chosen your camera type, place it high above your scene, pointing straight down. The position should cover all essential elements you want visible to the player. A height that’s too low might cut off parts of the scene, while too high could lose detail.
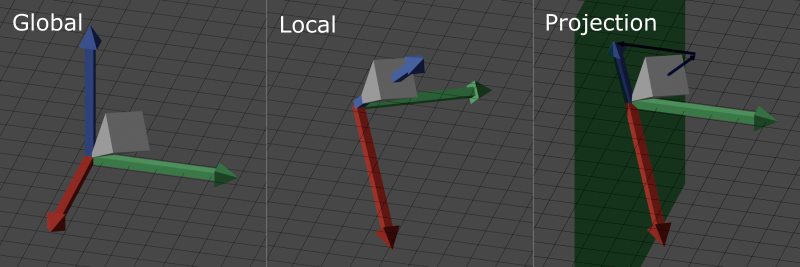
Adjust the camera’s rotation to exactly 90 degrees on the X-axis. This ensures the camera looks directly down without any tilt, maintaining an accurate top-down view. You can fine-tune the camera’s height by testing how much of the scene fits into the frame and making adjustments accordingly.
Try moving the camera around while in Play Mode to see how the view changes in real time. Does the camera show everything you want? If not, reposition it or tweak the orthographic size until it feels just right.
Adjusting Camera Properties
Adjusting your Birds Eye View camera properties in Unity can dramatically improve how your game scene feels and functions. Tuning these settings helps you control what your player sees and how they perceive depth and scale. It’s not just about making things look better; it’s about making the gameplay clearer and more intuitive.
Field Of View And Orthographic Size
The Field of View (FOV) is crucial if you’re using a perspective camera. It defines how wide the camera’s view angle is. A wider FOV can show more of the scene but might distort objects at the edges, while a narrower FOV zooms in and reduces distortion.
If your Birds Eye View camera is orthographic, the Orthographic Size replaces the FOV. This size controls how much of the scene the camera captures vertically. Adjusting this lets you zoom in and out without perspective distortion, which is perfect for top-down views.
Think about your game’s style: Do you want a tightly focused view on the player, or a broad look at the environment? Changing these settings can shift player focus and enhance gameplay experience instantly.
Clipping Planes And Depth Settings
Clipping planes determine how close or far objects can be from your camera before they disappear from view. The Near clipping plane removes objects too close, while the Far clipping plane cuts off distant objects.
Setting these values correctly prevents strange visual glitches like objects popping in and out unexpectedly. It also optimizes performance by not rendering unnecessary objects.
Depth settings control the order in which cameras render if you use multiple cameras. Ensuring your Birds Eye View camera has the right depth value guarantees it displays over or under other camera views as intended.
Have you noticed how tweaking clipping planes can fix annoying flickering in your scene? Sometimes, small adjustments here solve big visual problems.
Credit: medium.com
Implementing Camera Controls
Implementing camera controls in a Birds Eye View setup enhances player experience. It allows users to explore the scene smoothly. Effective controls include panning, zooming, and rotating. Each control must respond well to user input. This section explains how to create these camera movements in Unity.
Panning And Dragging The View
Panning lets players move the camera horizontally or vertically. Use mouse or touch input for dragging the view. Track the mouse or finger movement to update the camera position. Limit the pan area to avoid showing unwanted parts of the scene. Smooth the movement with interpolation for a better feel.
Zooming In And Out
Zoom control changes the camera’s distance from the target. Use the mouse scroll wheel or pinch gestures on touch devices. Adjust the camera’s orthographic size or field of view. Set minimum and maximum zoom levels to keep the view clear. Add smooth zoom transitions for natural movement.
Rotating The Camera Angle
Rotation changes the camera’s angle around the target point. Use right mouse button drag or two-finger twist gestures. Rotate the camera around the vertical axis to keep the scene orientation clear. Clamp rotation angles to prevent disorienting views. Smooth rotation helps maintain user focus on the scene.
Optimizing Performance
Optimizing performance is crucial when creating a Birds Eye View camera in Unity. It ensures your game runs smoothly without lag, even when the scene is complex. Small adjustments can lead to significant improvements, making your game more enjoyable for players.
Culling Unnecessary Objects
Culling means not rendering objects that the camera doesn’t need to see. This reduces the workload on your graphics processor and boosts frame rates.
You can set up frustum culling, which automatically ignores objects outside the camera’s view. But you should also manually disable or hide objects that are far away or irrelevant to the current gameplay.
Ask yourself: Are all objects visible to the bird’s eye camera essential at every moment? If not, disable their rendering or use occlusion culling to hide those blocked by other objects.
Using Layers And Tags Effectively
Layers and tags help you organize objects so the camera only processes what matters. Assign objects to specific layers and configure your camera to render only those layers.
This way, you avoid rendering UI elements or background objects that don’t need to be seen from above. It’s a simple setting in the camera component but can drastically cut down unnecessary rendering.
Consider tagging interactive objects separately. You can then write scripts that enable or disable rendering based on game logic, keeping performance tight and responsive.
Adding Visual Enhancements
Visual enhancements improve the clarity and appeal of a bird’s eye view camera in Unity. Adding effects like shadows and lighting helps players better understand the scene. Simple tweaks make the camera view more engaging and easier to navigate.
Adding visual enhancements to your Birds Eye View Camera in Unity can significantly elevate your game’s aesthetics and player engagement. By fine-tuning lighting and applying post-processing effects, you can create a more immersive and visually appealing experience. These enhancements not only improve the overall look but also ensure players stay captivated by your game’s environment.Lighting Adjustments For Birds Eye View
Lighting can make or break the visual appeal of your Birds Eye View. A well-lit scene can highlight important game elements and enhance the overall atmosphere. You might want to experiment with different light sources, such as directional lights for a consistent look or spotlights to highlight specific areas. Adjusting the light intensity and color can give your scene a unique feel. Warm tones might create a cozy environment, while cooler tones can add a sense of mystery. Don’t forget to consider shadows—they add depth and realism, making your scene feel more dynamic.Post-processing Effects
Post-processing effects are like the cherry on top of your visual enhancements. They can refine the final look of your game, making it more polished and professional. Consider using effects like bloom to create a soft glow around bright objects, adding a touch of magic to your scene. Another powerful effect is color grading, which can change the entire mood of your game. Whether you want a vibrant, cheerful look or a more subdued, dramatic atmosphere, color grading can help achieve that. Lens flares and ambient occlusion can also add realism by simulating real-world camera effects. Have you ever noticed how certain games just pop with visual flair? Often, it’s the subtle post-processing effects that make the difference. By experimenting and finding the right balance, you can create a stunning birds eye view that captivates and holds your players’ attention.Testing And Debugging Tips
Check camera angles early to spot view issues quickly. Use Unity’s debug tools to test camera movement smoothly. Adjust settings step-by-step for clear bird’s eye perspective.
When working on a birds-eye view camera in Unity, thorough testing and debugging are vital. Ensuring the camera functions smoothly enhances user experience. Effective testing helps identify issues early, saving time and resources. Debugging ensures the camera operates as intended, providing a seamless view for users.Common Issues And Fixes
Camera flickering can be a common problem. Check for overlapping objects causing rendering issues. Adjust the camera’s near and far clipping planes. This can often resolve flickering problems. Another issue is the camera’s field of view. If it’s too wide or narrow, objects may appear distorted. Tweak the field of view settings to achieve clarity.Debugging Camera Movement
Camera movement bugs can disrupt user experience. First, ensure the camera’s position updates correctly. Use debug logs to track its position during runtime. If the camera stutters, check for frame rate drops. Optimize scripts to reduce the load. Also, examine the camera’s movement script. Ensure it follows user input accurately. Debugging these areas improves smoothness and reliability.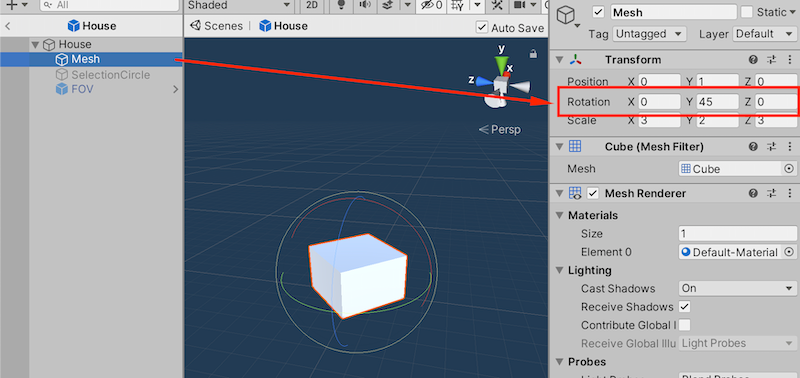
Credit: medium.com
Frequently Asked Questions
What Is A Birds Eye View Camera In Unity?
A Birds Eye View Camera in Unity captures a top-down perspective. It helps visualize scenes from above. This camera type is common in strategy and simulation games for better spatial understanding.
How To Set Up Birds Eye View Camera In Unity?
To set up, create a new camera in Unity. Position it high above the scene. Adjust its rotation to look straight down. Set orthographic mode for 2D clarity or perspective for 3D depth.
Can I Control Birds Eye Camera Movement In Unity?
Yes, you can script camera controls using C. Common controls include panning, zooming, and rotating. This improves navigation and user interaction within the scene.
Why Use Orthographic Mode For Birds Eye Camera?
Orthographic mode removes perspective distortion. It keeps objects the same size regardless of distance. This creates a clear, consistent top-down view, ideal for maps and strategy interfaces.
Conclusion
Creating a Birds Eye View camera in Unity helps improve your game’s design. It gives players a clear view from above. You can control the camera’s angle and height easily. This method works well for many game types. Practice these steps to get comfortable with the setup.
Keep experimenting to find the best view for your game. A good camera makes gameplay more fun and smooth. Try it today and see the difference it brings.


