
Have you ever wanted to bring more life and color to your garden? Building bird houses out of wood is a simple and rewarding way to invite beautiful birds right to your backyard.
Imagine watching tiny feathers flutter as your new feathered friends find a cozy home you crafted yourself. In this guide, you’ll discover easy steps to create safe and attractive wooden bird houses that even beginners can handle. Ready to turn your outdoor space into a bird haven?
Let’s get started!
Choosing The Right Wood
Choosing the right wood is key to building a durable bird house. The wood must be safe, weather-resistant, and comfortable for birds. It should also be easy to work with and affordable for your project. Picking the best wood type ensures the house lasts longer and protects the birds well.
Best Wood Types For Bird Houses
- Cedar:Naturally resistant to rot and insects. It lasts long outdoors.
- Pine:Affordable and easy to cut. Choose untreated pine for safety.
- Redwood:Strong and weather-resistant but can be costly.
- Fir:Durable and widely available. Works well for small bird houses.
- Spruce:Lightweight and easy to handle. Good for beginners.
Wood Treatments To Avoid
Avoid any wood treated with chemicals or paint. These can harm birds and their chicks. Do not use pressure-treated wood or wood sealed with toxic varnishes. Choose natural wood or wood sealed with non-toxic, bird-safe finishes. This keeps the bird house safe and eco-friendly.
Sourcing Affordable Wood
Check local hardware stores for scrap wood or offcuts. These are often cheaper and perfect for small projects. Reclaimed wood from old furniture can work if it is clean and untreated. Ask friends or neighbors if they have spare wood pieces. Buying in bulk can also reduce cost for larger projects.
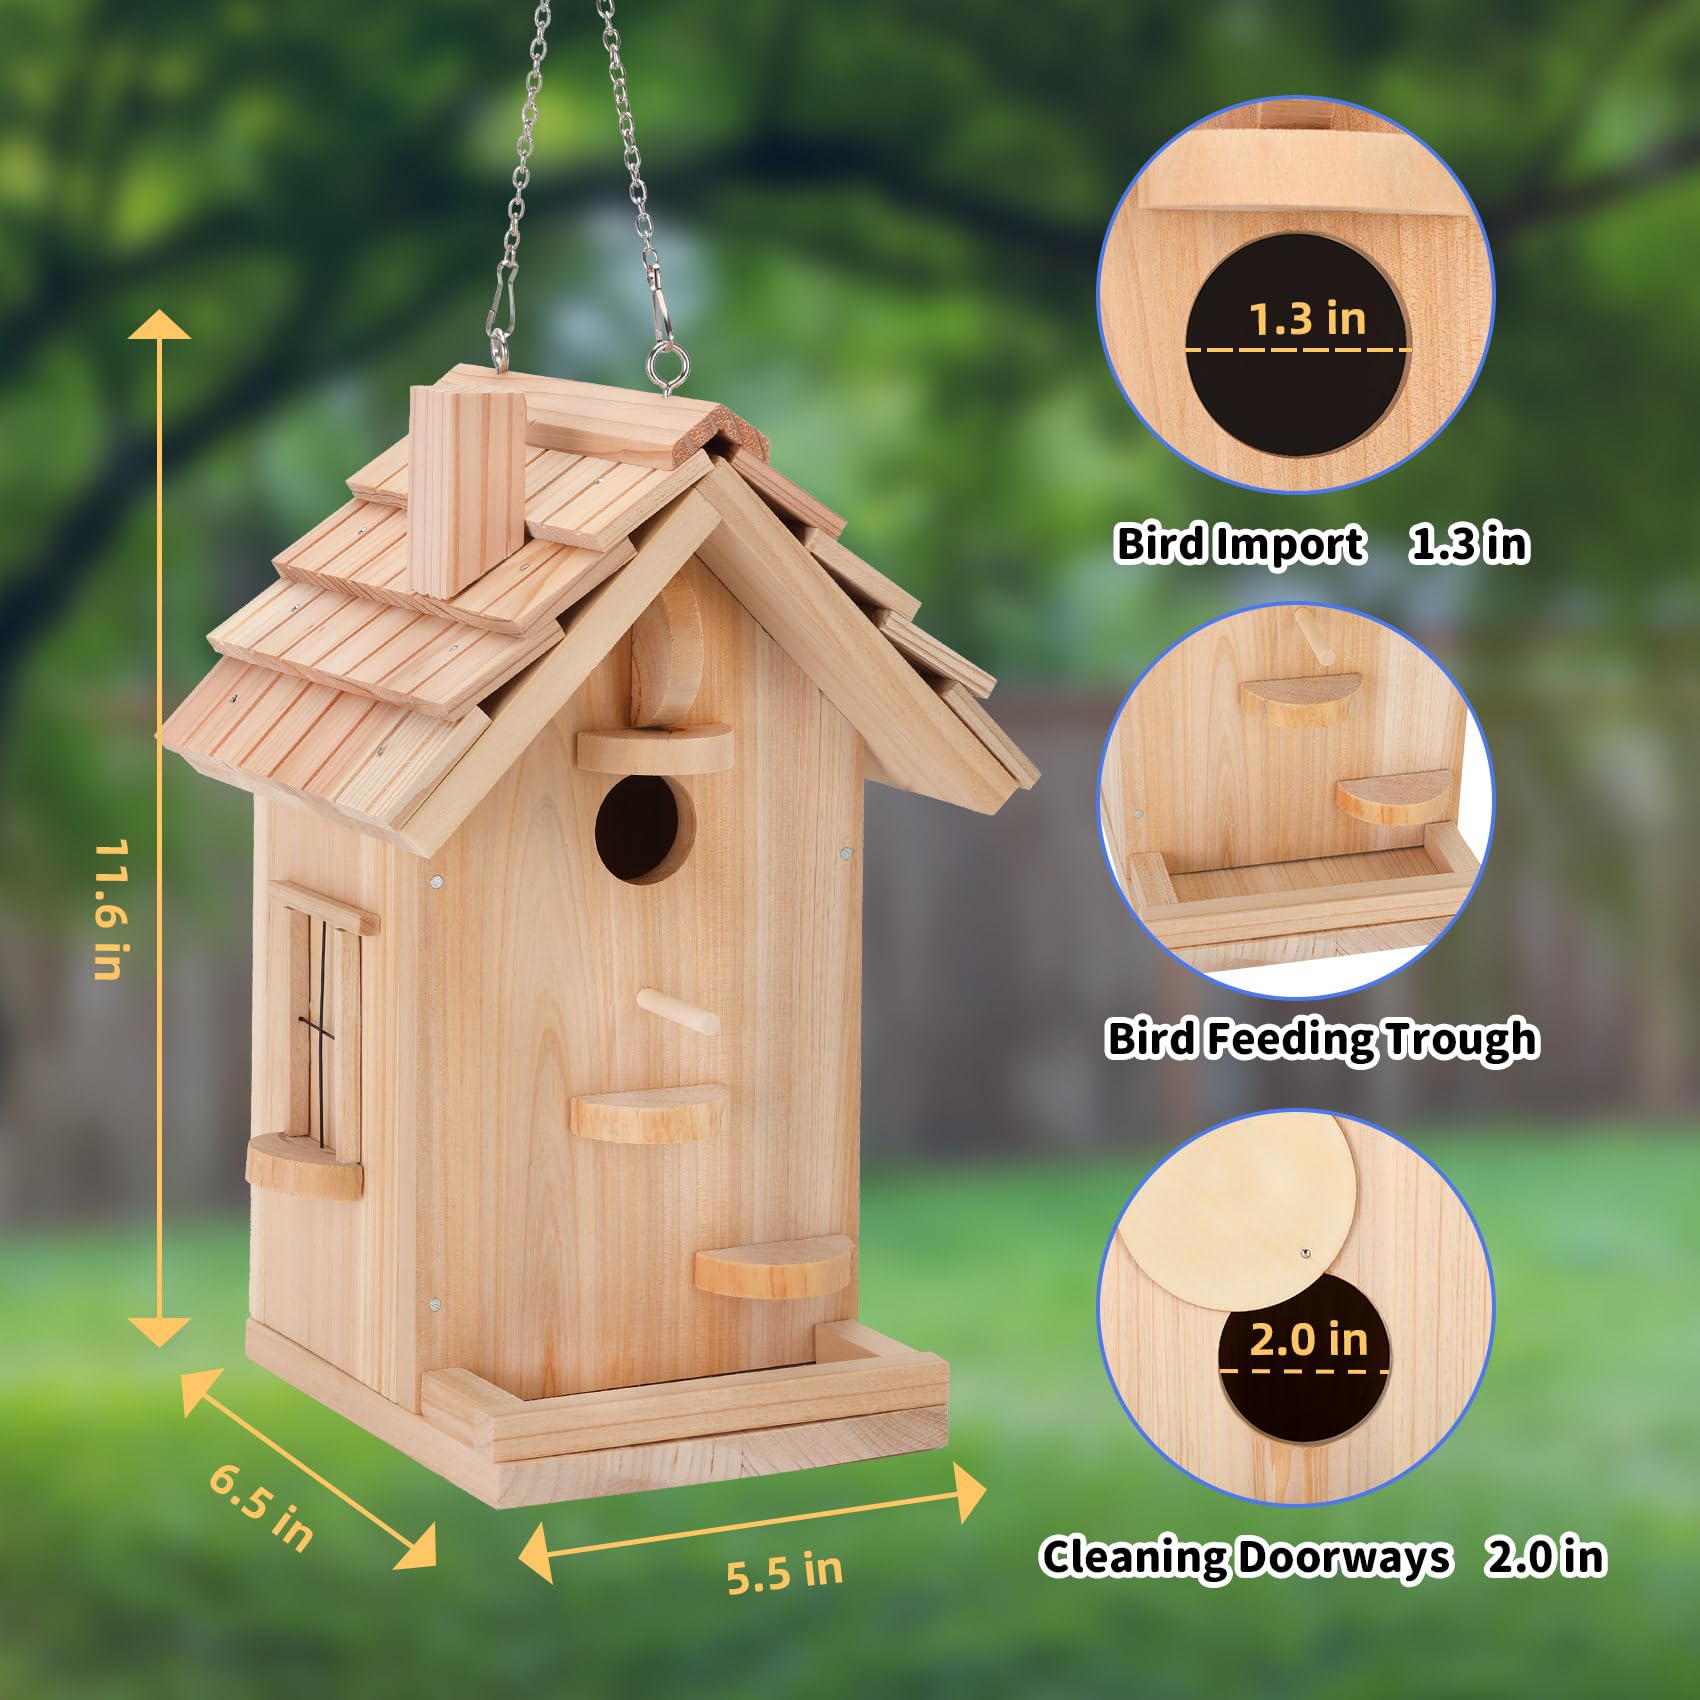
Credit: www.amazon.com
Essential Tools And Materials
Building a birdhouse from wood needs some key tools and materials. These help you work safely and create a sturdy home for birds. Gathering the right items makes the process smoother and more enjoyable. Below are the essentials for your project.
Basic Carpentry Tools Needed
- Measuring tape – to get precise wood sizes
- Pencil – for marking cut lines
- Hand saw or power saw – to cut wood pieces
- Hammer – to drive nails
- Nails or wood screws – to hold parts together
- Drill with bits – to make holes for screws and ventilation
- Screwdriver – for fastening screws
- Sandpaper – to smooth rough edges
- Clamps – to hold wood steady while working
Additional Supplies For Comfort
- Wood glue – strengthens joints
- Wood sealer or outdoor paint – protects against weather
- Brushes – for applying paint or sealer
- Wood pieces – cedar or pine are good choices
- Small hinges – if you want a clean-out door
- Roofing material – for extra weather protection
Safety Gear For Diy Projects
- Safety goggles – protect your eyes from dust and wood chips
- Work gloves – prevent splinters and cuts
- Dust mask – keeps you safe from sawdust
- Ear protection – reduces noise from power tools
Designing Your Bird House
Designing your bird house is a crucial step to attract birds and keep them safe. A well-planned design offers comfort and protection. It also makes building easier and more enjoyable. Focus on shape, size, and features that suit the birds you want to welcome.
Simple Bird House Shapes
Simple shapes make building easier and more effective. A basic box with a flat or slightly sloped roof works best. Avoid complex curves or angles. Birds prefer straightforward, cozy spaces. Rounded roofs or peaked tops help rain run off. Keep openings round or oval to fit bird species.
Sizing For Different Bird Species
Size matters. Different birds need different house sizes. Small birds like chickadees use houses about 5×5 inches. Larger birds like bluebirds need bigger spaces, around 6×6 inches. Entrance hole size controls which birds enter. Here’s a quick guide:
| Bird Species | House Size (WxH) | Entrance Hole Diameter |
|---|---|---|
| Chickadee | 5 x 5 inches | 1 1/8 inches |
| Bluebird | 6 x 6 inches | 1 1/2 inches |
| Tree Swallow | 5 x 5 inches | 1 1/2 inches |
Ventilation And Drainage Features
Good airflow keeps birds cool and dry. Add small ventilation holes near the roof. They let fresh air in without letting rain inside. Drainage holes at the bottom prevent water buildup. This stops mold and keeps nests safe. Make these holes small, about 1/4 inch in diameter.
Cutting And Preparing Wood Pieces
Measure and mark wood pieces carefully before cutting to ensure accuracy. Use a saw to cut the wood into the needed shapes and sizes. Sand edges smooth to prepare the wood for assembly and avoid splinters.
Cutting and preparing wood pieces is a crucial step in making bird houses. Proper preparation ensures your bird house is sturdy and safe for birds. It involves measuring, cutting, and sanding wood to create smooth, precise pieces. This process requires patience and attention to detail. Let’s explore the essential steps for preparing wood pieces.Measuring And Marking Wood
Accurate measurements are vital for a well-fitted bird house. Use a measuring tape to determine the required dimensions. Mark the measurements clearly with a pencil. Ensure all lines are straight and visible. This step prevents mistakes during cutting.Cutting Techniques For Beginners
Beginners should use simple tools like a hand saw. Hold the saw firmly and cut along the marked lines. For precision, make slow and steady cuts. Practice on scrap wood to build confidence. Avoid rushing to minimize errors and ensure safety.Sanding For Smooth Surfaces
Sanding is essential for a smooth finish. Use sandpaper of medium grit to start. Rub the wood surfaces gently in a circular motion. Once smooth, switch to fine-grit sandpaper. This ensures the wood pieces are ready for assembly without rough edges.Assembling The Bird House
Assembling the bird house is the exciting part where all pieces come together. This process shapes the home for your feathered friends. Precise assembly ensures durability and safety for the birds.
Joining Walls And Base
Start by aligning the walls evenly around the base. Use clamps or hold pieces firmly to avoid gaps. Check that edges meet at right angles for a neat fit. Apply wood glue along the edges to strengthen the bond.
Press the walls against the base firmly. Allow the glue to set before moving to the next step. This creates a stable frame for the bird house.
Attaching The Roof
Place the roof panel on top of the assembled walls carefully. Make sure it fits snugly without overhangs that could catch wind. The roof should cover all edges to protect against rain.
Use wood glue on the top edges of the walls. Press the roof down evenly and hold it in place. This seals the bird house and keeps it weather-resistant.
Securing With Nails Or Screws
After the glue has dried, secure all parts with nails or screws. Choose rust-resistant nails or screws for outdoor use. Drive them in at an angle to avoid splitting the wood.
- Use a hammer or drill for fast, firm attachment
- Place nails or screws every few inches for strength
- Check that nothing protrudes inside to harm birds
Double-check all connections for tightness. A well-assembled bird house lasts longer and provides a safe shelter.
Finishing Touches
Finishing touches bring your wooden birdhouse to life. These final details not only make the house more attractive but also more functional and safe for your feathered friends. Adding thoughtful features encourages birds to visit and stay, turning your project into a true haven.
Adding Perches And Entrances
Perches give birds a spot to land and rest before entering the house. You can use small wooden dowels or twigs for this purpose. Attach them securely just below the entrance hole, but avoid making them too long to prevent predators from reaching inside.
The entrance hole size matters for different bird species. A 1.5-inch diameter works well for small birds like chickadees and wrens. You might also consider adding a small overhang above the entrance to shield against rain and keep the interior dry.
Applying Non-toxic Paint Or Sealant
Protect your birdhouse from weather damage by applying a non-toxic paint or sealant. Choose water-based products labeled safe for wildlife to avoid harming birds. Paint the exterior only; leave the interior natural to keep the environment healthy for nesting.
Light colors reflect heat and help regulate temperature inside the house. Avoid dark shades that can absorb heat and make the space uncomfortable. A couple of thin coats are better than one thick coat to maintain breathability.
Decorating Ideas
Decorations can personalize your birdhouse and make it stand out in your garden. Use natural materials like bark strips, pinecones, or small stones glued to the exterior for a rustic look. Be careful not to add anything sharp or toxic that could hurt the birds.
Try painting simple patterns or bird-friendly symbols to add charm. You might also label your birdhouse with the species you hope to attract. What unique touch will you add to make your birdhouse a welcoming home?
Placement And Maintenance
Proper placement and regular maintenance are key to ensuring your wooden bird houses become safe, inviting homes for birds. Thoughtful positioning can protect birds from predators and harsh weather, while upkeep keeps the houses clean and attractive. Let’s dive into some practical tips that will help you create a welcoming environment for your feathered friends.
Best Locations For Bird Houses
Choose a quiet spot away from heavy foot traffic to keep birds comfortable and stress-free. Placing bird houses near trees or shrubs offers natural shelter and easy access to food sources. Avoid areas exposed to strong winds or direct afternoon sun, as extreme weather can harm the nestlings.
Mount the bird house 5 to 10 feet above the ground to protect against cats and other predators. Facing the entrance hole away from prevailing winds helps keep the interior dry. Have you noticed how birds prefer shaded areas during hot days? Try to mimic those conditions.
Regular Cleaning Tips
Cleaning your bird house at least once a year prevents parasites and diseases from building up. Use a mild bleach solution (1 part bleach to 9 parts water) to disinfect the inside, then rinse thoroughly and let it dry completely. Avoid harsh chemicals that can harm birds.
Remove old nesting material carefully to avoid disturbing any residents during breeding season. Setting a reminder to clean your bird houses in late fall, after birds have migrated, ensures you don’t interrupt their cycle. You’ll find that clean houses attract new tenants faster.
Monitoring Bird Activity
Keep an eye on the bird house to learn which species visit and how often. Simple observation can help you adjust placement or design to better suit local birds’ needs. Have you considered keeping a journal or taking photos to track changes over time?
Watch for signs of predators or pests like wasps that may invade the house. If you notice damage or blockages, fix them promptly to maintain a safe environment. Your attention can make all the difference in supporting healthy bird populations right outside your window.

Credit: www.firstdayofhome.com
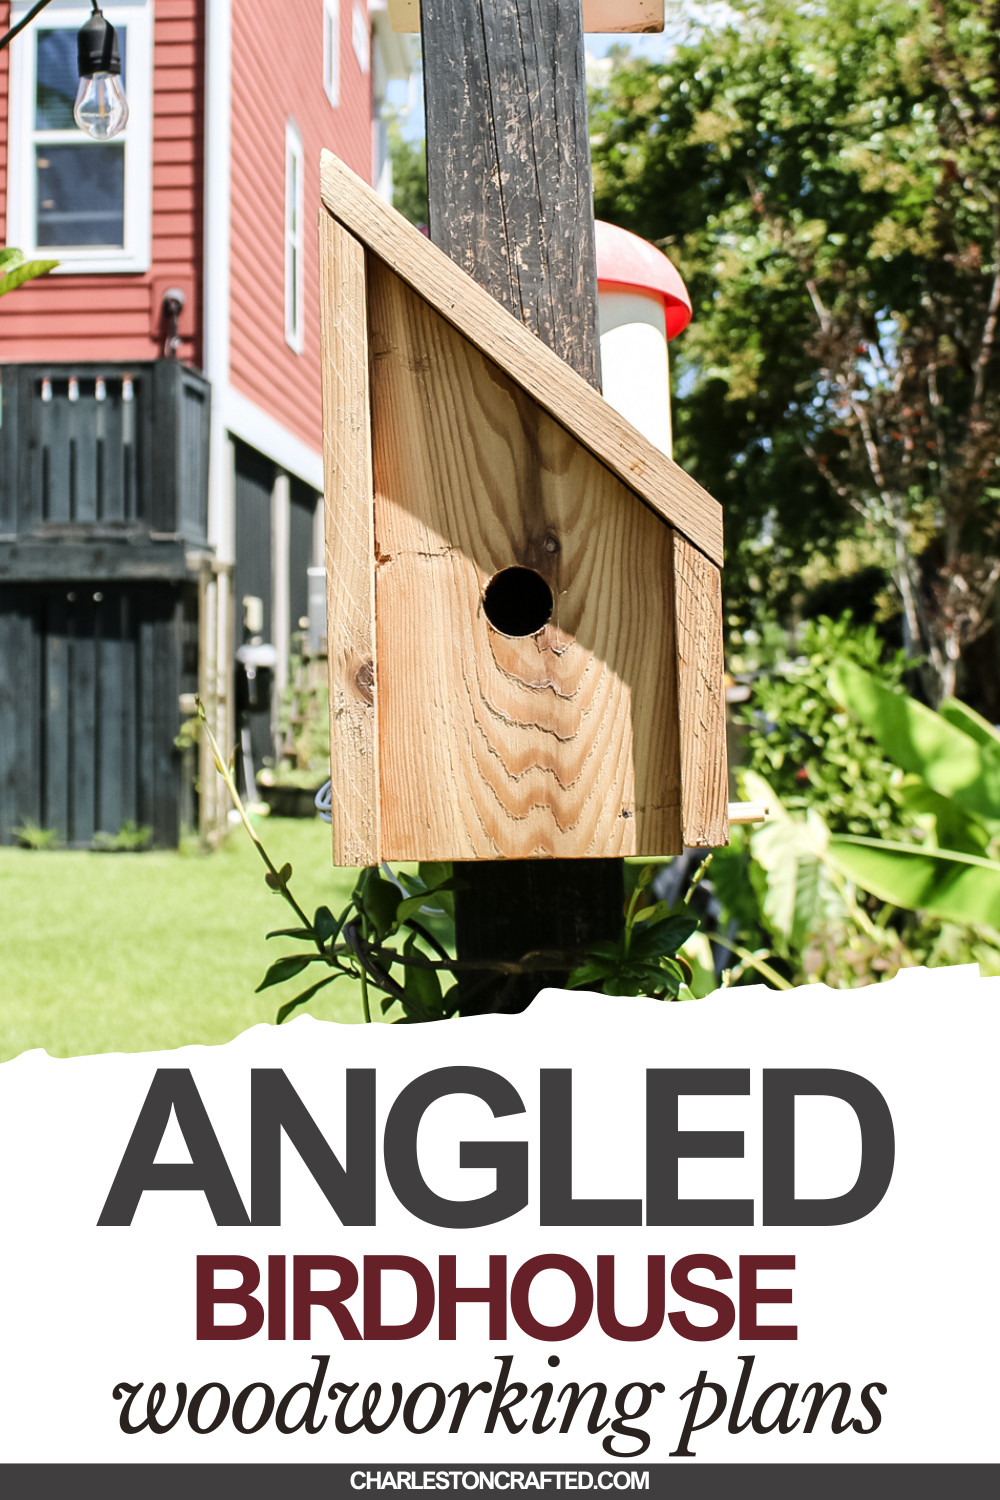
Credit: www.charlestoncrafted.com
Frequently Asked Questions
What Type Of Wood Is Best For Bird Houses?
Cedar and pine are ideal for bird houses. They resist decay and provide good insulation. Avoid treated wood to keep birds safe. Use untreated, natural wood for durability and bird health.
How Do I Properly Ventilate A Wooden Bird House?
Drill small holes near the top on the sides for airflow. Proper ventilation prevents overheating and moisture buildup. Ensure holes are small enough to keep predators out. Good airflow keeps birds healthy and comfortable.
What Size Should A Bird House Be?
Size depends on the bird species you want to attract. Generally, 6×6 inches base and 8-12 inches height work well. The entrance hole size is crucial—different birds prefer different diameters. Match size to local bird species for best results.
How To Protect Wooden Bird Houses From Weather?
Apply a non-toxic, water-based sealant on the exterior only. Avoid painting inside to keep birds safe. Place houses in shaded areas to reduce sun damage. Regular maintenance extends the bird house’s lifespan.
Conclusion
Building bird houses from wood brings joy and helps nature. You create safe homes for birds to live and raise chicks. The steps are simple and use easy tools anyone can handle. Choosing the right wood and size matters for happy birds.
Painting or sealing keeps the house strong through weather. Watching birds visit your wooden house feels rewarding and peaceful. Try making one yourself and enjoy nature closer than ever. It’s a fun, low-cost project that benefits your garden too. Give it a try and see the birds come home!


