
If you love watching birds up close, mounting a bird feeder with a camera is a game-changer. Imagine seeing every flutter, every peck, and every colorful feather in clear detail—all from the comfort of your home.
But setting it up the right way can be tricky. You want the perfect spot, a steady mount, and a clear view without scaring your feathered friends away. In this guide, you’ll learn simple, step-by-step tips to mount your bird feeder with a camera like a pro.
Keep reading, and soon you’ll enjoy stunning bird moments captured right in your backyard.
Choosing The Right Bird Feeder
Choosing the right bird feeder is key to capturing stunning footage with your camera. The feeder sets the stage for bird visits. It affects the types of birds you will see and how close they come. Selecting a feeder that suits your environment and camera setup improves your chances of great shots.
Consider the feeder’s design and purpose. Think about the birds you want to attract. The feeder should also be strong enough to hold a camera without tipping or shaking. Let’s explore important factors to guide your choice.
Types Of Bird Feeders
Different bird feeders serve different birds and needs. Tube feeders offer multiple feeding ports for small birds. Platform feeders are open and attract larger birds. Hopper feeders store more seed and protect it from rain. Suet feeders attract insect-eating birds. Each type changes how birds approach and feed.
Materials And Durability
Feeders made from metal or hard plastic last longer outdoors. Wood feeders blend well with nature but need regular care. Glass or acrylic feeders can look nice but may break easily. Choose a feeder that withstands weather and supports a camera’s weight. Durability ensures stable and clear camera shots.
Attracting Specific Bird Species
Different birds prefer different feeders and seeds. Finches like tube feeders with nyjer seed. Cardinals favor platform feeders with sunflower seeds. Woodpeckers enjoy suet feeders. Match the feeder to the birds you want to film. This helps increase bird visits and camera opportunities.
Credit: gardepro.com
Selecting A Camera For Bird Watching
Choosing the right camera for your bird feeder setup can make a huge difference in your bird watching experience. The camera you pick should capture clear images and videos without disturbing the birds. Think about how you want to observe the birds and what features will help you get the best view.
Camera Types Suitable For Feeders
There are several camera types that work well with bird feeders:
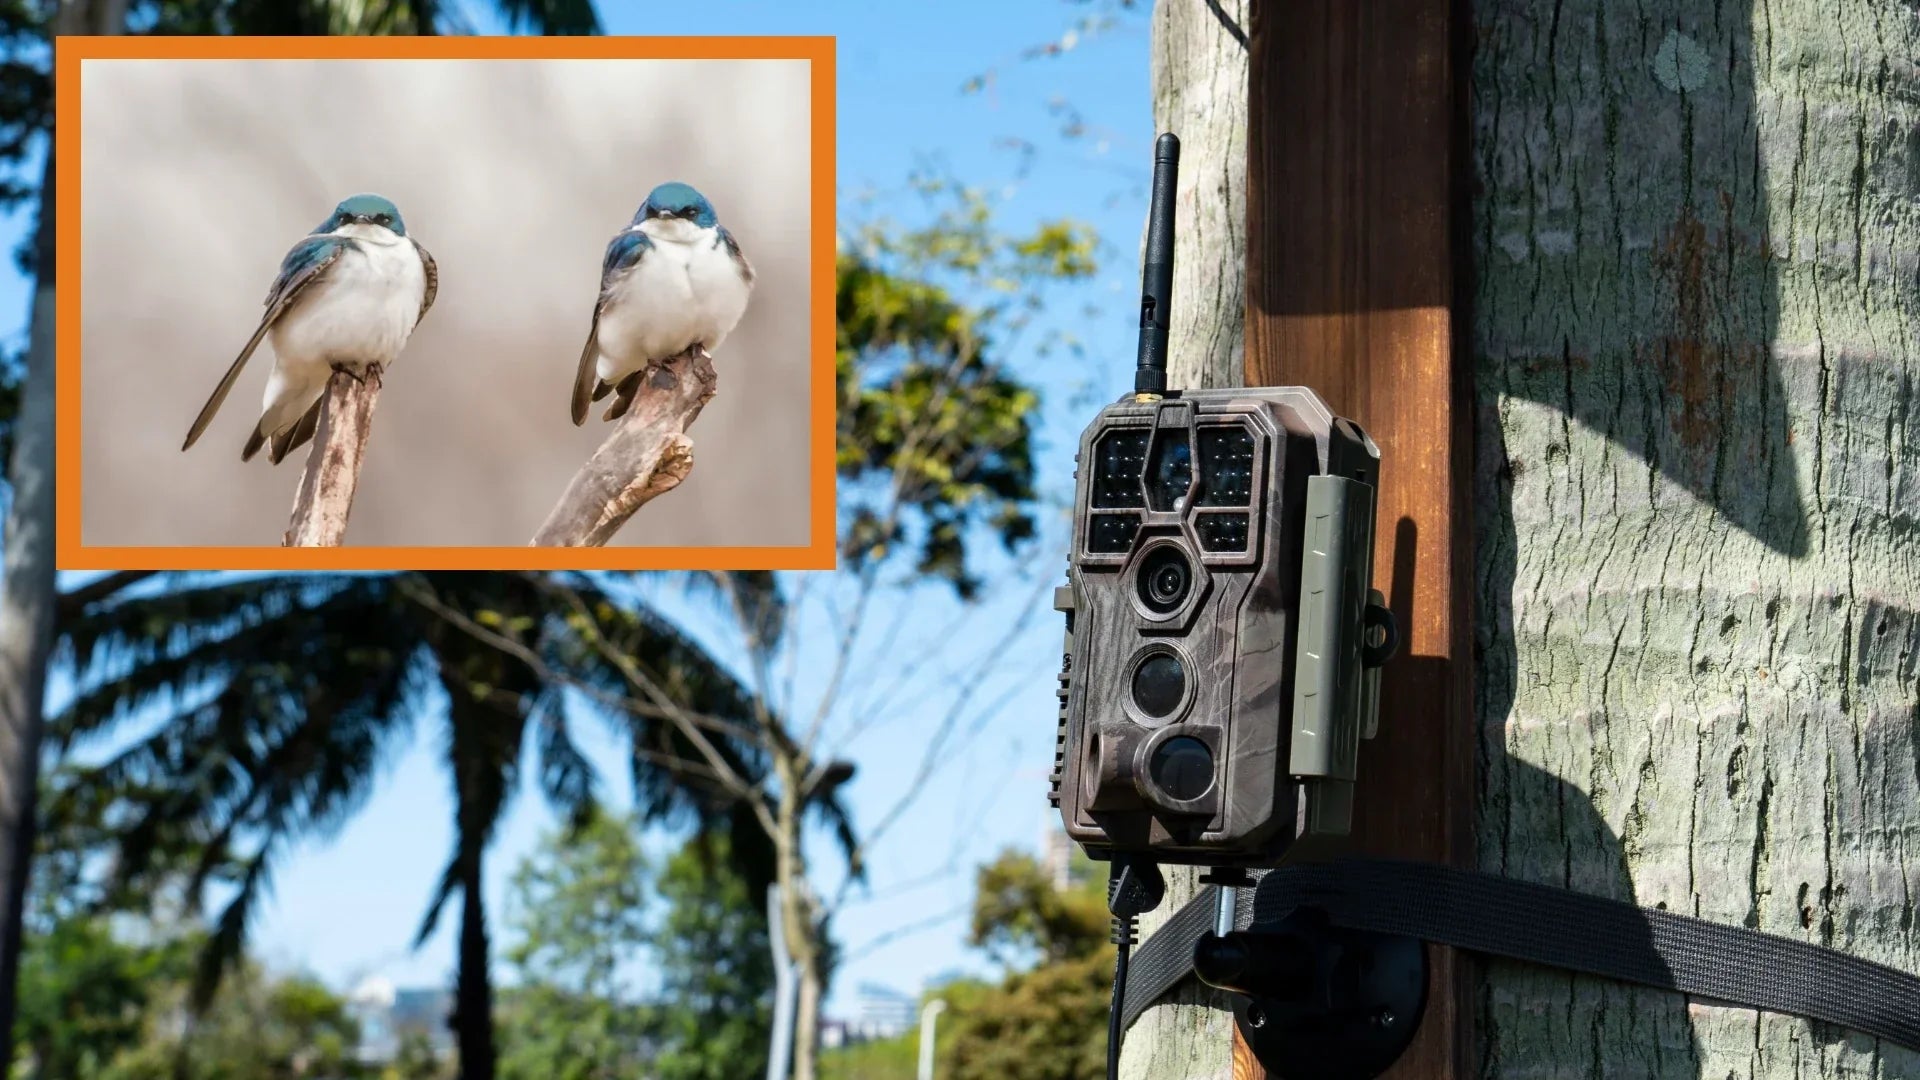
- Trail Cameras:These are motion-activated and great for catching birds in action without constant recording.
- Webcams:Perfect for live streaming and easy to connect to your computer or smartphone.
- Bird-Specific Cameras:Designed with features like silent operation and weatherproof casings.
Choosing a camera designed for outdoor use is crucial because it will face rain, wind, and temperature changes.
Resolution And Lens Options
How clear do you want your bird footage? Higher resolution cameras (1080p or above) capture more detail, which helps identify bird species easily.
Lens choice matters too. A wide-angle lens shows more of the feeder area, while a zoom or telephoto lens lets you focus closely on small birds without getting too close.
Consider a camera with adjustable focus so you can fine-tune the image once it’s mounted.
Wireless Vs Wired Cameras
Wireless cameras offer flexibility in placement since you don’t have to worry about running cables. This is great if your feeder is far from your house.
However, wireless cameras rely on batteries or Wi-Fi, which might run out or lose connection during bad weather.
Wired cameras provide a steady power source and often better image quality but require careful setup to hide cables and avoid disturbing the birds.
Which option fits your space and patience level better? Think about your setup and how much maintenance you’re willing to do.
Picking The Best Location
Choosing the right spot for mounting your bird feeder with a camera can make all the difference in the quality of your birdwatching experience. The location affects not only how clearly you can capture the birds but also their willingness to visit. Think about where birds feel safe and where your camera will get the best view.
Ideal Mounting Spots
Look for a place that offers a clear, unobstructed view of the feeder. A sturdy tree branch or a dedicated pole works well, especially if it’s about 5 to 6 feet off the ground. Avoid locations near busy footpaths or areas with heavy human activity to keep the birds comfortable.
Think about your own access too—make sure you can easily reach the feeder for refilling and camera maintenance without disturbing the birds. Mounting near a window can be great, but watch out for reflections that may scare birds away.
Considering Bird Safety
Bird safety should be your priority. Place the feeder away from places where predators like cats can hide or pounce. A good rule is to keep the feeder at least 10 feet from dense shrubs or fences where predators may lurk.
Also, avoid spots that are too exposed to strong winds or direct afternoon sun, which can stress the birds. Have you noticed how some feeders get less traffic during hot afternoons? Choosing a shaded area helps birds feel secure and encourages longer visits.
Lighting And Background Tips
Natural light is your best friend for clear, vibrant photos. Position the feeder so the sun lights it from behind or the side, not directly into the camera lens. This reduces glare and shadows that can ruin a great shot.
Consider the background carefully. A plain or natural backdrop like trees or bushes lets the birds stand out in your images. Bright or busy backgrounds can distract from the bird and make the camera focus less precise.

Credit: www.amazon.com
Mounting The Bird Feeder And Camera
Choose a sturdy spot to hang the bird feeder where birds can easily land. Attach the camera nearby, ensuring it faces the feeder clearly without blocking bird access. Secure both firmly to avoid movement from wind or animals.
Mounting a bird feeder with a camera combines your love of birdwatching with the thrill of capturing beautiful moments in nature. Not only does it allow you to observe birds closely, but it also provides a chance to document their behavior and interactions. Whether you’re a seasoned bird enthusiast or a curious beginner, setting up a feeder with a camera can be a rewarding experience. However, to ensure success, proper mounting is essential for both the feeder and the camera.
Tools And Materials Needed
Before you begin, gather all necessary tools and materials to make the process smooth. You’ll need:
- A sturdy bird feeder suitable for your local bird species
- A weatherproof camera with a good resolution and zoom capabilities
- Mounting brackets or hooks
- Screws and a screwdriver
- A ladder for reaching high places
- Cable ties or adhesive strips for securing the camera
Having these items on hand will save you time and ensure a secure setup.
Step-by-step Mounting Process
Start by selecting a location that offers a clear view of the feeder and is easily accessible for refilling and maintenance. Ensure the chosen spot is safe from predators and has minimal obstructions.
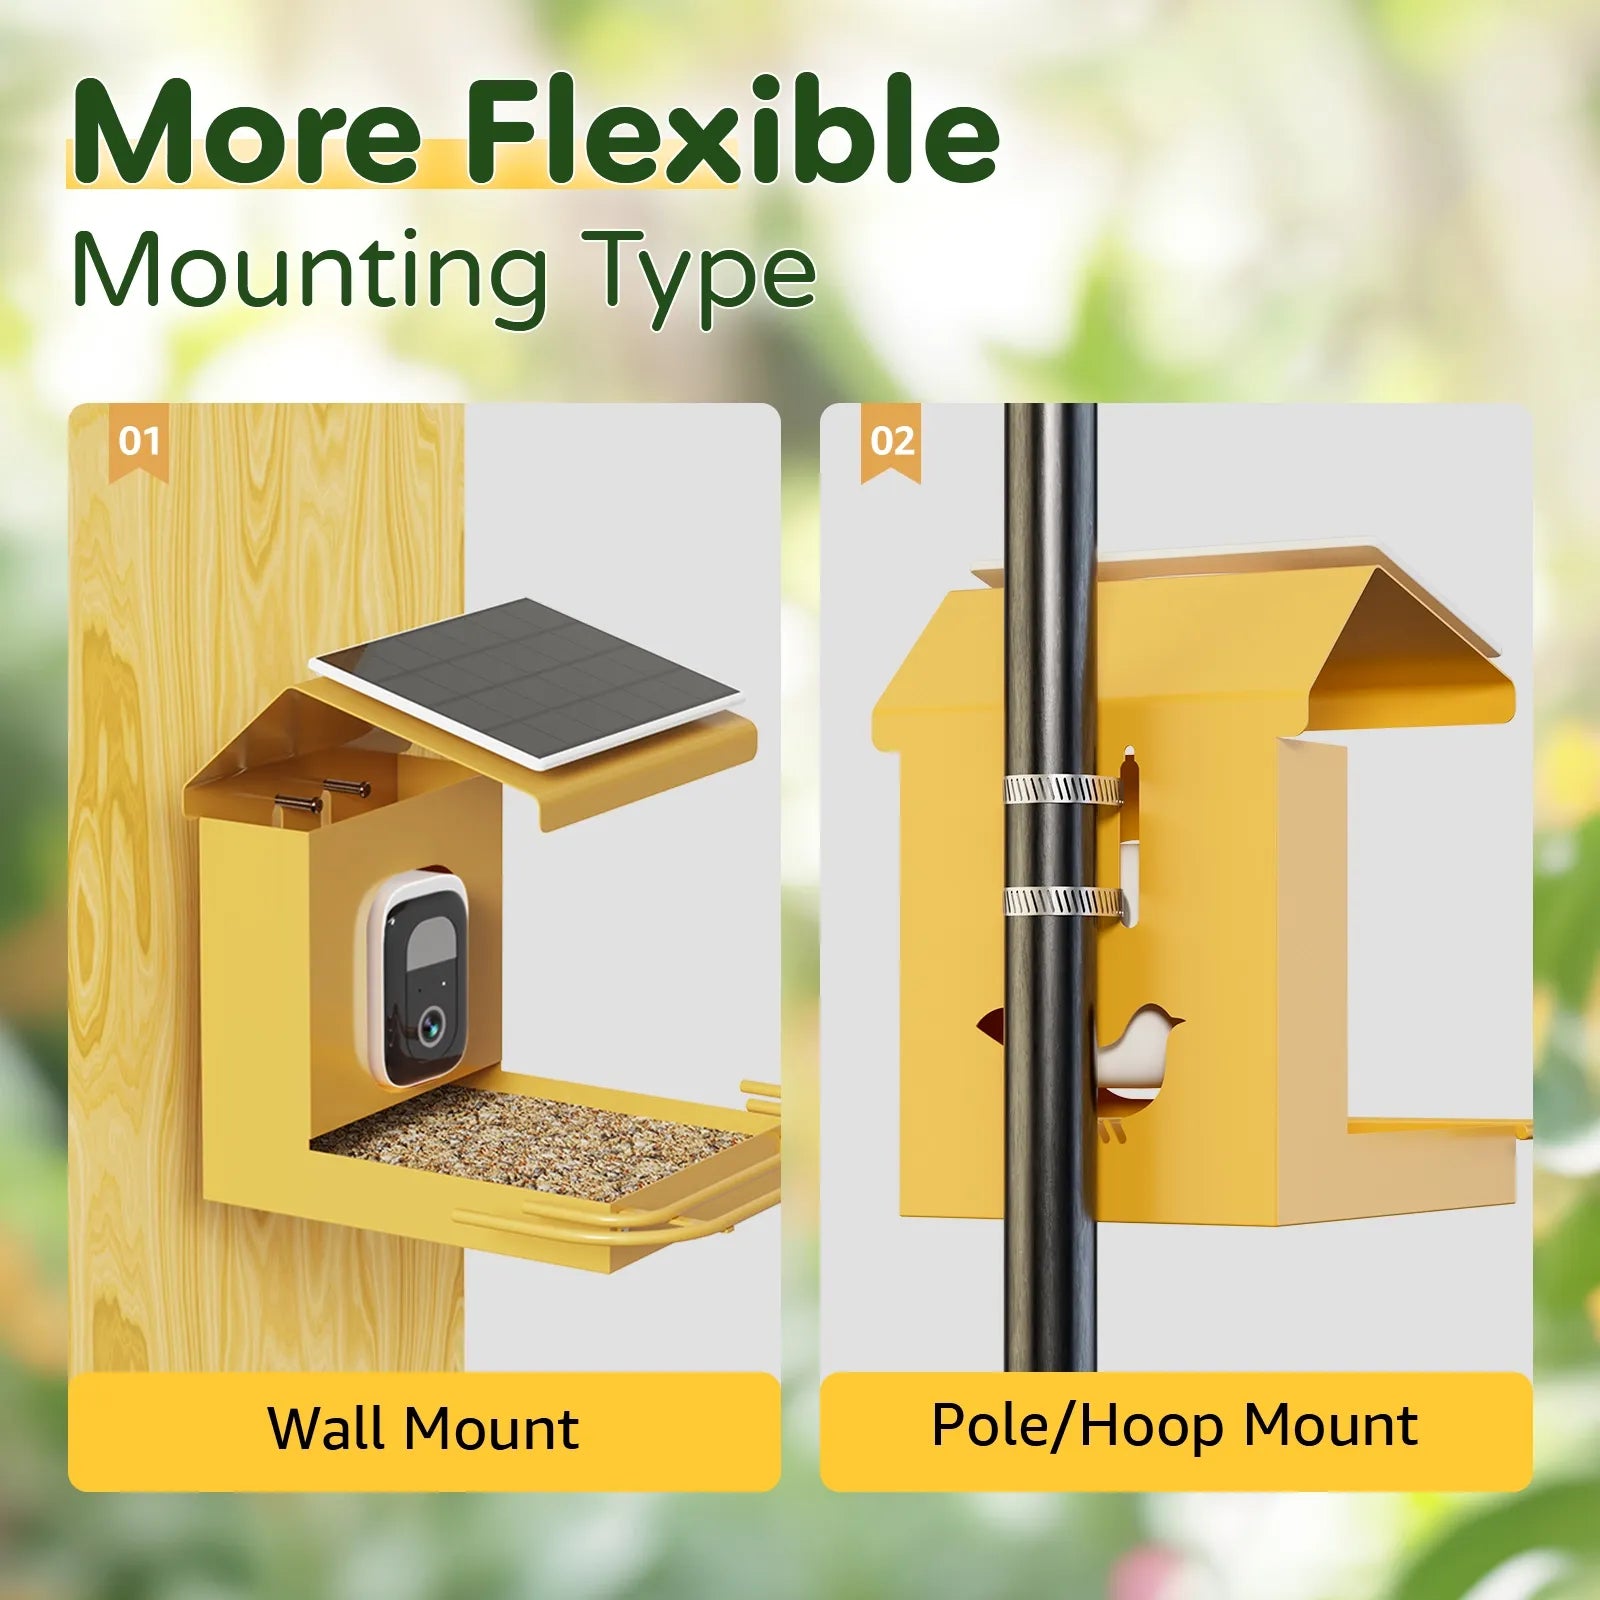
- Install the mounting bracket or hook at your chosen location, ensuring it’s secure and stable.
- Attach the bird feeder to the bracket, making sure it’s level and steady.
- Position the camera on its mount, aligning it to capture the best angles of the feeder.
- Use the ladder carefully to make final adjustments if the setup is elevated.
Take a moment to step back and assess the setup from a distance. Does it provide the coverage you want?
Securing The Camera For Stability
A stable camera is crucial for capturing clear footage. Consider these tips to enhance stability:
- Use cable ties or adhesive strips to firmly secure the camera to its mount.
- Check that the camera is tightly fastened and cannot be easily moved by wind or animals.
- Ensure the camera’s power source, if external, is safely protected from weather conditions.
Testing the camera’s stability by gently shaking the mount can help identify any weak points. By following these guidelines, you’ll create a reliable setup that captures stunning bird activity. Are you ready to witness nature’s wonders right from your own backyard?
Configuring The Camera Settings
Configuring the camera settings is essential to capture clear and detailed bird footage. The right settings improve video quality and ensure you do not miss any bird activity. Adjusting focus, exposure, and motion detection helps create a better viewing experience. Recording and streaming options offer flexibility for how you watch and save your bird videos.
Optimizing Focus And Exposure
Set the camera focus to keep birds sharp and clear. Use manual focus if autofocus struggles with small birds. Adjust exposure to balance light and shadows. Bright sunlight can cause glare, so lower exposure in such conditions. In low light, increase exposure to capture more details. Check the preview to ensure the picture looks natural and not too dark or bright.
Motion Detection And Alerts
Enable motion detection to record only when birds appear. This saves storage space and battery life. Adjust sensitivity to avoid false alerts from wind or moving branches. Set alert preferences to get notifications on your phone or email. Test the motion detection by moving near the feeder to confirm it works well. Customize alert times to avoid disturbances during night hours.
Recording And Streaming Options
Choose between continuous recording or motion-triggered clips. Continuous recording captures everything but uses more storage. Motion-triggered clips save space and focus on bird visits. Select the video quality based on your storage capacity and internet speed. Use streaming options to watch live bird activity on your device. Check compatibility with your phone or computer before setting up streaming.
Maintaining The Feeder And Camera
Maintaining your bird feeder and camera is key to enjoying clear views and healthy visiting birds. Neglecting upkeep can lead to blurry footage or even harm the feathered guests. Simple, regular care ensures your setup works smoothly and stays inviting throughout the seasons.
Regular Cleaning Tips
Clean your feeder at least once every two weeks to prevent mold and bacteria buildup. Use warm water and mild soap, avoiding harsh chemicals that could hurt birds.
Don’t forget to wipe down the camera lens gently with a microfiber cloth to keep your footage sharp. Check for spider webs or debris that may block the view.
- Disassemble feeder parts for thorough cleaning.
- Rinse thoroughly to remove soap residue.
- Dry completely before reassembling to avoid moisture damage.
Battery And Power Management
Regularly monitor your camera’s battery life to avoid missing exciting moments. If your camera uses rechargeable batteries, keep spares handy and charge them fully before use.
Consider using solar-powered options if your feeder is in a sunny spot. This reduces the hassle of frequent battery changes and keeps your camera running longer.
- Turn off the camera when not in use to save power.
- Use energy-efficient settings if available.
- Inspect power connections and cables for wear or damage.
Troubleshooting Common Issues
If your camera isn’t capturing clear images, check the focus and clean the lens carefully. Sometimes adjusting the angle slightly can improve the field of view.
Connectivity problems are common—restart your Wi-Fi router and camera to reset the connection. Verify that the camera’s firmware is up to date for best performance.
Birds avoiding the feeder? Make sure the feeder is clean and placed in a quiet, safe spot. Sometimes repositioning it away from busy walkways helps.
Credit: www.bilantan.com
Frequently Asked Questions
How Do I Mount A Bird Feeder With A Camera?
Choose a sturdy pole or tree branch. Attach the feeder securely. Fix the camera nearby with a clear view. Ensure the camera is weatherproof and has power access for continuous recording.
What Is The Best Camera For Bird Feeder Mounting?
Opt for a small, weatherproof camera with HD quality. Wireless models offer easy installation. Look for cameras with night vision and motion detection for better bird watching.
How High Should I Mount A Bird Feeder With Camera?
Mount the feeder 5 to 6 feet above ground. This height deters predators and gives the camera a clear view. Adjust as needed based on your yard’s layout and bird species.
How Do I Power A Camera On A Bird Feeder?
Use rechargeable batteries for portability or solar-powered cameras for sustainability. Alternatively, plug the camera into a nearby outdoor outlet using waterproof cables.
Conclusion
Mounting a bird feeder with a camera brings nature closer to you. It lets you watch birds safely and learn about their habits. Choose a good spot that is steady and safe for birds. Keep the camera clear and check it often.
This simple setup offers hours of joy and discovery. Enjoy every moment watching your feathered visitors.


