
Are you tired of squirrels raiding your bird feeder and scaring away your feathered friends? Electrifying your bird feeder pole might sound complicated, but it’s actually a simple and effective way to keep unwanted critters at bay.
Imagine enjoying your backyard without the frustration of constant feeder theft, while still welcoming birds safely. In this guide, you’ll discover easy steps to electrify your bird feeder pole, protect your feeders, and create a peaceful haven for the birds you love.
Ready to take control and make your bird feeder squirrel-proof? Let’s dive in!

Credit: www.youtube.com
Choosing The Right Feeder Pole
Choosing the right feeder pole is a key step in electrifying your bird feeder effectively and safely. The pole must support the electrical setup without posing risks to birds or your garden. Selecting the right materials and considering the pole’s height and placement will make your project successful and enjoyable.
Materials That Work Best
Metal poles are a popular choice because they conduct electricity well, which is essential for electrification. However, they require proper insulation to keep the birds safe and prevent shorts. Stainless steel or aluminum poles resist rust and last longer outdoors, making them ideal.
Wooden poles can work if you treat them with a weatherproof sealant and use insulated wiring. Avoid plastic poles, as they can degrade quickly under sun and rain, leading to electrical hazards. Have you checked your local hardware store for poles designed specifically for outdoor electrical use?
Height And Placement Tips
Set your feeder pole high enough to deter squirrels and other critters, but not so high that birds feel unsafe landing. Around 5 to 6 feet usually works well. Placing the pole near natural cover like shrubs can encourage birds to approach while giving them a quick escape.
Consider sunlight and wind directions when choosing the spot. Too much sun might overheat the electrical parts, while strong winds could damage the setup. Where do you notice birds frequenting most in your yard? Position your pole there to maximize visits.
Selecting An Electrification Method
Selecting the right electrification method for your bird feeder pole is crucial. It affects ease of use, maintenance, and safety. Each option offers distinct benefits and challenges. Consider your location, power access, and budget before deciding. Below are common electrification methods to help guide your choice.
Battery-powered Systems
Battery-powered systems offer portability and ease of installation. They do not need wiring or a power outlet nearby. Rechargeable batteries reduce waste and save money over time. Regular battery checks are necessary to keep the feeder energized. This option works well in areas without electricity access.
Solar-powered Options
Solar-powered setups use sunlight to charge batteries or run the system directly. They are eco-friendly and low-maintenance once installed properly. Solar panels must be placed where sunlight is abundant. Cloudy or shaded locations may reduce efficiency. Solar power suits outdoor feeders in sunny spots.
Wired Electric Solutions
Wired electric solutions connect directly to household power sources. They provide constant power without needing battery replacements. Installation requires running cables safely and following electrical codes. This method suits permanent setups near buildings. It offers reliable performance but may need professional help to install.
Gathering Necessary Tools And Materials
Gathering the right tools and materials sets the foundation for electrifying a bird feeder pole safely and effectively. This process requires careful selection of parts that work well together and ensure durability outdoors. Preparing these items in advance helps avoid interruptions during installation and keeps the project on track.
Focus on quality components designed for outdoor electrical setups. These will resist weather damage and keep your bird feeder safe from unwanted pests. Safety is key, so include gear that protects you during the work.
Insulators And Wiring
Choose insulators made from strong, non-conductive materials. These prevent electricity from traveling down the pole and causing harm. Look for UV-resistant plastic or ceramic types for long-lasting use.
- Use insulated wiring rated for outdoor use.
- Wire gauge should match the power source and distance.
- Opt for weatherproof cables to prevent shorts.
Proper insulators and wiring keep the electrical current controlled and safe around your bird feeder.
Connectors And Safety Gear
Connectors link wires securely and keep connections dry. Waterproof connectors or terminal blocks work best outside. They protect against corrosion and ensure steady current flow.
- Use wire nuts or crimp connectors made for outdoor use.
- Include a fuse or circuit breaker for added protection.
- Wear insulated gloves and safety glasses during installation.
- Have a voltage tester to check your work safely.
Safety gear protects you from electric shocks and accidents. Connectors maintain reliable electrical connections in all weather conditions.
Step-by-step Electrification Process
Begin by gathering all necessary materials, including wires and connectors. Securely attach the wires to the pole, ensuring safe insulation. Test the electrical setup carefully before mounting the bird feeder to avoid any hazards.
Electrifying a bird feeder pole can deter unwelcome guests like squirrels and larger birds, ensuring that your feathered friends enjoy their meal in peace. Before you dive into this project, ensure safety is your top priority. Wear rubber gloves and always double-check your setup to avoid accidents. Ready to give it a try? Let’s break it down into simple steps.
Installing Insulators On The Pole
The first crucial step is installing insulators. These keep the electric current from grounding through the pole. Begin by selecting durable plastic or ceramic insulators designed for outdoor use. Attach the insulators at regular intervals along the pole, ensuring each is securely fastened. This setup prevents the electric current from escaping, keeping it effective and safe. It’s a straightforward process that sets the foundation for the rest of your electrification project.
Wiring Setup And Connections
Now, let’s focus on the wiring. Choose a wire that is weather-resistant and suitable for outdoor electrical projects. Run the wire through the insulators, ensuring it is tight but not overly strained. Connect the wire to an electric fence charger. This charger should be appropriate for small animals and birds, providing a gentle yet effective deterrent. Secure all connections carefully, double-checking that there are no exposed wires. This step ensures that the electrification works efficiently without posing any risk to you or the birds.
Testing The Electric Current
Testing is a crucial step in ensuring your setup is safe and functional. Use a voltage tester to check the electric current running through the wire. The reading should align with the specifications of your electric fence charger. If the current is too high, adjust your charger settings to a safer level. This will protect both the birds and the pole from potential hazards. Regular testing ensures your electrification setup remains effective and safe over time. Does this solution seem feasible for your bird feeder pole? Taking these steps can make a noticeable difference in how your bird feeder serves its intended guests.
Ensuring Safety And Compliance
Electrifying a bird feeder pole requires careful attention to safety and legal rules. This ensures the setup does not harm birds, pets, or people. Following correct safety steps protects everyone and keeps your project legal.
Safe Voltage Levels
Choosing the right voltage is critical. Too high voltage can hurt birds or other wildlife. Too low voltage may not stop unwanted animals effectively. Experts suggest using low-voltage systems under 12 volts. These systems reduce risk but still provide enough power to deter pests.
Use a voltage tester to check the electric current regularly. Avoid exposed wires or connections to prevent shocks. Insulate all wiring with waterproof materials. Keep wires tight and secure to stop accidental contact.
Local Regulations To Consider
Check local laws before adding electricity to your bird feeder pole. Some areas have rules about outdoor electrical devices. These laws protect wildlife and people from danger. Contact your local government or wildlife agency for guidance.
Permits or inspections may be required in some places. Fines or penalties can happen if rules are broken. Follow all local codes for electrical work. Use licensed electricians if unsure about installation. This ensures your setup is safe and legal.
Maintaining Your Electrified Feeder Pole
Keep the electrified feeder pole clean and dry to ensure proper function. Regularly check the wiring for damage and clear any debris that may block the current. Simple upkeep helps keep birds safe and the pole working well.
Maintaining your electrified bird feeder pole is essential for ensuring its longevity and functionality. This task might seem daunting at first, but with a few straightforward steps, you can keep your feeder pole in optimal condition. Let’s dive into some practical tips that will help you keep your electrified bird feeder pole in excellent shape.
Regular Inspections
Performing regular inspections is crucial. Check the wiring and connections every few weeks to ensure everything is secure and there are no signs of wear or damage. Look for frayed wires or corrosion, which can lead to malfunctions. If you spot any issues, address them immediately to prevent further complications. Don’t forget to test the electrified pole’s functionality regularly. It’s better to catch problems early than to let them develop into bigger issues.
Weatherproofing Tips
Weatherproofing your electrified bird feeder pole is vital, especially if you live in an area prone to heavy rain or snow. Use waterproof materials or coatings to protect the pole from moisture. Seal any open connections with waterproof tape or sealant to prevent water ingress. This simple step can save you from potential electrical faults. Consider installing a canopy or cover over the feeder to shield it from direct exposure to the elements. This can significantly extend the life of your feeder pole.
Troubleshooting Common Issues
Encountering issues with your electrified bird feeder pole is not uncommon, but most problems are easy to fix. If the pole stops working, first check the power source and connections. Ensure that the circuit breaker has not tripped. Reset it if necessary. If the problem persists, consult the manufacturer’s manual for specific troubleshooting tips. Sometimes a simple reset or replacement of a component can solve the issue. Remember, maintaining your electrified bird feeder pole is all about being proactive. Regular care and attention can prevent most problems and ensure that your feathered friends continue to visit your garden safely. What steps will you take today to ensure your bird feeder pole remains in top condition?
Alternative Pest-proofing Strategies
Alternative pest-proofing strategies protect bird feeders without electricity. These options keep pests away safely and effectively. They suit different environments and needs. Using a mix of methods often works best. Explore physical barriers, natural deterrents, and feeder design adjustments below.
Physical Barriers
Physical barriers block pests from reaching bird feeders. Metal baffles around poles stop squirrels and larger animals. Mesh cages protect seeds while letting birds feed freely. Smooth, slippery pole covers prevent climbing. Choose barriers that are sturdy and weather-resistant. Proper installation ensures pests cannot bypass them.
Natural Deterrents
Natural deterrents use scents or textures pests dislike. Sprinkle cayenne pepper or chili powder on seed trays. Birds do not mind spicy tastes. Place strong-smelling herbs like mint or lavender nearby. These herbs repel rodents and insects. Some gardeners use garlic spray to keep pests away. Always avoid harmful chemicals to protect birds.
Feeder Design Adjustments
Adjust feeder design to reduce pest access. Use feeders with small feeding ports for tiny birds only. Weight-sensitive perches close under heavy animals like squirrels. Choose feeders with built-in baffles or cages. Keep feeders clean to avoid attracting unwanted visitors. Position feeders away from trees or structures pests use to jump.
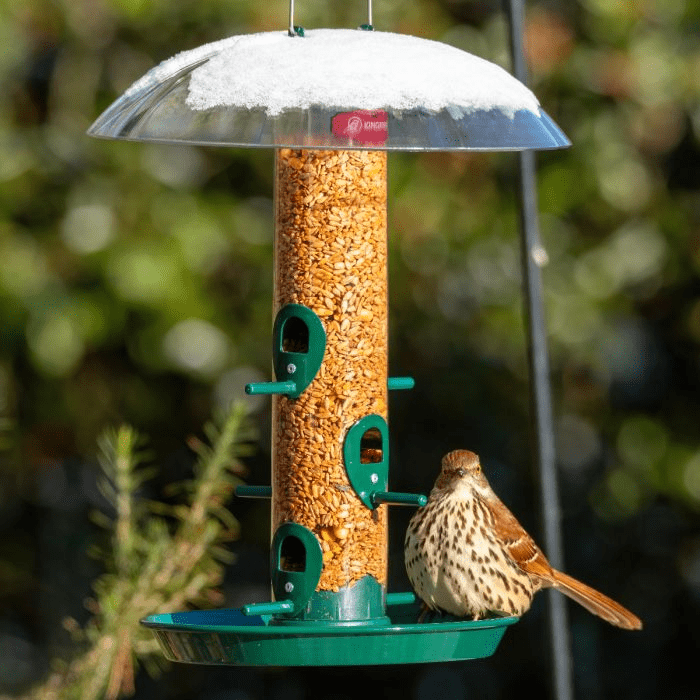
Credit: www.kingsyard.com
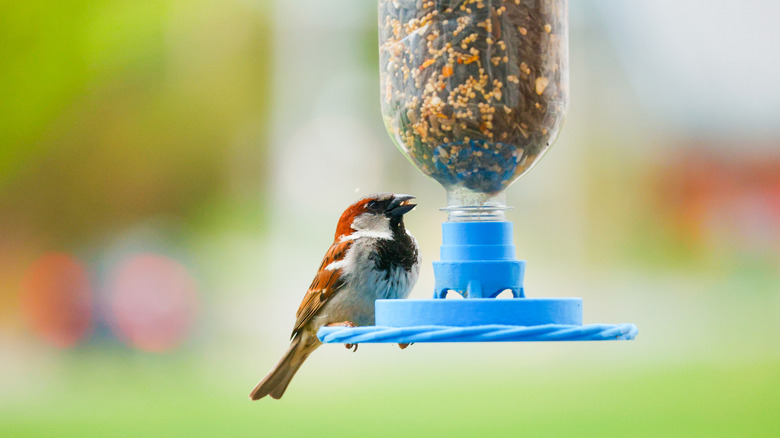
Credit: www.outdoorguide.com
Frequently Asked Questions
How Do You Electrify A Bird Feeder Pole Safely?
To electrify a bird feeder pole safely, use low-voltage wiring and insulated connectors. Avoid exposed wires to prevent shocks. Install a weatherproof power source and keep electricity away from birds and pets.
What Materials Are Needed To Electrify A Bird Feeder Pole?
You need insulated electrical wire, a low-voltage power supply, connectors, and waterproof casing. Also, use a voltage regulator and grounding tools for safety and durability.
Can Electrifying A Bird Feeder Pole Harm Birds?
Properly electrified poles use low voltage, which does not harm birds. The electric current deters squirrels but is safe for birds if installed correctly.
Why Electrify A Bird Feeder Pole?
Electrifying a bird feeder pole helps deter squirrels and pests. It protects bird feed from being stolen, ensuring birds have uninterrupted access to food.
Conclusion
Electrifying a bird feeder pole keeps squirrels and pests away. It protects your bird food and invites more birds. Safety matters—always follow instructions and use proper equipment. Regular checks help the system work well over time. Enjoy watching birds without unwanted visitors.
Simple steps bring great results for your backyard.


