
Imagine turning something as simple as a teacup into a charming little bird feeder right in your own garden. You might think it’s tricky, but what if I told you it’s easier than you expect?
By making your own teacup bird feeder, you not only add a unique touch to your outdoor space but also invite colorful birds to visit and brighten your day. In this guide, you’ll discover simple steps that anyone can follow, even if you’ve never crafted before.
Ready to bring more life and joy to your backyard? Let’s dive in and create a beautiful teacup bird feeder together.
Credit: colormethrifty.com
Choosing The Right Teacup
Choosing the right teacup is key to making a charming and safe bird feeder. The teacup must be sturdy, easy to clean, and the right size for small birds. Careful choice helps create a feeder that lasts and attracts birds to your garden.
Materials And Durability
Ceramic teacups are popular for bird feeders. They are strong and weather-resistant. Porcelain cups look pretty but can be fragile. Avoid plastic teacups; they may not last long outdoors. Choose cups with a smooth finish to make cleaning easier.
Size And Shape Considerations
Choose a cup wide enough for birds to perch or rest near the feeder. Cups with a deep bowl hold more birdseed but can be harder for small birds to access. Shallow cups work well for tiny birds. The cup’s handle can be useful for hanging the feeder securely.
Vintage Vs Modern Styles
Vintage teacups add a nostalgic charm to your feeder. They often have unique patterns and colors. Modern cups tend to be simpler and more durable. Both styles can attract birds, so pick what fits your garden’s look. Ensure any vintage cup is free of cracks and safe for outdoor use.
Essential Tools And Supplies
Gathering the right tools and supplies is the foundation for making charming teacup bird feeders. Having everything ready before you start makes the crafting process smoother and more enjoyable. It also helps you avoid interruptions that can break your creative flow.
Basic Crafting Tools
Your project begins with a few simple tools that you’ll likely find around the house or in any craft kit. A strong pair of scissors or a small saw will help you trim any materials needed. Needle-nose pliers come in handy for bending wire or handling small parts with precision.
A drill with a small bit is essential to create drainage holes in the teacup saucer. This step prevents water from pooling, keeping the bird feeder clean and safe. Don’t forget a ruler or measuring tape to keep your design balanced and accurate.
Adhesives And Sealants
Choosing the right adhesive can make or break your bird feeder’s durability. Waterproof epoxy glue is a reliable choice; it bonds ceramic and metal surfaces firmly and withstands outdoor conditions. Hot glue might work for quick fixes but usually lacks long-term strength against weather.
Sealants are equally important to protect your feeder from the elements. Applying a clear, non-toxic outdoor sealant keeps paint and decorations intact while preventing water damage. Ask yourself: How often will your feeder face rain or snow? This will guide your sealant choice.
Decorative Elements
Your teacup bird feeder can be a small piece of garden art. Think about adding colorful paints, weatherproof stickers, or even small mosaic tiles to personalize your creation. Natural touches like twine or small pinecones can add rustic charm.
Consider practical decoration too. Reflective beads or shiny buttons might catch a bird’s eye and invite them over. What small detail will make your feeder stand out in your outdoor space? Your creativity here can turn a simple feeder into a delightful focal point.
Step-by-step Assembly
Putting together your teacup bird feeder is where your creativity meets functionality. This part is hands-on and rewarding, turning simple items into a charming garden feature. Each step is straightforward and designed so you can enjoy the process as much as the final product.
Preparing The Teacup And Saucer
Start by cleaning the teacup and saucer thoroughly. Remove any dust, dirt, or old residue to ensure glue or paint sticks well. A quick wipe with rubbing alcohol works better than soap and water for this.
Check for any cracks or chips that might weaken the structure. If the pieces are fragile, consider reinforcing them with a bit of epoxy before moving on. This preparation keeps your feeder sturdy and safe for birds.
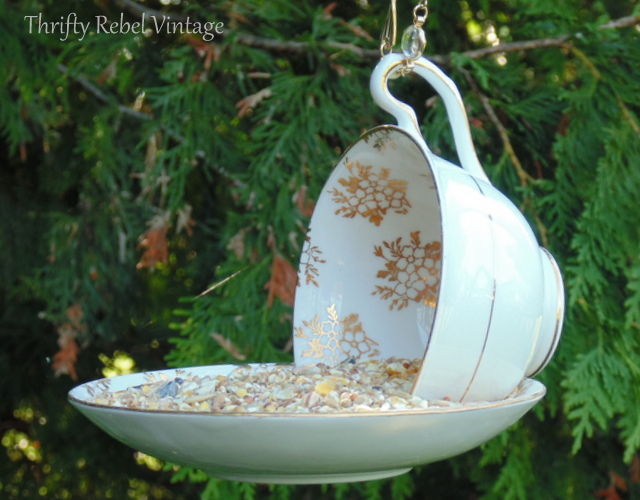
Attaching The Hanging Mechanism
Choose a strong wire or chain for hanging. Thread it through the teacup handle or around the saucer’s edge securely. Twist or knot the wire tightly to prevent slipping.
Some people use eye screws to attach the wire. If you have a drill, this makes the hanging more durable. Remember, the feeder needs to hold the weight of seeds plus the occasional curious bird.
Sealing For Weather Resistance
Apply a waterproof sealant to protect your feeder from rain and sun damage. Use a clear, non-toxic outdoor sealant to keep the colors bright and the materials intact. Brush on two thin coats, letting each dry completely.
Sealing not only extends the life of your feeder but also keeps it safe for wildlife. Have you thought about how weather could affect your feeder’s stability and appearance over time?

Credit: www.daintydressdiaries.com
Creative Design Ideas
Creative design ideas make teacup bird feeders stand out. They add charm and personality to your garden. Simple touches can turn a basic feeder into a lovely garden feature. Try different styles to match your outdoor space and attract more birds. Here are some fun ways to design your teacup bird feeders.
Painting And Personalizing
Use bright colors or soft pastels to paint your teacup and saucer. Choose weatherproof paint for durability. Add patterns like dots, stripes, or flowers for a unique look. Personalize with names or small messages using a fine brush. Seal the paint with a clear coat to protect it from rain. This step makes your feeder colorful and eye-catching.
Adding Natural Accents
Glue small pine cones, twigs, or dried flowers around the saucer’s edge. Use moss or small stones to decorate the base for a natural feel. These accents blend your feeder with the garden. They also provide texture and interest. Natural materials create a cozy spot for birds to visit.
Incorporating Recycled Materials
Use old buttons, beads, or broken jewelry pieces as decoration. Attach small shells or pieces of colored glass for sparkle. Recycled items add character and reduce waste. They make your feeder unique and eco-friendly. This approach saves money and supports sustainability.
Best Birdseed For Teacup Feeders
Choosing the right birdseed is key for teacup bird feeders. The seed must attract birds and stay fresh. Different seeds bring different birds. The goal is to invite many birds to your garden. Proper seed selection keeps birds healthy and happy.
Attracting Local Birds
Select seeds that local birds prefer. Common favorites include sunflower seeds, millet, and nyjer. Sunflower seeds attract finches, chickadees, and cardinals. Millet is loved by sparrows and doves. Nyjer seeds bring in goldfinches. Use a mix to invite various species.
Seasonal Seed Choices
Change seeds with the seasons. In spring, offer high-energy seeds like sunflower. Summer calls for lighter options like millet. In fall and winter, use seeds with more fat content for warmth. Black oil sunflower seeds are great all year. Adjust seed types to match bird needs.
Avoiding Mold And Spoilage
Keep seeds dry to stop mold growth. Use fresh seed and avoid leftovers. Clean the teacup feeder regularly. Store seeds in airtight containers. Wet seeds spoil fast and harm birds. Proper care keeps feeders safe and inviting.
Placement Tips For Maximum Bird Visits
Place teacup bird feeders where birds feel safe, like near trees or shrubs. Ensure feeders are visible and easy for birds to land on. Keep them away from busy areas to attract more visitors.
Creating a teacup bird feeder is just the start of your bird-watching adventure. To truly enjoy the flurry of feathers, you need to strategically place your feeder. Thoughtful placement can mean the difference between a quiet backyard and a bustling bird haven.Ideal Hanging Spots
Choose a spot that mimics a bird’s natural habitat. Hanging your feeder near bushes or trees can make birds feel safe and at home. These spots provide shelter and a quick escape route if needed. If you have a garden, try hanging the feeder near flowering plants. Birds are naturally drawn to vibrant colors and sweet nectar. This can boost the footfall around your feeder.Safety From Predators
Your feeder’s location can be a lifesaver. Ensure it’s high enough to be out of reach from ground predators like cats. A height of about 5-6 feet is generally safe. Avoid placing feeders too close to fences or structures that predators can climb. It may seem trivial, but a few inches can make a big difference in safety.Visibility And Accessibility
Birds need to see your feeder easily. Position it in a clear line of sight from their usual flight paths. This increases their chances of spotting it while flying by. Think about accessibility too. Make sure you can easily refill and clean the feeder. A well-maintained feeder attracts more visitors. Have you ever noticed how a simple change in placement can alter the dynamics of your backyard? Share your experience or any unique placement ideas in the comments!Maintenance And Cleaning
Clean your teacup bird feeder regularly to keep birds healthy and happy. Use mild soap and warm water, then rinse well. Remove old seeds and dry completely before refilling.
Maintaining and cleaning teacup bird feeders is essential for their longevity. It ensures a safe feeding environment for birds. Proper maintenance prevents issues and keeps your garden welcoming.Regular Cleaning Schedule
Clean your teacup bird feeders every two weeks. Remove old seeds and debris to maintain hygiene. Use mild soap and warm water for washing. Rinse thoroughly to remove soap residue. Ensure the feeder is completely dry before refilling.Preventing Algae And Mold
Algae and mold thrive in damp conditions. Place the feeder in a sunny spot to reduce moisture. Use a natural vinegar solution to clean stubborn spots. Regular cleaning helps prevent algae and mold growth.Repairing Damage
Inspect your feeders for cracks or chips regularly. Repair any damage to avoid harming the birds. Use non-toxic glue for minor repairs. Replace irreparable feeders to ensure bird safety. Regular checks extend the feeder’s lifespan.Troubleshooting Common Issues
Building teacup bird feeders is fun, but some issues may arise. Weather damage, pesky squirrels, and shy birds can affect your feeder’s success. Solving these problems helps keep your feeder safe and attractive to birds.
Dealing With Weather Damage
Teacup bird feeders face rain, wind, and sun. Use waterproof glue to hold parts firmly. Seal the teacup with clear outdoor varnish to protect paint and ceramics. Place feeders in shaded areas to reduce sun fading. Check feeders often and fix cracks or chips fast. A sturdy hook or chain helps keep feeders steady in wind.
Keeping Squirrels Away
Squirrels love bird feeders but can cause damage. Hang feeders on thin, smooth wires hard for squirrels to climb. Add a baffle above or below the feeder to block squirrels. Avoid feeding squirrels nearby to reduce their visits. Use spicy bird seed mixes that birds like but squirrels dislike. Regularly clean up spilled seed to prevent attracting squirrels.
Encouraging Shy Birds
Shy birds need time to trust feeders. Place feeders near bushes or trees for quick escape routes. Keep noise and movement low around feeding spots. Fill feeders with favorite seeds like sunflower or millet. Offer fresh water nearby to invite more visitors. Change seed types sometimes to attract different bird species. Patience is key; shy birds will come with time.

Credit: colormethrifty.com
Frequently Asked Questions
What Materials Are Needed To Make Teacup Bird Feeders?
You need a teacup, saucer, strong glue, wire or chain, and birdseed. Choose weather-resistant materials for durability. These basic supplies make crafting easy and fun.
How Do You Safely Hang A Teacup Bird Feeder?
Use sturdy wire or chain to hang the feeder securely. Attach it to a tree branch or hook. Ensure it’s stable to prevent falling and keep birds safe.
What Birdseed Is Best For Teacup Feeders?
Use mixed seeds like sunflower, millet, and cracked corn. These attract a variety of birds. Avoid seeds that spoil quickly or attract pests.
How Often Should I Clean My Teacup Bird Feeder?
Clean the feeder every two weeks to prevent mold and disease. Use mild soap and water. Rinse well and dry before refilling.
Conclusion
Creating teacup bird feeders brings joy to your garden. They attract birds and add charm. The steps are simple and fun to follow. You only need a few materials to start. Watching birds enjoy your feeders feels rewarding. Make sure to place them where birds feel safe.
Cleaning them often keeps birds healthy. Try different designs to see what works best. Small efforts bring big smiles with these feeders. Give it a try and brighten your outdoor space today.


