Are you wondering how to keep your Bird Buddy Camera powered up and ready to capture every feathered friend at your window? Charging your Bird Buddy Camera might seem tricky at first, but it’s actually simple once you know the right steps.
In this guide, you’ll discover exactly how to charge your device quickly and safely, so you never miss a moment of nature’s beauty. Keep reading to unlock easy tips that will make charging your Bird Buddy Camera hassle-free and efficient.
Bird Buddy Camera Features
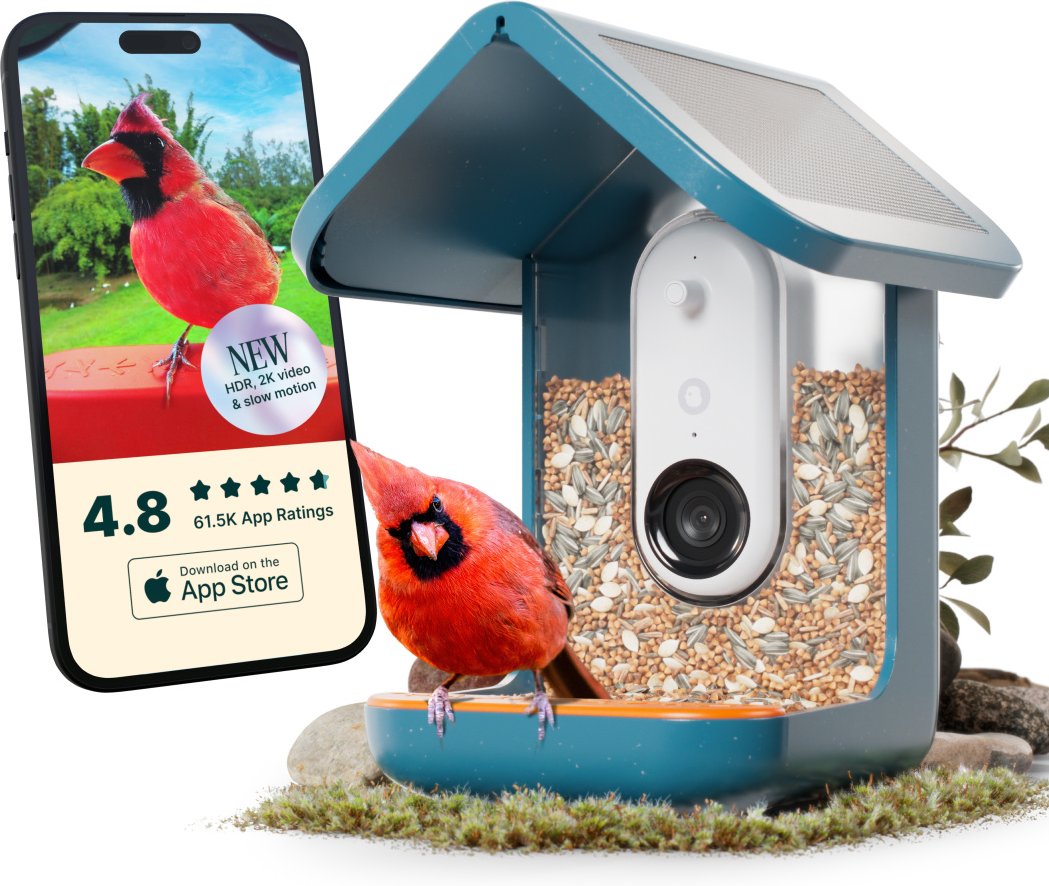
The Bird Buddy Camera offers smart features to help you enjoy bird watching. It connects easily to your phone for live views and notifications. The camera captures clear photos even in low light. Its design blends well into garden environments.
The camera also identifies bird species automatically. It uses AI to send you information about the birds it spots. This feature helps beginners learn about local birds quickly. The device stores images and videos for later review. These features make the Bird Buddy Camera user-friendly and fun.
High-quality Camera Lens
The Bird Buddy Camera has a sharp lens for clear images. It captures details like feathers and colors well. The lens works day and night. It adjusts to different lighting conditions smoothly.
Wireless Charging Capability
The camera supports wireless charging for convenience. Place it on the charging pad to recharge. No need to plug in cables often. This feature keeps the setup neat and simple.
Long Battery Life
The battery lasts for several days on a full charge. It supports extended bird watching sessions. Battery-saving modes help stretch usage further. You get more time to enjoy without frequent charging.
Ai Bird Identification
Built-in AI identifies bird species automatically. It compares images to a large bird database. The camera sends you bird names and fun facts. This feature adds learning to your bird watching.
Mobile App Integration
The Bird Buddy Camera connects to a mobile app easily. Receive alerts when birds appear near the camera. View live footage and past photos on your phone. The app controls camera settings remotely.

Credit: support.mybirdbuddy.com
Charging Requirements
Understanding the charging requirements of your Bird Buddy Camera is key to keeping it ready for every birdwatching moment. Charging this smart camera correctly ensures longer battery life and uninterrupted use. Let’s look at what you need to know to keep your device powered up efficiently.
Power Source Specifications
Your Bird Buddy Camera requires a stable power source that matches its voltage and current needs. Using a charger with the wrong output can damage the battery or slow down charging.
Always use the charger provided by Bird Buddy or one that matches the following specifications:
- Output Voltage:5V DC
- Output Current:1A to 2A
Have you ever tried charging with a phone charger only to find it takes forever? That’s because the output current might be too low for the camera’s battery.
Cable And Connector Type
The charging cable is more than just a wire; it ensures proper power transfer. Bird Buddy Cameras typically use a USB-C connector, which supports faster and more reliable charging.
Using a damaged or low-quality cable can cause intermittent charging or no charge at all. Inspect your cable regularly for wear and tear, and replace it if you notice fraying or loose connections.
Charging Environment
Where you charge your Bird Buddy Camera matters. Avoid charging in extreme temperatures—too cold or too hot environments can harm the battery’s health.
Try to charge your camera in a room temperature setting, ideally between 15°C and 25°C (59°F and 77°F). Charging in direct sunlight or near heat sources can cause overheating.
Have you thought about where you usually plug in your devices? A simple change in location can improve charging efficiency.
Preparing The Camera For Charging
Preparing your Bird Buddy Camera for charging is an important step to keep it working well. Before plugging it in, some simple tasks help protect the device and make charging efficient.
Cleaning the camera and checking its parts ensures no dirt blocks the charging port. Removing any case or cover allows better access to the charging connection. Also, turning off the camera can save battery and avoid interruptions during charging.
Cleaning The Charging Port
Use a soft brush or cloth to gently remove dust and dirt. Avoid using water or liquid cleaners near the port. A clean port improves the connection and speeds up charging.
Removing Protective Covers
Take off any cases or covers that block the charging area. This stops heat buildup and allows the charger to fit properly. Keeping the port open reduces charging problems.
Turning Off The Camera
Switch off the Bird Buddy Camera before charging. This saves battery power and helps the battery charge faster. It also prevents the camera from overheating during the process.
Checking The Charger And Cable
- Use the original charger and cable from Bird Buddy.
- Inspect the cable for any damage or wear.
- Ensure the charger fits the power outlet correctly.
Good charger condition supports safe and efficient charging.
Credit: www.chewy.com
Step-by-step Charging Process
Charging your Bird Buddy Camera is a straightforward process that ensures your device is always ready to capture those magical bird moments. Whether you’re a seasoned bird watcher or just starting, understanding the charging process is essential. Let’s dive into the step-by-step charging process to keep your camera powered up efficiently.
Connecting The Charger
First, locate the charging port on your Bird Buddy Camera. It’s usually found at the side or bottom, designed for easy access. Use the USB cable provided in your package to connect the camera to a power source, such as a wall adapter or a computer.
Ensure the connection is secure. A loose connection might delay the charging process or fail to charge the device entirely. If you’re using a computer, check if it’s powered on, as some computers don’t deliver power when turned off.
Indicator Lights And What They Mean
Once connected, pay attention to the indicator lights on your camera. These lights offer valuable information about the charging status. A steady green light typically means the camera is fully charged.
If the light is blinking or red, it indicates the camera is still charging. You should wait until the light turns green before disconnecting. If you notice the light is not coming on, recheck your connections or try a different power source.
Have you ever wondered why understanding these lights is crucial? It helps prevent overcharging, which can extend the lifespan of your battery. Always make it a habit to unplug once fully charged to maintain optimal battery health.
Charging Time And Tips
Knowing how long your Bird Buddy Camera takes to charge helps plan its use better. Proper charging ensures the camera stays ready to capture your feathered friends. Follow these simple tips to keep your device powered efficiently.
Estimated Charging Duration
Charging your Bird Buddy Camera usually takes around 2 to 3 hours. The exact time depends on the power source and battery level. A full charge keeps the camera running for several days.
Using the original charger or a USB port with similar power output gives the best results. Avoid very low-power sources, as they increase charging time significantly.
Tips For Faster Charging
- Charge the camera when it is turned off to speed up the process.
- Use a wall adapter with at least 5V/1A output for efficient charging.
- Keep the charging port clean and dry to maintain good connection.
- Avoid charging the camera in extreme temperatures; room temperature is ideal.
- Remove any case that may block the charging port during charging.
Common Charging Issues
Charging your Bird Buddy Camera should be straightforward, but sometimes you might face hiccups that stop your device from powering up. Identifying common charging issues early can save you time and frustration. Let’s look at the usual problems and how to handle them effectively.
Troubleshooting Power Problems
If your Bird Buddy Camera isn’t charging, start by checking the basics. Is the charging cable properly connected? A loose or damaged cable often causes power issues.
Try these quick checks:
- Use a different USB port or charger to rule out a faulty power source.
- Inspect the charging port for dust or debris that might block the connection.
- Restart your camera after plugging it in to see if it responds.
Sometimes, the problem isn’t the cable or port but the camera’s software. A simple firmware update can fix charging bugs. Have you tried updating your device recently?
When To Replace The Battery
Batteries don’t last forever, especially with regular use. If your camera’s battery drains quickly or won’t hold a charge, it might be time for a replacement.
Look for these signs:
- The camera powers off suddenly, even when the battery indicator shows charge.
- Charging takes much longer than usual or never reaches 100%.
- The device feels warm or hot during charging, which can signal battery wear.
Replacing the battery can feel intimidating, but most Bird Buddy models have user-friendly designs. If you’re unsure, reaching out to customer support can guide you through the process. How often do you check your battery health?
Maintaining Battery Health
Maintaining the battery health of your Bird Buddy Camera ensures longer use and reliable performance. A well-cared battery holds charge better and lasts through many birdwatching sessions. Simple habits can protect the battery from damage and slow its aging process.
Best Practices For Battery Longevity
- Charge the camera before the battery is fully empty.
- Use the original charger or one with the correct output.
- Avoid charging overnight to prevent overcharging.
- Keep the device in a cool, dry place while charging.
- Unplug the charger once the battery reaches 100%.
- Use the camera regularly to keep the battery active.
Storage Recommendations
Store the Bird Buddy Camera with a partial charge, around 50%. Batteries lose capacity if fully drained or fully charged for long periods. Turn off the device if not using it for weeks or months.
Keep the camera away from extreme temperatures. Heat and cold damage the battery cells. Ideal storage temperature is between 15°C and 25°C (59°F to 77°F).
Check the battery level every few weeks during storage. Recharge if it drops below 20% to prevent deep discharge.
Credit: www.amazon.com
Frequently Asked Questions
How Do I Charge My Bird Buddy Camera?
To charge your Bird Buddy camera, connect the included USB cable to the charging port. Plug the other end into a power source. Charging typically takes 2-3 hours for a full battery. Ensure the device is off for faster charging.
Can I Use Any Charger For Bird Buddy?
It’s best to use the original charger or a compatible USB charger with 5V output. Using incompatible chargers may damage your Bird Buddy camera or reduce battery life. Always check the voltage and current ratings before charging.
How Long Does Bird Buddy Battery Last After Charging?
A full charge generally lasts 1-2 weeks depending on usage. Frequent photo capturing and Wi-Fi use can drain the battery faster. To maximize battery life, turn off the camera when not in use.
What Indicates Bird Buddy Is Fully Charged?
The LED indicator on the camera changes color when charging. It usually glows red while charging and turns green or turns off when fully charged. Refer to the user manual for specific LED signals.
Conclusion
Charging your Bird Buddy camera is simple and quick. Use the right cable and plug it into a power source. Make sure the camera is off while charging. A full charge usually takes a few hours. Avoid overcharging to keep the battery healthy.
Regular charging keeps your camera ready to capture every moment. Follow these steps and enjoy clear, continuous bird watching. Easy care means more time enjoying your feathered friends. Keep your Bird Buddy charged and never miss a sight.