
If you love birds and want to invite beautiful purple martins into your yard, building a martin bird house is the perfect way to start. Imagine watching these graceful birds swoop and sing right outside your window.
You don’t need to be an expert carpenter to make a safe, cozy home they’ll love. In this guide, you’ll find simple steps and tips that make the process easy and rewarding. Ready to create a welcoming space that brings nature closer to you?
Let’s dive in and build your martin bird house together.
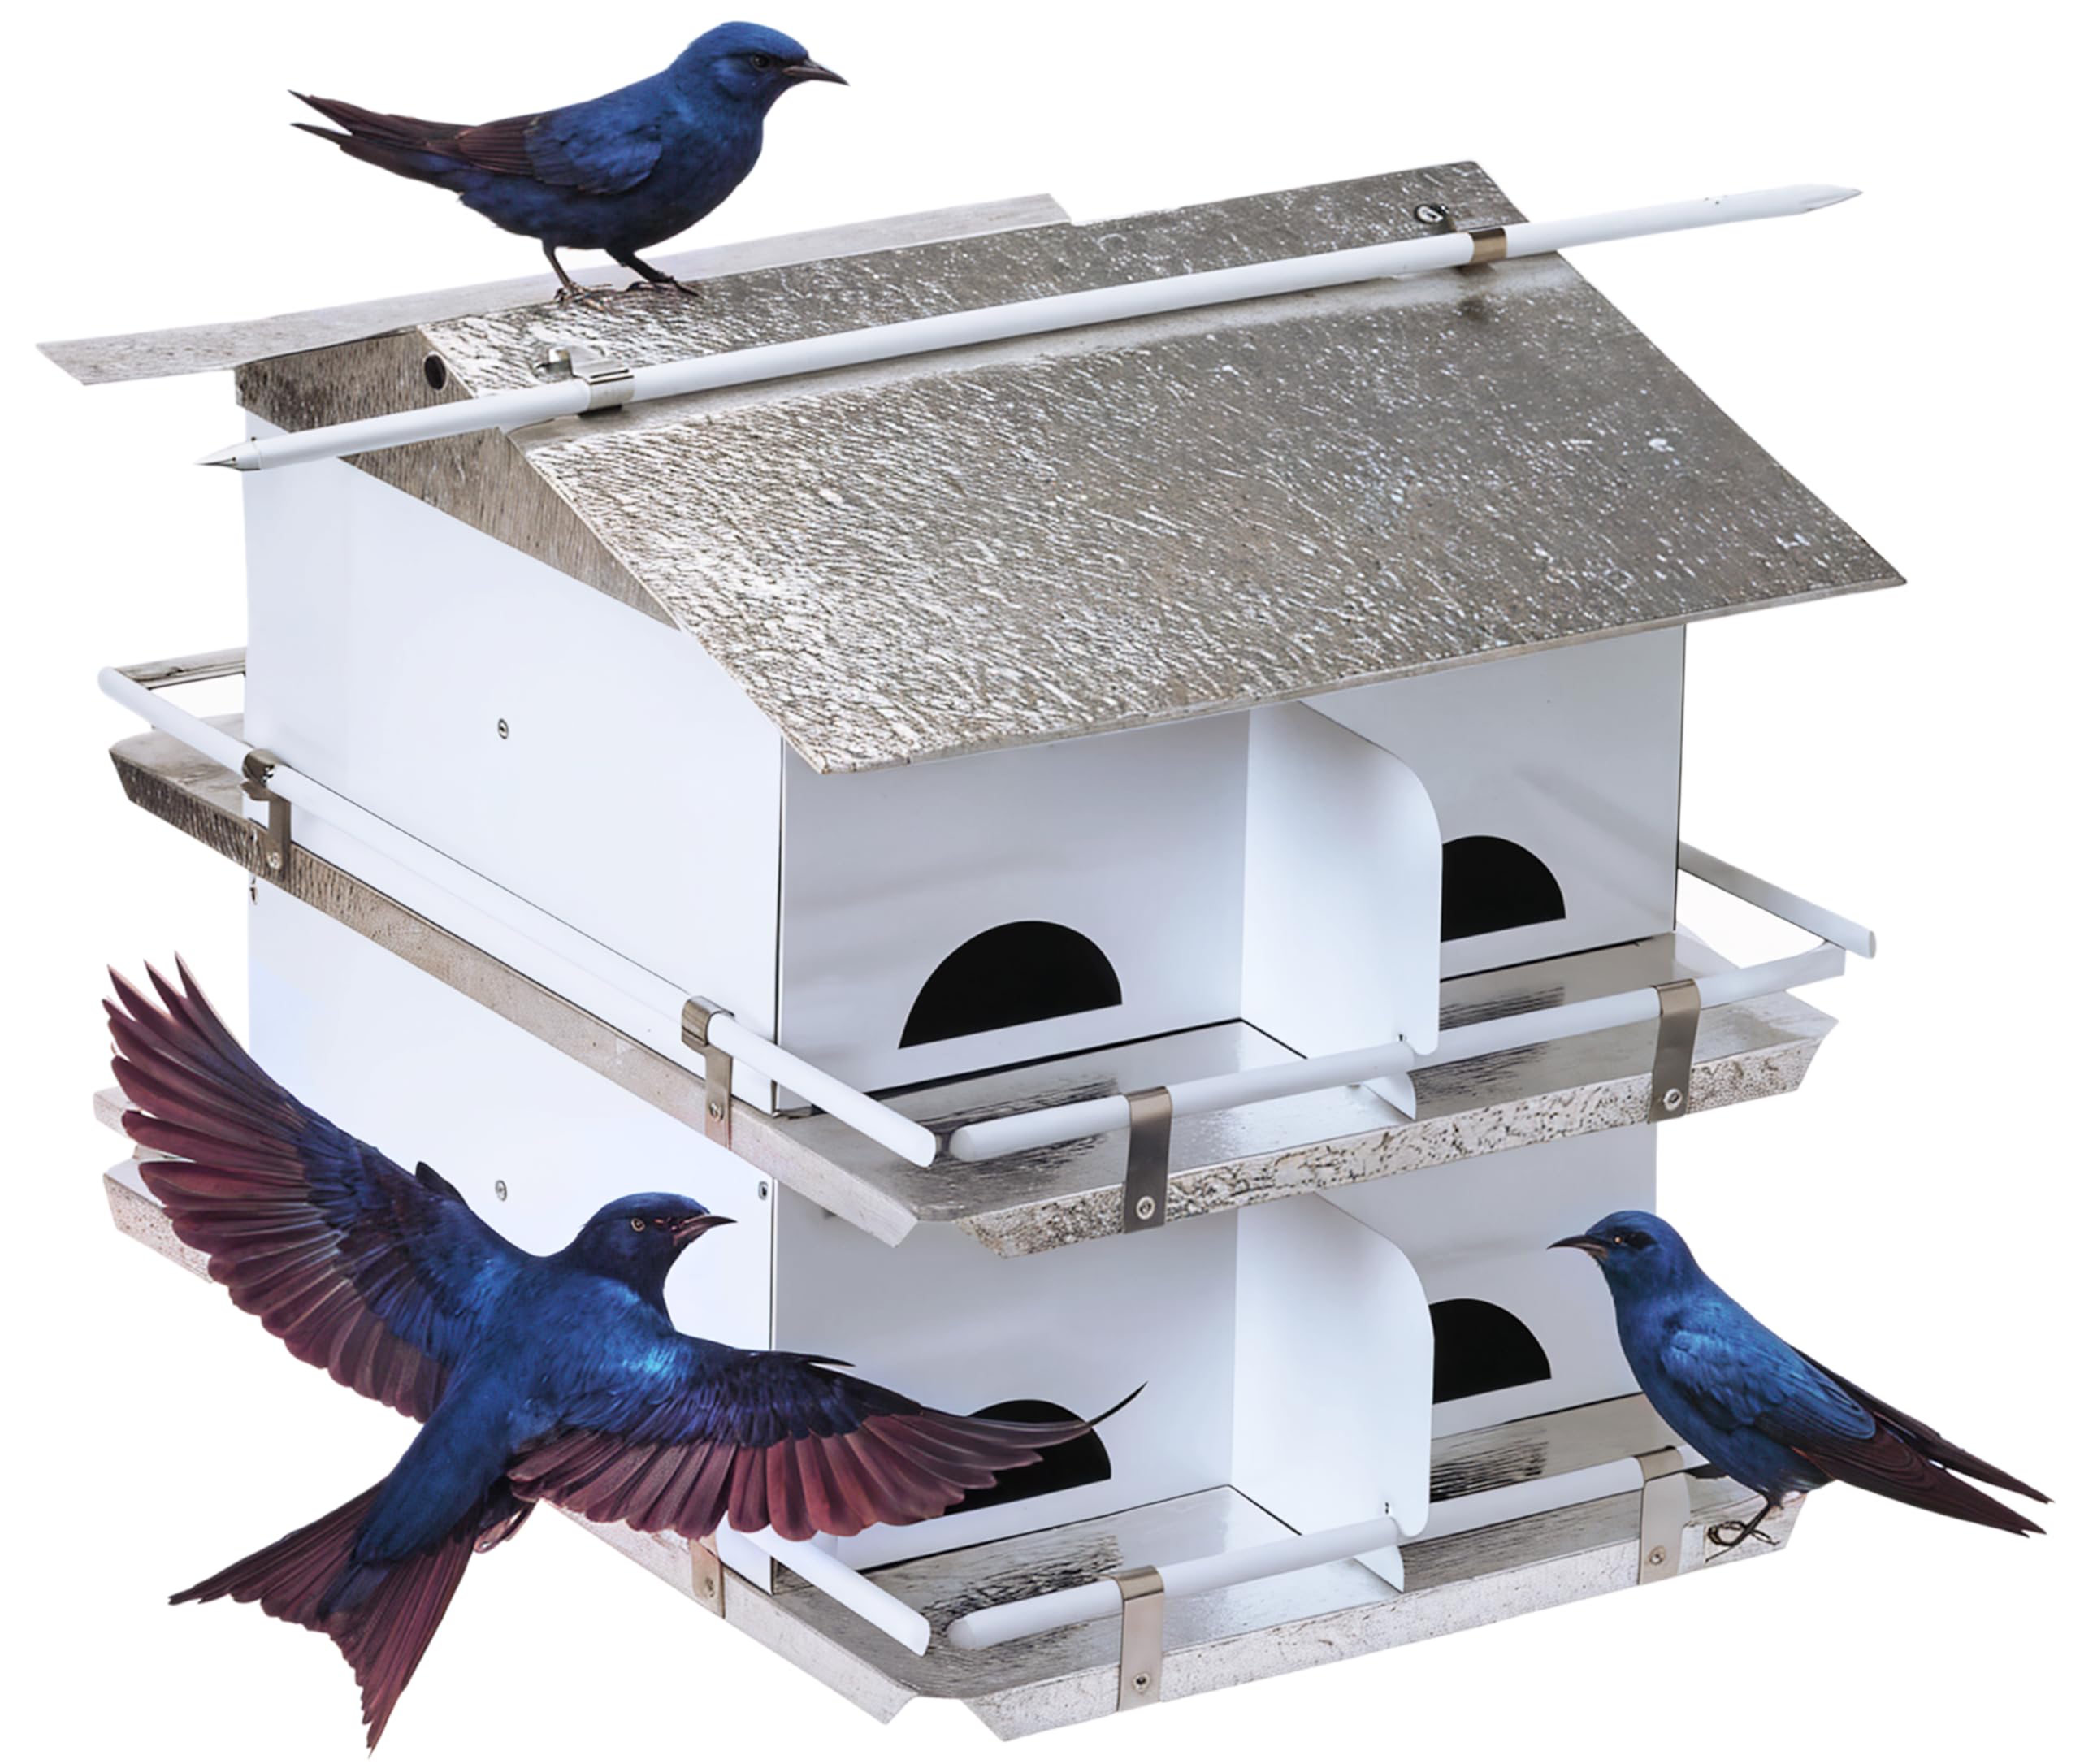
Credit: www.amazon.com
Materials Needed
Gathering the right materials makes building a martin bird house easier and more fun. Using quality items ensures the house lasts long and stays safe for the birds. This section covers the wood types, tools, and extra supplies needed for the project.
Wood Types
- Cedar: Naturally resistant to rot and insects.
- Pine: Affordable and easy to work with, but less durable.
- Redwood: Durable and weather-resistant, but costly.
- Exterior-grade plywood: Use only for parts not exposed to rain.
Choose untreated wood to avoid harming the birds. Avoid pressure-treated lumber as it contains chemicals.
Tools Required
- Measuring tape for accurate cuts.
- Hand saw or circular saw to cut the wood.
- Drill with bits for making holes and screwing parts.
- Screwdriver or power driver for fast assembly.
- Sandpaper or sanding block to smooth edges.
- Clamps to hold pieces steady while working.
Additional Supplies
- Exterior wood screws or galvanized nails to prevent rust.
- Water-based wood glue for extra strength.
- Non-toxic paint or stain for weather protection.
- Hinges if building a clean-out door.
- Mesh or wire for ventilation and drainage holes.
Choosing The Right Location
Choosing the right location for your martin bird house is key to attracting these beautiful birds and ensuring they feel safe and comfortable. The spot you pick influences how often martins visit and whether they decide to stay and nest. Careful thought about height, safety, sunlight, and shelter will make your bird house a welcoming home.
Ideal Height And Placement
Martins prefer their houses to be placed high off the ground. Aim for a height between 10 and 15 feet. This height keeps them away from most ground predators and gives them a good vantage point.
Place the house in an open area with a clear flight path. Avoid putting it too close to trees or buildings that could block their approach. A location near water or open fields often attracts more martins.
Avoiding Predators
Predators like cats, raccoons, and snakes can scare martins away. You can protect your bird house by mounting it on a smooth metal pole instead of a wooden post. This makes it harder for predators to climb.
Also, think about placing baffles or guards below the house. These act as barriers to keep unwanted visitors at bay. Are you ready to take these extra steps to keep your martins safe?
Sunlight And Shelter Considerations
Martins enjoy warmth but need protection from harsh weather. Position the house so it receives morning sunlight and afternoon shade. This balance helps keep the interior comfortable.
Try to shield the house from strong winds and heavy rain. Placing it near a natural windbreak, like a row of bushes or a fence, can provide extra shelter. How will you find the perfect spot that offers both sun and protection?
Designing The Bird House
Designing the perfect martin bird house means paying attention to details that make the space safe and inviting for these charming birds. Your design choices directly impact whether martins will choose to nest there. Let’s break down the key elements you need to get right.
Size Specifications
Martin bird houses need to be spacious enough for a growing family, but not too large to scare the birds away. Each compartment should measure about 6 inches wide, 6 inches deep, and 9 inches high. You can create multiple compartments in one house to attract several pairs of martins at once.
Think about how much room the chicks need to move and the parents need to feed them. Having at least 4 to 6 compartments is ideal if you want to host a colony.
Entrance Hole Dimensions
The entrance hole size is critical for keeping predators out while welcoming martins. The recommended diameter is 2 1/8 inches. Too large, and unwanted birds like starlings or squirrels might move in.
Place the holes about 5 to 6 inches above the floor of each compartment. This height helps protect the chicks from ground predators and weather.
Ventilation And Drainage
Good airflow prevents overheating and keeps the nest dry, which is vital for the birds’ health. Add small ventilation holes near the top of each compartment to allow fresh air to circulate.
Drainage holes in the floor help prevent water buildup after rain. Without proper drainage, nests can become soggy, causing discomfort or even harm to martin families.
Have you checked if your current bird house design includes these simple but essential features?
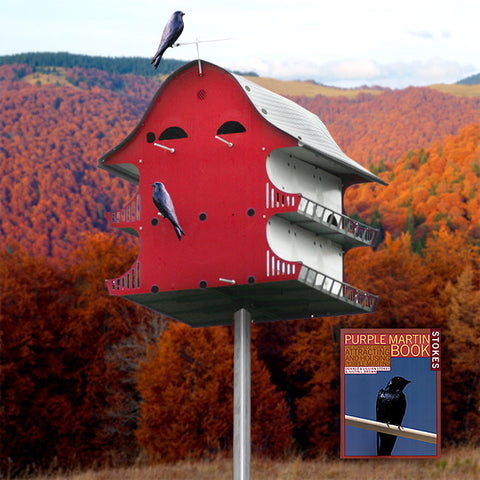
Credit: www.wildbirdstoreonline.com
Cutting And Preparing Wood
Cutting and preparing wood is a crucial phase in building your martin bird house. The precision of your cuts and the smoothness of the wood will directly affect the house’s durability and safety for the birds. Paying close attention to measurement, cutting techniques, and finishing touches will save you from frustration later on.
Measuring And Marking
Start by carefully measuring each piece of wood according to your martin house design. Use a reliable tape measure and mark the cutting lines clearly with a pencil. Double-check your measurements—have you ever cut a piece too short and had to start over? That little extra moment of accuracy can save you time and wood.
Mark all the edges and corners distinctly to ensure straight cuts. Using a square tool helps keep your lines perfectly perpendicular. Clear and precise marks are your guide to clean cuts.
Safe Cutting Techniques
Safety should always come first. Before you start cutting, wear protective goggles and gloves to shield your eyes and hands. Keep your fingers well away from the blade and use clamps to hold the wood steady.
Choose the right saw for your cuts. A handsaw works well for small pieces, while a circular saw speeds up larger cuts. Cut slowly and steadily; rushing increases the risk of mistakes and accidents. Have you noticed how a smooth, controlled cut feels almost effortless?
Sanding And Smoothing
After cutting, the edges and surfaces need attention to prevent splinters that could harm the birds. Use medium-grit sandpaper first to smooth rough edges, then switch to fine-grit for a polished finish. Running your hand over the wood will help you detect any rough spots you might have missed.
Take your time with sanding—it’s easy to overlook but vital for the birds’ comfort and safety. Smooth surfaces also help paint or sealant adhere better, protecting your bird house against weather damage. Have you ever thought about how a little extra effort here means a longer-lasting home for your feathered friends?
Assembling The House
Begin by gathering all wooden parts and tools needed for the martin bird house. Carefully join each piece, ensuring tight fits for durability and safety. Secure the roof and entrance to protect birds from weather and predators.
Assembling the house is where your creativity and craftsmanship come into play. This phase can be both rewarding and a bit of a challenge, but with the right steps, your martin birdhouse will soon be ready to welcome its feathered inhabitants. Let’s dive into the specifics of assembling your birdhouse, ensuring it’s sturdy and welcoming.Nailing And Screwing Parts
Begin by organizing all the parts of your birdhouse. This includes the walls, floor, and any internal dividers. Use nails or screws to attach the sides to the base, ensuring each joint is tight and secure. A cordless drill can make this task quicker and more efficient. But don’t rush; precision is key. Check the alignment after securing each piece to ensure your birdhouse stands straight and stable.Securing The Roof
The roof is not just a cover; it’s a protective shield against the elements. Align the roof panels carefully, ensuring they overlap slightly to prevent water leakage. Use screws to attach the roof securely to the walls. Adding a waterproof sealant can provide extra protection against rain. Have you considered painting or staining the roof? It can add a touch of personality while providing additional weatherproofing.Adding Mounting Hardware
Mounting your birdhouse correctly is crucial for its stability and accessibility. Attach sturdy mounting hardware to the back of the house. This could be a bracket or a set of hooks, depending on where you plan to place it. Ensure the hardware can support the weight of the house and withstand outdoor conditions. Consider where you’ll place the birdhouse. Is it visible from your window for easy bird-watching? Ensure it’s also at a height that’s safe from predators. With these steps, your martin birdhouse is not just a home, but a sanctuary.Finishing Touches
Finishing touches can make or break your martin bird house. These final details not only improve the house’s look but also ensure it’s safe and inviting for the birds. Taking time here shows you care about your feathered visitors and boosts the chances they’ll make your house their home.
Painting And Sealing
Choose a light, natural color like soft blue or white to reflect heat and keep the house cool. Avoid dark colors that absorb sunlight and can overheat the interior.
Use a non-toxic, water-based exterior paint to protect the wood from weather damage. Seal all edges and corners well to prevent moisture from seeping in and causing rot.
I once skipped sealing the bottom edges, and after a rainy season, the wood started to warp. Don’t let this happen to your birdhouse—seal thoroughly for long-lasting durability.
Avoiding Toxic Materials
Birds are sensitive to chemicals, so avoid paints, stains, or sealants containing VOCs or heavy metals. Check labels carefully and opt for products labeled “bird-safe” or “non-toxic.”
Even the screws and nails should be rust-resistant and free of harmful coatings. Stainless steel or galvanized hardware works best.
Would you want to live in a house with toxic fumes? Birds don’t either, so keep your martin house a safe space for them.
Adding Perches Or Accessories
Adding perches might seem helpful, but martins typically don’t need them and may even avoid houses with perches because predators can use them too. Instead, focus on keeping the entrance clear and easy to access.
You can add a predator guard below the entrance hole to protect your birds from raccoons or snakes. A simple metal plate works well and increases your martin house’s safety.
Consider installing a mounting pole that can be easily raised or lowered. This makes cleaning and monitoring the house much easier and keeps you connected with your birds’ progress.
Installing The Martin House
Installing the martin bird house correctly is key to attracting these beautiful birds to your yard. The right placement and setup ensure safety and comfort for the birds, encouraging them to stay and raise their young. Let’s look at how you can mount your martin house, keep it stable, and maintain it effectively to enjoy the full benefits of your effort.
Mounting Options
Choose a location that provides an open flight path for the martins. Many prefer mounting the house on a pole about 10 to 15 feet above the ground. This height helps keep predators away and gives the birds a good vantage point.
You can use a metal or wooden pole, but metal tends to last longer and is easier to maintain. Avoid trees or buildings near the house since they can block the entrance or provide hiding spots for predators. Would you want your guests to feel safe and comfortable right at the doorstep?
Ensuring Stability
Once you pick the spot, secure the martin house firmly to prevent wobbling or tilting. Use strong brackets or straps designed for outdoor use to hold the house steady. A shaky house can scare off martins or make it unsafe during windy days.
Adding guy wires anchored to the ground around the pole can provide extra support. Check the stability regularly, especially after storms. Have you ever seen how a small shake can make a big difference in your own comfort? Birds feel the same way.
Monitoring And Maintenance
Keep an eye on the martin house throughout the season. Clean out old nesting material after each breeding cycle to prevent parasites and diseases. This simple task can greatly improve the chances of martins returning year after year.
Look for signs of wear or damage in the house and its mounting system. Tighten any loose screws and repaint if needed to protect the wood. How often do you check your own home’s safety? Your birdhouse deserves the same attention.
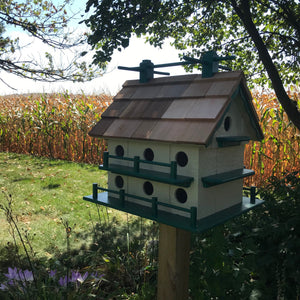
Credit: stonebridgecollections.com
Frequently Asked Questions
What Materials Are Best For Building A Martin Bird House?
Use untreated wood like cedar or pine for durability. Avoid metal and plastic, which can overheat. Ensure smooth surfaces and proper ventilation for bird comfort and safety.
How Big Should A Martin Bird House Be?
A typical Martin house should have compartments about 6×6 inches. The entrance hole should be 2 inches in diameter. Adequate size ensures proper nesting and protection from predators.
Where Is The Ideal Location To Place A Martin Bird House?
Place the house 10-15 feet high in an open area. Avoid shady spots and dense trees. Ensure clear flight paths for easy access and predator avoidance.
How To Maintain A Martin Bird House Yearly?
Clean the house after breeding season. Remove old nesting material to prevent parasites. Check for damage and repair before the next season.
Conclusion
Building a martin bird house is simple and rewarding. You create a safe home for beautiful birds. Use the steps shared to guide your work. Place the house in a quiet, open spot. Watch as martins visit and raise their young.
Enjoy nature’s charm right in your yard. Your effort helps protect these lovely birds. Try making one today and see the joy it brings.


