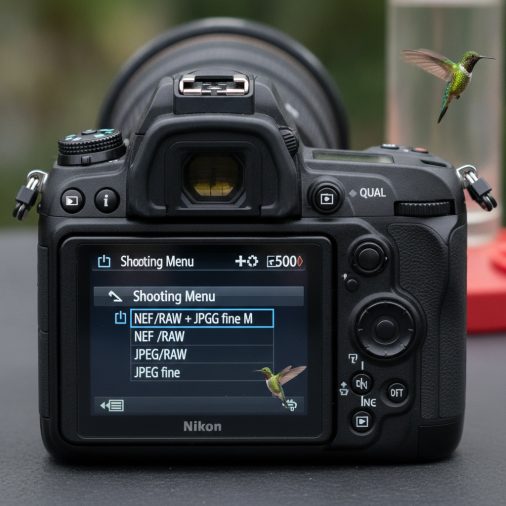
Start With the Shooting Menu: Image Quality and Format
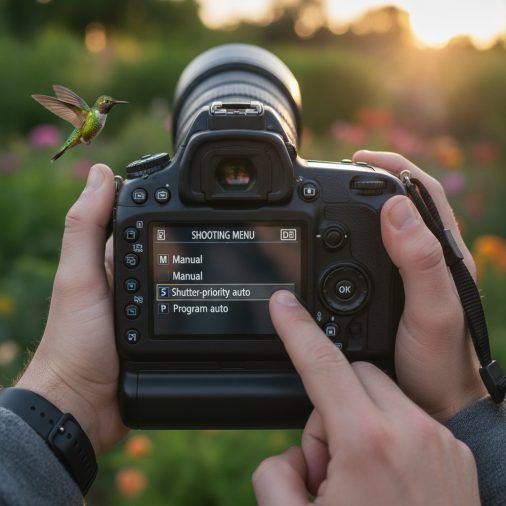
Setting Shutter Speed in the Right Mode
ISO and Auto ISO Configuration
High shutter speeds reduce light reaching the sensor, so ISO must compensate. The D500 handles high ISO reasonably well, making this manageable. Go to the Photo Shooting Menu and scroll to ISO sensitivity settings. – Set ISO sensitivity to Auto – Set Maximum sensitivity to ISO 3200 (or ISO 6400 if shooting in shade or low light) – Set Minimum shutter speed to 1/2000 or Auto When using Auto ISO with a minimum shutter speed locked in, the camera automatically raises ISO to maintain your target exposure at that speed. This is particularly useful when a hummingbird moves from sunlight to shade near a feeder.Continuous Shooting: Activating High-Speed Burst
The D500 can shoot up to 10 frames per second, which dramatically increases your odds of capturing a hummingbird in a clean pose. Press the release mode dial lock button on the top left of the camera and rotate the Release Mode Dial to CH (Continuous High). This activates the maximum burst rate. For hummingbirds, CH is almost always the right choice. A single press-and-hold burst gives you multiple frames across the bird’s movement arc, and even a half-second burst at 10 fps yields five or more images to select from.Autofocus System: The Most Critical Menu Section
This is where most photographers either succeed or struggle with hummingbirds. The D500’s Multi-CAM 20K autofocus system is capable, but it needs to be configured correctly for a fast, unpredictable subject.AF Mode
Go to the Setup Menu or use the AF mode button (front left of the camera body) combined with the main command dial. Set AF mode to AF-C (Continuous-Servo Autofocus). AF-C continuously adjusts focus as the subject moves, which is essential for hummingbirds. AF-S (Single-Servo) locks focus on initial acquisition and is not suitable for moving birds.AF Area Mode
Hold the AF mode button and rotate the sub-command dial to change the AF area mode. For hummingbirds, the two most effective options are: | AF Area Mode | Best Use for Hummingbirds | |—|—| | 3D-Tracking | Subject moves unpredictably; camera follows the bird across the frame | | Group Area AF | Bird is closer or in predictable hover; strong at holding lock on small subjects | | Dynamic Area AF (25-point) | Good compromise when 3D-Tracking loses the subject frequently | 3D-Tracking works well when you can place the initial focus point on the bird and allow the camera to follow. It can sometimes lose track of the bird against a busy background. Group Area AF is often more reliable against complex flower or feeder backgrounds because it treats a cluster of focus points as a single zone.Custom Settings Menu: Refining AF Tracking
Navigate to the Custom Setting Menu (pencil icon) and go to section A: Autofocus.A1 – AF-C Priority Selection
Set this to Release + Focus or Release. This allows the shutter to fire even if focus is not perfectly confirmed, which is important when a hummingbird briefly leaves the focus zone. Setting it to Focus only may cause missed shots during rapid movement.A3 – Focus Tracking with Lock-On
This setting controls how quickly the AF system reacts when something interrupts the focus path — like a branch passing in front of the bird. – Set to 3 (Normal) or 4 (Long) for hummingbirds – A longer lock-on delay means the camera holds focus on the bird rather than jumping to a branch or background that briefly crosses the frameA4 – AF Activation
Keep this set to Shutter/AF-ON or configure it for back-button focusing. Many wildlife photographers prefer back-button AF, where autofocus is assigned to the AF-ON button on the back of the camera rather than the shutter button. This separates focus from firing, giving you more control during bursts. To set up back-button AF, go to Custom Setting A4 and set AF activation to AF-ON only (or adjust Custom Setting F2: Assign AF-ON button to activate AF).Custom Settings: Electronic Front-Curtain and Buffer
D5 – Exposure Delay Mode
Keep this at Off for hummingbirds. Any shutter delay defeats the purpose of fast burst shooting.Buffer Consideration
The D500’s buffer handles extended bursts well, especially when using a fast CFexpress or XQD card. Cards like the Sony 120GB XQD G Series Memory Card provide write speeds that help keep the buffer clear during long bursts, which matters when tracking a hummingbird through several seconds of hovering. Using a slow card causes the buffer to fill mid-burst and stops shooting at the worst possible moment.Metering and White Balance
Metering Mode
Press the metering mode button (top right of the viewfinder) and rotate the dial to Matrix Metering. This evaluates the entire scene and generally handles hummingbird-in-flower or hummingbird-at-feeder compositions well. If the bird is backlit or against a bright sky, consider Spot Metering or applying exposure compensation of +0.7 to +1.0 EV to avoid underexposing the bird.White Balance
Go to Photo Shooting Menu > White balance. For outdoor hummingbird shooting, Auto (Keep warm lighting colors) or Daylight works for most conditions. Shooting in RAW means white balance is fully adjustable after the fact, so this is less critical than the AF and shutter settings.Viewfinder Display and Active D-Lighting
Viewfinder Grid and Information Display
In the Custom Setting Menu, section D (Shooting/Display), you can enable the framing grid if it helps you track small subjects. Many photographers find it distracting during action shooting and leave it off.Active D-Lighting
Go to Photo Shooting Menu > Active D-Lighting and set it to Off when shooting RAW. D-Lighting affects JPEG processing but is irrelevant for RAW files and can slow buffer processing.Saving Settings to a User Bank
Once your hummingbird settings are dialed in, save them to a User Settings Bank so you don’t have to reconfigure each session. Go to Custom Setting Menu > U1/U2 (User Settings) via the mode dial, or use Manage Picture Control and Shooting Menu banks to save full configuration sets. Assigning hummingbird settings to U1 on the mode dial lets you switch from landscape or casual shooting to full hummingbird mode instantly. For a broader look at how these settings relate to other bird subjects, the Nikon D500 best settings for bird photography covers the full range of bird photography situations beyond just hummingbirds.Positioning and Feeder Setup for Better Results
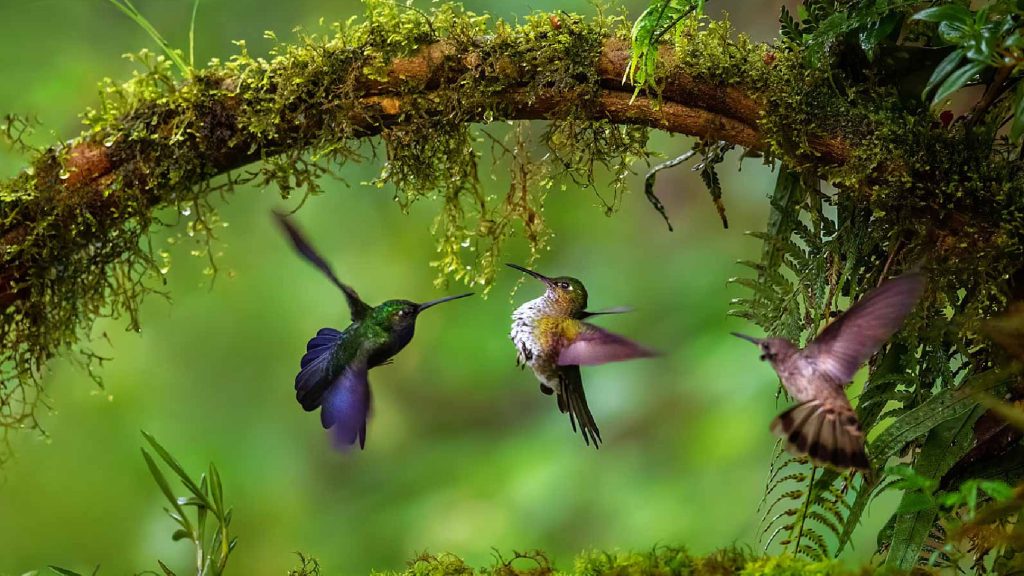
Camera settings alone won’t produce great shots if the environment works against you. Hummingbirds are most predictable at feeders and flowering plants, where they return repeatedly to the same positions. Position yourself so the sun is behind you or to the side. Front lighting reveals iridescent feather colors — especially the gorget (the colorful throat patch) on male Ruby-throated Hummingbirds. Shooting with the sun behind the bird typically creates silhouettes or washed-out colors. Use a tripod or monopod to reduce fatigue during extended sessions. A stable base also helps the AF system maintain lock-on more consistently because camera movement doesn’t confuse subject tracking. If you’re interested in observing hummingbirds more closely without a large camera setup, the Nikon D500 bird photography settings guide also addresses practical field positioning alongside technical configurations.Common Mistakes That Cost Sharp Hummingbird Photos
– Using AF-S instead of AF-C: The camera locks focus on acquisition and doesn’t track movement, resulting in blurred birds. – Shutter speed below 1/1000s: Wings blur significantly. Even the bird’s body may show motion blur at slower speeds. – Focus Tracking with Lock-On set too short: The camera chases every background element instead of staying on the bird. – Slow memory cards: The buffer fills and the camera stops firing mid-burst. – Shooting JPEG-only: Hummingbird shots often need exposure and color correction that JPEG compression makes difficult without quality loss. – Leaving Active D-Lighting on: It adds processing overhead and is unnecessary in RAW workflows.FAQ
What AF area mode works best for hummingbirds on the Nikon D500? Group Area AF and 3D-Tracking are the two most effective options. Group Area AF tends to hold focus better against complex backgrounds like flowers or feeders. 3D-Tracking works well when the bird moves across open space and you can maintain initial contact with the focus point on the subject. What shutter speed freezes hummingbird wings completely? Hummingbird wings beat 50 to 80 times per second depending on species. A shutter speed of 1/3200s captures reasonable wing detail, and 1/4000s or faster can freeze individual feathers mid-stroke. At 1/2000s, some wing blur is likely but the bird’s body and face will be sharp. Can I use Auto ISO with a fixed shutter speed on the D500? Yes. In the Photo Shooting Menu under ISO sensitivity settings, enable Auto ISO and set a minimum shutter speed. The camera then adjusts ISO automatically to maintain exposure at your locked shutter speed. This is one of the most practical configurations for hummingbird shooting in variable outdoor light. Should I use back-button autofocus for hummingbirds? Many bird photographers prefer back-button AF because it lets you start and stop continuous focus independently from the shutter. When a hummingbird briefly stops to perch, you can release the AF-ON button to lock focus, then fire the shutter freely without the camera hunting for a new focus point. How does the buffer limit hummingbird burst shooting on the D500? The D500 has a generous buffer, but at 10 fps in RAW, it fills within several seconds of continuous shooting. Using a fast XQD or CFexpress card maximizes how many frames you can capture before the camera slows. Releasing the shutter between bursts rather than holding it down continuously also helps keep the buffer from hitting its limit. Does the D500’s crop sensor help with hummingbird photography? The APS-C crop factor of 1.5x effectively extends focal length, so a 300mm lens frames like a 450mm equivalent. This extra reach is genuinely useful for small subjects like hummingbirds at a feeder several feet away. It’s one reason the D500 is often preferred over full-frame Nikon bodies for close bird work, a topic covered in detail in this comparison of Nikon D500 versus D850 for bird photography. What aperture should I use when shooting hummingbirds? A starting point of f/5.6 to f/7.1 balances depth of field with enough light to support fast shutter speeds. Wider apertures like f/4 can throw wings at the edge of depth of field out of focus. Narrower apertures like f/11 require higher ISO to compensate, which reduces image quality in lower light.Quick Reference: Recommended D500 Settings for Hummingbirds
| Setting | Recommended Value | |—|—| | Shooting Mode | Manual or Shutter Priority | | Shutter Speed | 1/2000s – 1/4000s | | Aperture | f/5.6 – f/7.1 | | ISO | Auto, max 3200–6400 | | AF Mode | AF-C | | AF Area Mode | Group Area AF or 3D-Tracking | | Release Mode | CH (Continuous High) | | AF-C Priority (A1) | Release or Release + Focus | | Lock-On (A3) | 3 to 4 (Normal to Long) | | Metering | Matrix (adjust for backlight) | | Image Format | RAW or RAW + JPEG | | Active D-Lighting | Off |Getting the Nikon D500 configured for hummingbirds is mostly about locking in three things: a fast enough shutter speed, continuous AF with proper tracking behavior, and burst mode with a card that keeps up. The menu navigation can feel tedious the first time, but saving everything to a user bank means you only do it once. If you photograph other birds between hummingbird sessions, checking out essential Nikon D500 settings for bird photography can help you build a second bank optimized for slower or perched species without losing your hummingbird configuration.