
Are you wondering how to keep your Bird Buddy Camera powered up and ready to capture every moment? Charging your Bird Buddy Camera might seem tricky at first, but once you know the simple steps, it becomes a breeze.
In this guide, you’ll discover exactly how to charge your device quickly and safely, so you never miss a single bird visit. Keep reading, and you’ll learn easy tips that save you time and hassle, making your birdwatching experience smooth and enjoyable.

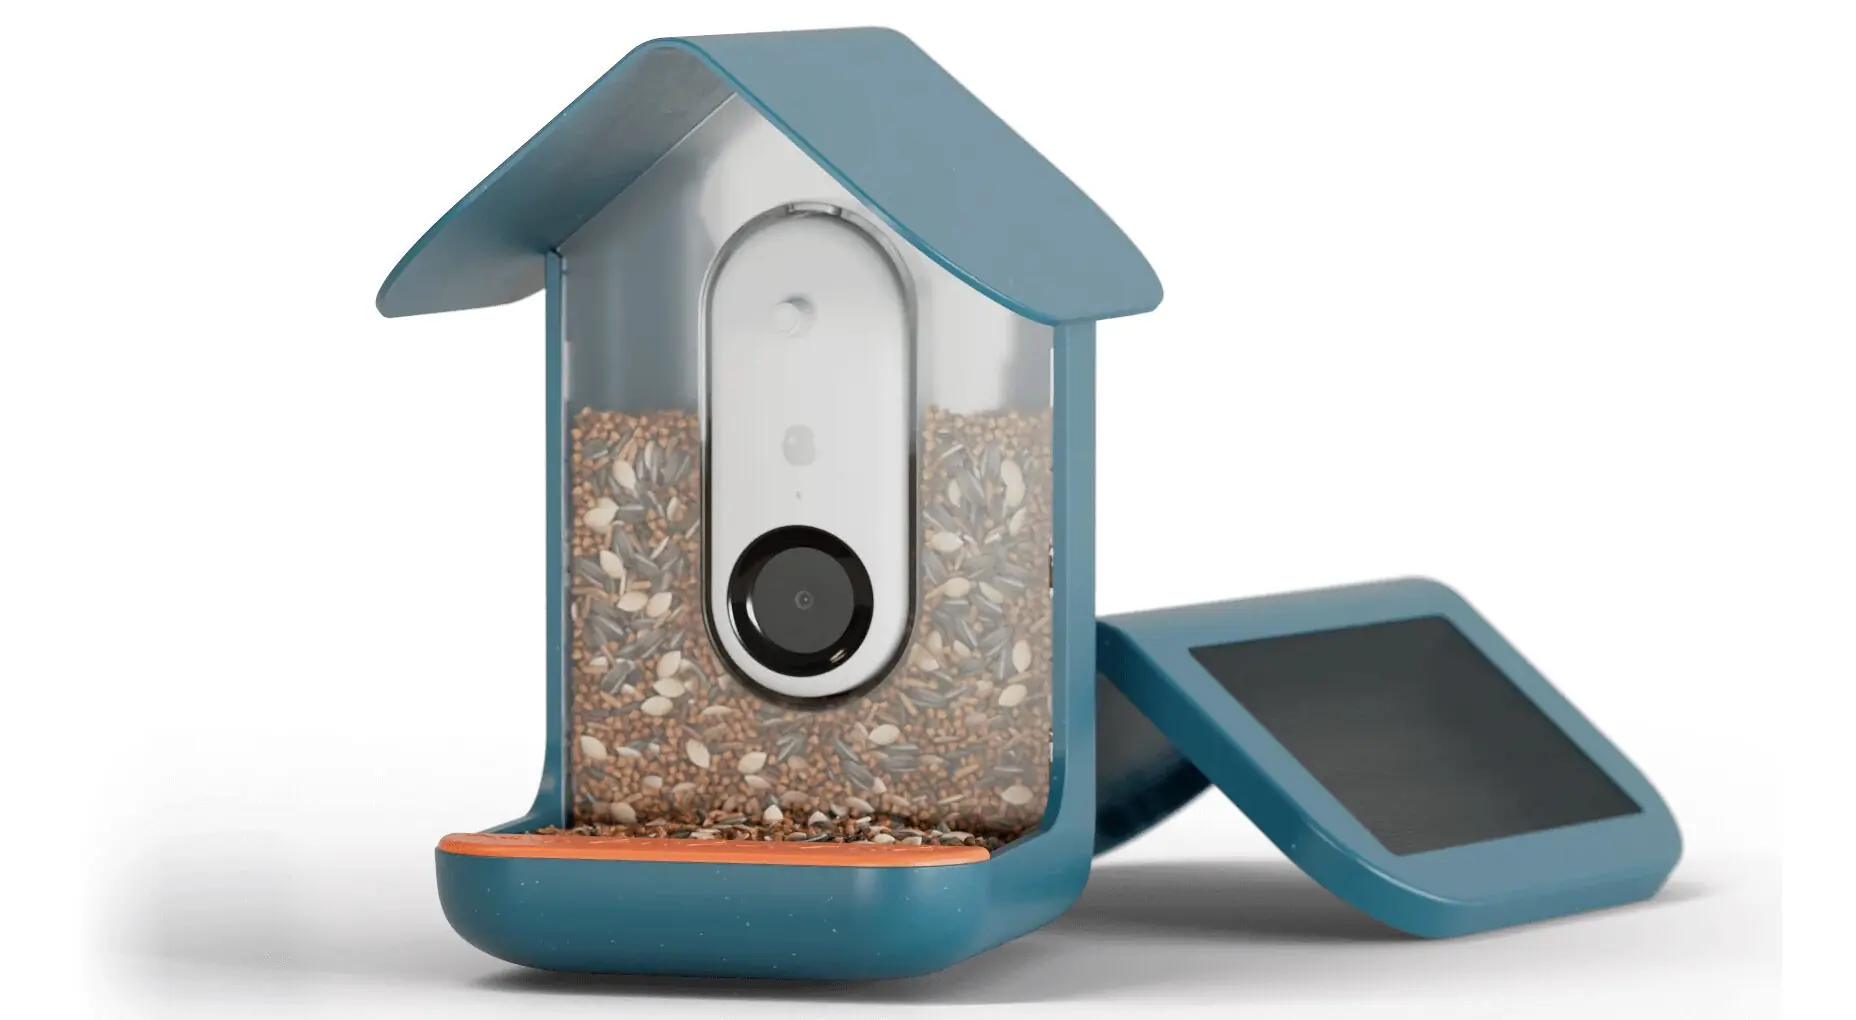
Credit: support.mybirdbuddy.com
Preparing Your Bird Buddy Camera
Preparing your Bird Buddy Camera for charging is an essential step to keep it ready for capturing those beautiful bird moments. Taking a few minutes to get everything in place ensures a smooth charging process and extends the life of your device. Let’s look at what you need before plugging in your camera.
Gathering Necessary Charging Accessories
Start by collecting all the accessories required for charging your Bird Buddy Camera. This usually includes the charging cable, power adapter, and possibly a charging dock if your model supports one.
- Use the original charging cable provided with your camera to avoid compatibility issues.
- Check if the power adapter matches the voltage requirements specified in the user manual.
- Keep a clean, dry space handy to place your camera while it charges.
Having everything ready saves you time and prevents frustration. Have you ever tried to charge your camera only to realize the cable was missing or incompatible? Avoid that hassle by organizing your accessories beforehand.
Checking Battery Status
Before you connect your camera to the charger, check its current battery level. Most Bird Buddy Cameras display battery status through an app or an indicator light.
- Open the Bird Buddy app to see the exact battery percentage.
- Look for any warning signals like blinking lights that suggest low power.
- Note if the camera shuts down unexpectedly during use, which could mean it’s time to charge.
Knowing your battery status helps you plan when to charge without interrupting your birdwatching sessions. Think about how much longer you want to use your camera before fully charging it—this can guide how long you leave it plugged in.
Charging Methods
Charging your Bird Buddy Camera is simple and quick. You can power it up using different methods designed for convenience. Each method ensures your camera stays ready to capture every moment.
Using The Usb Cable
The most common way to charge the Bird Buddy Camera is with the USB cable. Connect the cable to the camera’s charging port. Plug the other end into a USB power adapter or a computer.
This method provides a steady and reliable charge. It is perfect for indoor use or when you have access to a power source. The camera will show a light indicator while charging, so you know it is working.
- Use the original USB cable for best results.
- Charging time usually takes a few hours.
- Safe to charge overnight without damage.
Wireless Charging Options
The Bird Buddy Camera also supports wireless charging. Place the camera on a compatible wireless charging pad. Make sure the camera’s charging area touches the pad’s surface.
This method eliminates cables and makes charging more convenient. It is great for quick top-ups throughout the day. Wireless charging pads vary, so check for compatibility before use.
- Use a Qi-certified wireless charger for safety.
- Avoid metal objects between the camera and pad.
- Keep the camera still during charging for best results.
Step-by-step Charging Process
Charging your Bird Buddy Camera is simple and quick. Follow a clear process to ensure your device powers up correctly. Proper charging helps your camera last longer and work efficiently. Here is the step-by-step charging process that guides you through connecting the charger and understanding the indicator lights.
Connecting The Charger
Start by locating the charging port on your Bird Buddy Camera. Use the charger that comes with the device for the best fit and safety. Plug the charger firmly into the camera’s port. Next, connect the other end of the charger to a power source, such as a USB wall adapter or a computer.
Make sure the connection is secure to avoid interruptions. Avoid using damaged cables or adapters. Charging usually takes a few hours, but times can vary depending on the power source.
Indicator Lights And What They Mean
The Bird Buddy Camera has indicator lights to show the charging status. Pay attention to these lights to know when the camera is charging or fully charged.
- Red light:The camera is charging.
- Green light:Charging is complete.
- Flashing light:There may be a connection or charging issue.
If the light flashes, check the cable and connection. Reconnect the charger if needed. Understanding these signals helps you maintain your camera’s battery health and avoid power problems.
Credit: gearjunkie.com
Charging Tips For Longevity
Charging your Bird Buddy Camera correctly helps keep the battery healthy. Good charging habits extend battery life. This means your camera works longer without needing frequent replacements. Here are important tips to follow.
Optimal Charging Times
Charge the camera during moderate times of the day. Avoid charging in very hot or cold places. The best time is when the battery level drops below 20%. Stop charging once it reaches 80% to 90%. This keeps the battery from stress.
Avoiding Overcharging
Do not leave the camera plugged in after full charge. Overcharging can reduce battery capacity. Unplug the charger as soon as the camera reaches full charge. Use a timer or smart plug if needed. This prevents unnecessary battery wear.
Battery Care Best Practices
- Use the original charger or a compatible one.
- Keep the charging port clean and dry.
- Store the camera with about 50% battery if not used for long.
- Avoid complete battery drain before charging.
- Charge regularly to maintain battery health.
Troubleshooting Charging Issues
Charging issues can stop your Bird Buddy camera from working properly. Troubleshooting these problems quickly helps keep your camera ready to catch every bird visit. Knowing common issues and how to solve them saves time and frustration.
Common Problems And Solutions
- Camera not charging:Check the charging cable for damage. Use the original charger to ensure proper voltage.
- Slow charging:Clean the charging port gently with a soft brush. Avoid charging in extreme cold or heat.
- Battery not holding charge:Fully discharge the battery, then charge it completely. If the issue stays, the battery may need replacement.
- Charging indicator not lighting up:Test the power source with another device. Replace the charger or cable if needed.
When To Contact Support
Contact Bird Buddy support if the camera still does not charge after trying all solutions. Persistent issues could mean a hardware fault. Support can guide you through advanced troubleshooting or warranty options.
:max_bytes(150000):strip_icc()/bird-feeder-with-camera-f5a327fa34d746f5beeacd7a48eb9021.jpg)
Credit: www.realsimple.com
Frequently Asked Questions
How Do I Charge My Bird Buddy Camera?
To charge your Bird Buddy camera, connect the included USB cable to the camera’s charging port. Plug the other end into a power adapter or USB port. Charging takes about 2-3 hours for a full battery.
Can I Use Any Charger For Bird Buddy?
It is best to use the original charger or a 5V USB adapter. Using incompatible chargers may damage the battery or reduce charging efficiency. Always check the voltage and current specifications before charging.
How Do I Know When Bird Buddy Is Fully Charged?
The Bird Buddy camera’s LED indicator shows charging status. A red light means charging; it turns green when fully charged. Avoid overcharging by unplugging once the green light appears.
How Long Does Bird Buddy Battery Last After Charging?
A full charge typically lasts 2-3 weeks depending on usage. Frequent photo capturing and Wi-Fi connectivity may reduce battery life. Charge regularly to ensure continuous operation.
Conclusion
Charging your Bird Buddy Camera is simple and quick. Use the right cable and plug it into a power source. Keep an eye on the battery level to avoid interruptions. A full charge helps capture every moment clearly. Regular charging ensures the camera stays ready to use.
Enjoy watching birds anytime without worrying about power. Follow these steps for smooth, hassle-free charging every time. Your Bird Buddy Camera will always be ready for your next birdwatching adventure.


