
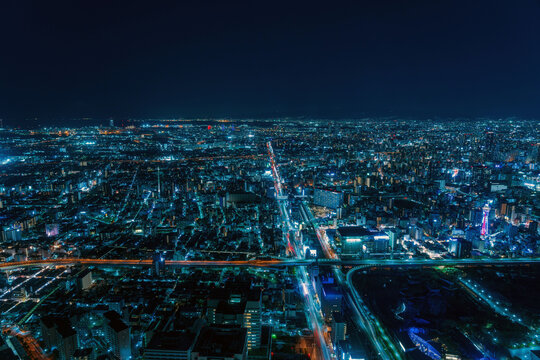
Have you ever wanted to capture a scene from above, showing the full picture in one stunning shot? Taking a bird’s eye view photo lets you do just that.
It’s a unique way to see the world from a fresh perspective, making your photos stand out. You’ll learn simple, practical tips to master this technique. Whether you have a drone, a tall ladder, or just your smartphone, you’ll discover how to get amazing shots that grab attention every time.
Ready to see your photography in a whole new way? Let’s dive in.
Choosing The Right Equipment
Taking a bird eye view photo requires special equipment. The right tools help you capture clear and wide images from above.
This guide covers the best cameras and lenses for bird eye view photography. Knowing what to pick makes shooting easier and better.
Best Cameras For Bird Eye View
Choose cameras with high resolution and good image stabilization. These features help capture sharp photos from high angles.
- DSLR cameras with full-frame sensors offer excellent image quality.
- Mirrorless cameras are lightweight and have fast autofocus.
- Drones with built-in cameras allow easy aerial shooting.
- Action cameras are small and good for tight spaces.
Essential Lenses And Accessories
Picking the right lenses and gear helps you get the perfect shot from above. Wide-angle lenses capture more of the scene below.
| Lens Type | Use | Benefit |
| Wide-angle lens | Landscape shots | Captures wide scenes |
| Telephoto lens | Zoom on details | Focuses on distant objects |
| Fisheye lens | Creative effects | Shows a curved, wide view |
| Tripod | Camera stability | Reduces blur from movement |
| Remote shutter | Trigger camera | Prevents shake during shooting |

Credit: www.freepik.com
Finding Perfect Locations
Taking a bird eye view photo needs a good spot. You must find places that give wide views and clear scenes.
This guide helps you find great locations for bird eye view photos. It covers city areas, nature spots, and tall places.
Urban Settings
City rooftops and tall buildings give wide views of streets and parks. Look for public terraces or accessible rooftops.
- Check for permission to access rooftops
- Choose early morning or late evening for soft light
- Find places with open views and few tall trees
Natural Landscapes
Hills, cliffs, and open fields offer great angles to shoot nature. Look for spots with clear views of rivers, forests, or mountains.
| Location Type | Best Time to Visit | What to Look For |
| Hilltops | Sunrise or Sunset | Wide views and open sky |
| Cliffs | Midday for clear light | Rivers and valleys below |
| Open Fields | Golden hour | Patterns in grass or crops |
High Vantage Points
Tall towers, observation decks, and bridges make good high vantage points. They let you see large areas from above.
Use this checklist before you choose a high vantage point:
- Is the spot safe and legal to access?
- Does it offer a clear, wide view?
- Can you set up your camera without obstacles?
- Is the lighting suitable at your planned time?
Mastering Composition Techniques
Taking a bird eye view photo can create a unique perspective. Good composition makes the photo interesting and clear.
Using simple composition tricks helps you guide the viewer’s eye. It also adds balance and depth to your shots.
Using Leading Lines
Leading lines are lines in your photo that draw the viewer’s eyes to the main subject. They create a path for the eyes to follow.
From a bird eye view, roads, rivers, or fences can serve as strong leading lines. Use them to guide attention across the photo.
- Look for natural or man-made lines
- Place the subject where lines meet or lead
- Keep lines clear and not too busy
Balancing Elements
Balance means placing objects so the photo feels stable. Avoid crowding one side with too much detail.
In bird eye view photos, spread different shapes, colors, or sizes evenly. This keeps the viewer’s eye moving smoothly.
- Use empty space to balance busy areas
- Pair large objects with smaller ones
- Keep color and light balanced across the frame
Incorporating Patterns And Textures
Patterns repeat shapes or colors and add rhythm to photos. Textures bring depth and interest to flat scenes.
Look for natural patterns like fields, rooftops, or shadows. Textures like rough walls or smooth water add contrast.
- Use patterns to fill the frame or highlight the subject
- Mix different textures for a tactile feel
- Capture patterns from above for strong visual impact
Credit: stock.adobe.com
Utilizing Drones For Aerial Shots
Taking bird eye view photos shows a unique perspective from above. Drones make this easy and fun.
Drones can fly high and capture wide views. They help you get clear and steady aerial shots.
Choosing The Right Drone
Select a drone with a good camera for sharp photos. Look for models with image stabilization.
Battery life is important. Pick a drone that can fly long enough for your shots.
- High-resolution camera (12MP or more)
- Gimbal for steady images
- Flight time of 20 minutes or more
- Easy controls for smooth flying
Safety And Legal Tips
Fly your drone in open areas away from people. Avoid crowded places to keep safety.
Check local drone laws before flying. Follow rules on height limits and no-fly zones.
- Keep drone within line of sight
- Do not fly above 400 feet
- Stay away from airports and restricted areas
- Respect privacy of others
Flight Techniques For Stability
Fly your drone slowly and steadily to get clear photos. Avoid fast or jerky movements.
Use the drone’s hover feature to keep it steady. Take photos when the drone is still.
- Start with calm weather and low wind
- Use manual controls for smooth turns
- Hover and frame your shot before taking photos
- Practice flying to improve control
Lighting Tips For Bird Eye View Photos
Lighting is very important for bird eye view photos. Good light shows details and shapes clearly.
Using the right light can make your photos look sharp and bright. It also helps set the mood.
Golden Hour Advantages
The golden hour happens just after sunrise or before sunset. The light is warm and soft then.
This light reduces harsh shadows and adds a nice glow. It makes colors look richer and natural.
- Light is less direct and easier to work with
- Colors become warmer and more inviting
- Shadows are softer and less distracting
- Highlights show texture and depth
Dealing With Shadows
Shadows can hide details in bird eye view photos. Watch where shadows fall on your subject.
Use shadows to add depth but avoid large dark areas. Change your shooting angle to soften shadows.
- Move your camera to reduce strong shadows
- Use a reflector to bounce light into shadow areas
- Avoid shooting in bright midday sun without shade
- Try filling shadows with artificial light if needed
Using Natural And Artificial Light
Natural light gives a soft, even look. Shoot outdoors or near windows for good natural light.
Artificial light helps when natural light is weak. Use lamps or LED panels to brighten your photo.
- Natural light is best during morning or late afternoon
- Artificial light can fill dark spots or add highlights
- Mix both lights carefully to keep colors natural
- Use diffusers to soften harsh artificial light
Post-processing Tips
Taking a bird eye view photo is just the start. Editing helps bring out the best in your shot.
Good post-processing makes colors pop and fixes small issues. This guide covers key editing steps.
Enhancing Colors And Contrast
Adjust colors to make your photo lively. Increase contrast to add depth and make details clear.
- Boost saturation carefully to avoid unnatural colors
- Use curves or levels to improve brightness and contrast
- Adjust white balance for true-to-life colors
- Apply selective color edits to highlight key areas
Correcting Perspective
Bird eye photos can have angled lines or distortion. Fix these with perspective tools in your editor.
| Issue | Solution |
| Tilted horizon | Use rotate or straighten tool |
| Leaning buildings or shapes | Apply perspective correction or warp |
| Uneven edges | Crop or transform to balance frame |
Cropping For Impact
Cropping removes distractions and focuses on the main subject. It also improves composition.
Consider these cropping tips:
- Follow the rule of thirds to place key elements
- Leave space around the subject for better balance
- Cut out unwanted objects or empty areas
- Try different crop ratios to find the best look
Credit: rend.pro
Frequently Asked Questions
What Equipment Is Best For Bird’s Eye View Photography?
A drone with a high-resolution camera is ideal for bird’s eye view photos. Alternatively, use a tall tripod or shoot from a high vantage point like a rooftop. Ensure your equipment allows stable, clear shots from above.
How Can I Find The Perfect Location For Bird’s Eye Photos?
Look for elevated spots such as hills, buildings, or bridges. Urban areas with interesting patterns and natural landscapes with contrasting colors work well. Scout locations that offer a clear, unobstructed view from above.
What Settings Optimize Bird’s Eye View Photos?
Use a narrow aperture (f/8-f/11) for sharpness across the frame. Choose a fast shutter speed to avoid motion blur, especially with drones. Shoot in RAW format for better post-processing flexibility.
How Do I Compose A Captivating Bird’s Eye View Photo?
Focus on patterns, shapes, and symmetry visible from above. Include contrasting colors and textures to add interest. Use leading lines to guide the viewer’s eye through the image.
Conclusion
Capturing a bird’s eye view photo can be simple. Use a drone or find a tall spot. Focus on lighting and composition. Practice makes perfect. Try different angles to find the best shot. Keep your camera steady. Use a tripod if needed.
Edit your photos for the final touch. Share your work with friends and family. Enjoy the process and learn from each shot. With time, you’ll capture stunning aerial images. Happy shooting!


