
Have you ever wanted to see your bedroom from a fresh perspective? Drawing a bird’s eye view of your bedroom lets you do just that.
It’s a simple way to visualize your space clearly and plan how everything fits together. Whether you’re rearranging furniture or designing a new layout, this skill can save you time and frustration. In this guide, you’ll learn easy steps to create your own bird’s eye view drawing, even if you’ve never tried before.
Ready to transform how you see your room? Let’s get started!
Materials Needed
Drawing a bird’s eye view of a bedroom requires some basic materials. These tools help you create an accurate and neat sketch from above.
Gathering the right supplies before starting makes the process easier and more enjoyable.
Drawing Tools
Good drawing tools are essential for clear lines and details. Use pencils for sketching and pens for final outlines.
- Graphite pencils (HB, 2B)
- Eraser
- Ruler or straightedge
- Fine-tip pens or markers
- Colored pencils or markers (optional)
- Drawing paper or sketchbook
Measurement Supplies
Accurate measurements help you draw a bedroom that matches the real size. Use simple tools to measure the room and furniture.
- Tape measure or measuring tape
- Notebook to write down measurements
- Calculator for scaling sizes
Reference Images
Using pictures helps you understand the layout and details of the bedroom. You can find photos of rooms or furniture online or take your own.
- Photos of bedrooms from above or floor plans
- Pictures of furniture pieces
- Examples of bird’s eye view drawings

Credit: www.spoak.com
Preparing The Space
Drawing a bird’s eye view of a bedroom starts with preparing the space. This ensures your sketch will be clear and accurate.
Two main tasks help in preparation: clearing the area and taking accurate measurements. Both are important for a good layout.
Clearing The Area
Remove any items that block your view of the floor. This includes small furniture, rugs, or clutter on the ground.
- Move chairs and small tables aside
- Pick up toys, books, or clothes from the floor
- Remove rugs or mats to see the floor clearly
- Ensure good lighting to spot all corners
Taking Accurate Measurements
Measure the room’s length and width carefully. Also, measure doors, windows, and fixed furniture.
| Item | Measurement Needed |
|---|---|
| Room Length | Wall to wall distance |
| Room Width | Wall to wall distance |
| Door Size | Height and width |
| Window Size | Height and width |
| Furniture | Length, width, and height |
Sketching The Room Layout
Drawing a bird’s eye view of a bedroom starts with sketching the room layout. This helps you plan the space clearly.
First, you draw the walls. Then you mark the doors and windows. These steps make the layout easy to understand.
Drawing The Walls
Begin by drawing the outline of the bedroom walls. Use a ruler to keep the lines straight and neat.
- Measure the length of each wall accurately.
- Draw the walls to scale on your paper or screen.
- Include any corners or alcoves in the room shape.
- Use light pencil strokes to adjust if needed.
Marking Doors And Windows
Next, add the doors and windows to your wall drawing. This shows how people enter and how light enters the room.
| Feature | How to Draw | Tips |
| Doors | Draw a break in the wall line with an arc showing the door swing. | Show which way the door opens. |
| Windows | Draw a thin rectangle inside the wall line. | Place windows where natural light enters. |
Credit: medium.com
Adding Furniture And Fixtures
Drawing a bird’s eye view of a bedroom helps you plan where to place furniture. It shows the room from above, making it easy to arrange items. Adding furniture and fixtures makes your drawing look complete and useful.
Start by deciding which pieces of furniture to include. Then, add details like storage and small decorations. This guide will help you add beds, tables, storage, and small details in your drawing.
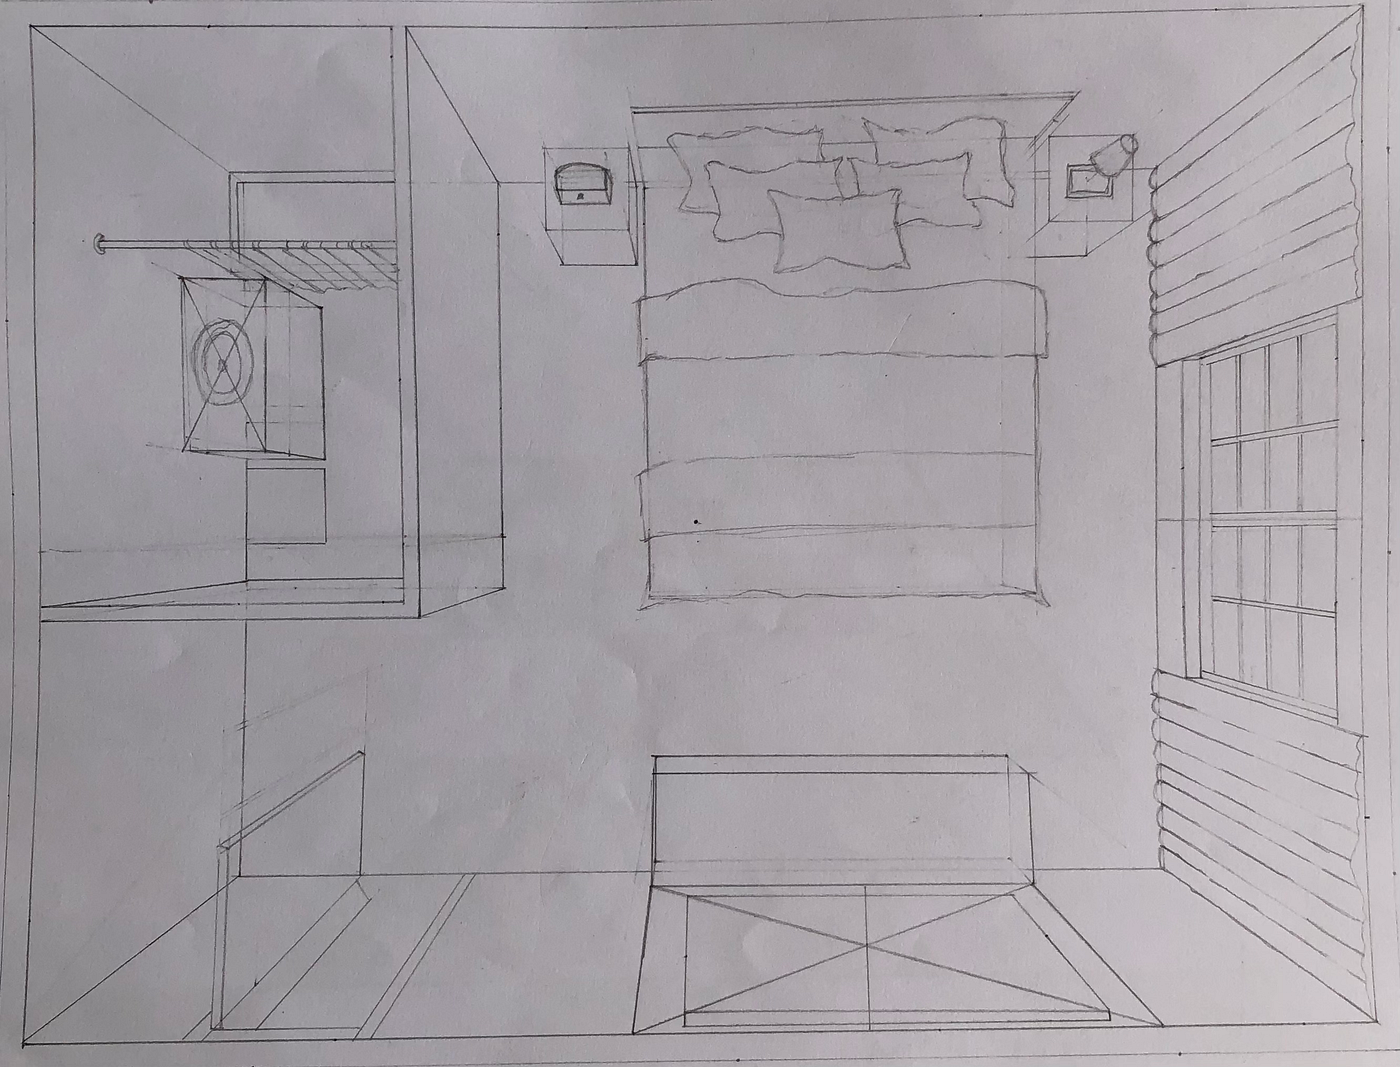
Placing Beds And Tables
Place the bed first because it takes the most space. Draw it in the center or against a wall. Then add tables near the bed or around the room. Tables can be nightstands or desks.
- Draw the bed as a rectangle, showing pillows and blankets.
- Place tables close to the bed for convenience.
- Use simple shapes like squares or rectangles for tables.
- Keep enough space around furniture for walking paths.
Including Storage Units
Storage units like wardrobes and shelves keep the room tidy. Draw them along walls to save space. Show doors or drawers to make them clear in your drawing.
| Storage Type | Shape in Drawing | Placement Tips |
| Wardrobe | Rectangle with lines for doors | Along walls, near the bed |
| Shelves | Thin rectangles or squares | Above desks or empty walls |
| Drawers | Small rectangles under tables | Next to bed or desk |
Adding Small Details
Small details make your drawing more realistic. Add lamps, rugs, or plants to show comfort. These items add life and make the room feel complete.
- Draw lamps as small circles or squares with lines for stands.
- Show rugs as shaded areas or patterned rectangles.
- Add plants as small circles with leaf shapes.
- Mark windows and doors clearly to fit furniture around them.
Refining The Drawing
After sketching the basic shapes of your bedroom from a bird’s eye view, it is time to refine the drawing. Refining helps make the layout clearer and easier to understand.
This stage focuses on improving lines, shapes, and adding important details. Clear drawings show the room’s design better.
Enhancing Lines And Shapes
Start by darkening the main outlines of walls and furniture. Use smooth, steady lines to make the shapes neat.
Erase extra sketch marks and fix any uneven edges. Make sure all objects have clear, simple shapes.
- Use a ruler for straight walls and edges
- Draw curves carefully for rounded furniture
- Keep lines consistent in thickness
- Remove overlapping or unclear lines
Adding Labels And Annotations
Labels help identify furniture and room parts in your drawing. Write simple names next to each item.
Annotations give extra details like measurements or material types. Use small text and arrows to connect notes to objects.
- Label beds, desks, wardrobes, and doors
- Note window sizes or door swings
- Use arrows to show direction or size
- Keep writing neat and readable
Final Touches
Adding final touches makes your bird’s eye view drawing clear and neat. Small details help others understand your bedroom layout better.
Focus on colors, shading, and checking your drawing for any mistakes before finishing.
Using Colors And Shading
Colors help show different parts of the bedroom. Use light colors for walls and darker colors for furniture. This makes the drawing easier to read.
Shading adds depth. Shade areas where shadows would naturally fall, like under the bed or behind a chair. This gives a 3D effect.
- Use soft colors to avoid distraction
- Shade edges to show height differences
- Keep colors consistent for similar items
Reviewing For Accuracy
Check your drawing to make sure all items are in the right place. Measure twice to avoid mistakes. Accurate scale helps others understand the space well.
Look for missing details like doors, windows, or light switches. These small parts complete your drawing and improve clarity.
- Verify furniture sizes match real objects
- Confirm room dimensions are correct
- Ensure labels are clear and readable

Credit: hollyl-84270.medium.com
Frequently Asked Questions
What Tools Do I Need To Draw A Bird’s Eye View Bedroom?
You need graph paper, a ruler, pencil, eraser, and measuring tape. These tools help create accurate, clean, and proportional drawings for your bedroom layout.
How Do I Measure A Bedroom For A Bird’s Eye View?
Measure the length and width of the room using a tape measure. Note dimensions of doors, windows, and furniture for precise scaling in your drawing.
What Scale Should I Use For A Bedroom Floor Plan?
Common scales are 1:50 or 1:100, meaning 1 cm equals 50 or 100 cm. Choose a scale that fits your paper and shows enough detail clearly.
How Can I Add Furniture Accurately To The Bird’s Eye View?
Measure each furniture piece, then draw them to scale on the plan. Place them according to their actual position for a realistic layout.
Conclusion
Creating a bird’s eye view of a bedroom is simple and fun. Start with basic shapes to outline furniture. Use light lines to adjust as needed. Add details like lamps and rugs for realism. Keep practicing, and your skills will improve over time.
Remember, there’s no perfect drawing. Each attempt is a step forward. Enjoy the process and let your creativity flow. Soon, drawing from above will feel natural. Art is about expression, not perfection. With these tips, you’ll draw confidently and enjoyably.
So grab your pencil and start designing your dream space today!


