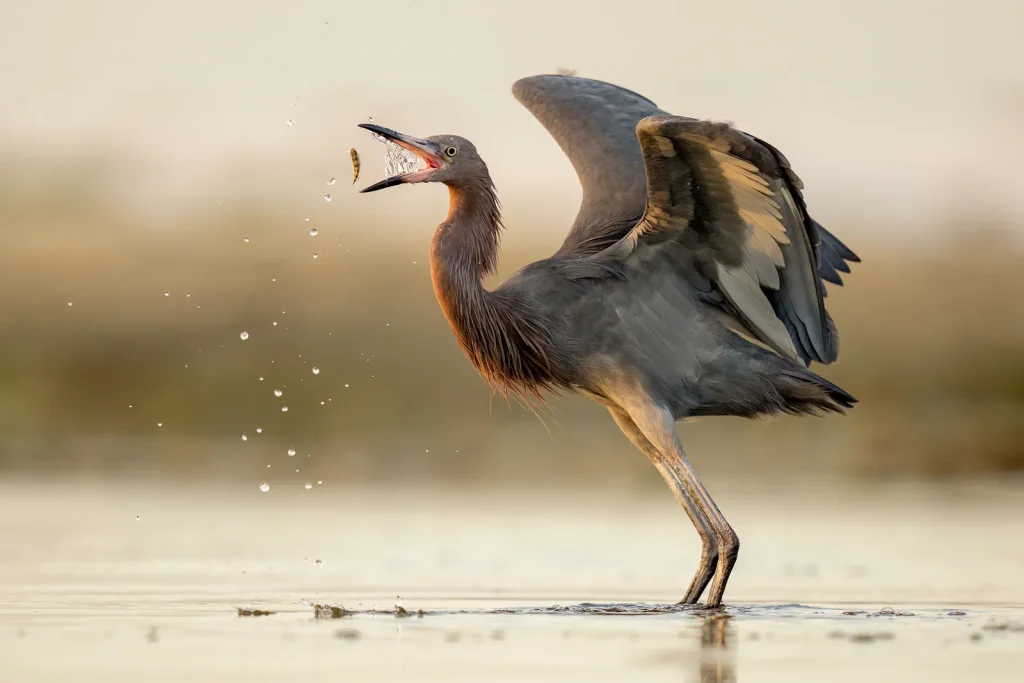
Are you ready to capture stunning photos of birds in flight or perched in their natural habitat? Getting the right camera settings can make all the difference between a blurry shot and a breathtaking image.
Whether you’re a beginner or looking to improve your bird photography skills, understanding the best settings will help you freeze motion, highlight details, and bring your photos to life. Keep reading, and you’ll discover simple yet powerful tips that will transform your bird photography instantly.
Your next great shot is just a few adjustments away!
Choosing The Right Camera
Choosing the right camera is a crucial step in capturing stunning bird photographs. The gear you pick affects your ability to freeze motion, capture fine details, and work efficiently in different lighting conditions. Understanding the options available helps you make informed decisions that suit your style and budget.
Dslr Vs Mirrorless
Both DSLR and mirrorless cameras have unique strengths for bird photography. DSLRs offer an optical viewfinder that some photographers prefer for its clarity and real-time view. However, mirrorless cameras provide faster autofocus and continuous shooting speeds, which can be a game-changer when tracking quick birds.
Mirrorless models tend to be lighter and more compact, making long outings easier on your body. Think about your shooting style—do you value a lightweight setup for hikes, or do you prefer the traditional feel of a DSLR? Your choice should match how and where you plan to shoot.
Sensor Size And Resolution
Sensor size directly impacts image quality and low-light performance. Full-frame sensors generally capture more light and detail, which helps when shooting in dim conditions like dawn or dusk. Crop sensors, on the other hand, give you extra reach because of the crop factor, making distant birds appear closer without needing a longer lens.
Resolution matters too, but higher megapixels don’t always mean better images. If you want to crop tightly or print large photos, aim for a camera with at least 20 megapixels. Otherwise, focus on sensor quality and ISO performance to get sharp, clear shots.
Lens Selection For Birds
Your lens choice is as important as the camera body. Telephoto lenses with focal lengths of 300mm and above are essential to get close-up shots without disturbing birds. Fast lenses with wide apertures (like f/2.8 or f/4) help in low light and create beautiful background blur to make your subject stand out.
Consider image stabilization features to reduce camera shake, especially if you shoot handheld. Zoom lenses offer flexibility when birds move unpredictably, but prime lenses often deliver sharper images. What kind of birds do you want to photograph? That will guide your lens choice—larger birds might allow for shorter focal lengths, while small, skittish birds require longer reach.
Optimal Shutter Speed
Choosing the optimal shutter speed is crucial for capturing sharp and detailed bird photos. It controls how long your camera sensor is exposed to light, directly affecting motion blur and image clarity. Knowing how to adjust shutter speed based on your subject’s movement can transform your bird photography results.
Freezing Bird Motion
Birds move fast, and freezing their motion requires a high shutter speed. Generally, a shutter speed of at least 1/1000 second is ideal for clear, sharp images of birds in action. This speed helps capture the flutter of wings or sudden head turns without blur.
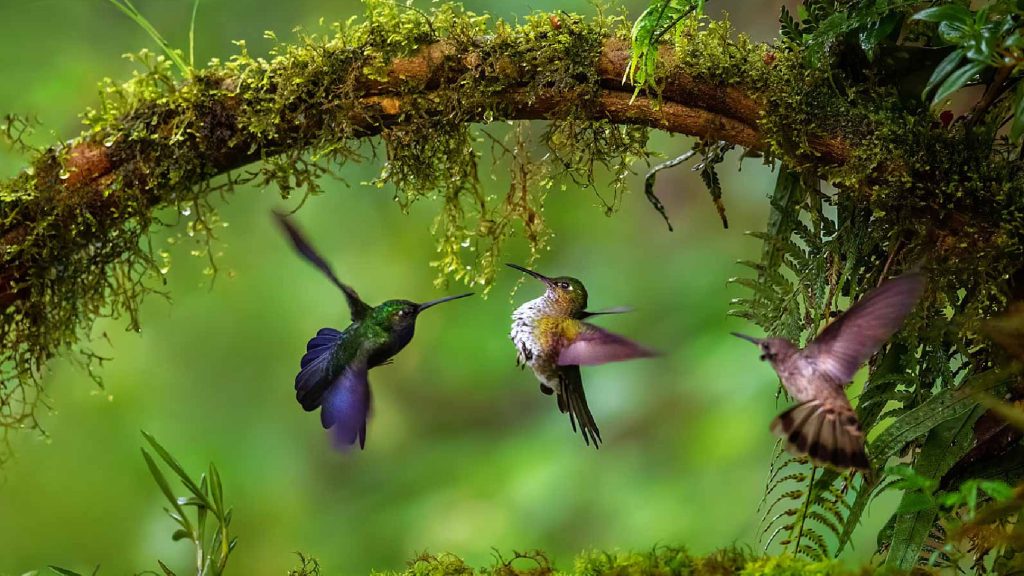
In my experience photographing hummingbirds, increasing the shutter speed to 1/2000 second made a huge difference. Their wings stopped mid-air, showing incredible detail. If your shutter speed is too slow, you’ll end up with smudged wings instead of crisp feathers.
Adjusting For Flight And Perching
Flight shots demand faster shutter speeds than birds perched or standing still. For flying birds, aim for shutter speeds between 1/1000 and 1/4000 second depending on their speed and size. Smaller, quicker birds need the higher end of this range.
When birds are perching or moving slowly, you can reduce shutter speed to around 1/500 to 1/800 second. This allows more light into the camera and helps avoid underexposed images while still keeping the subject sharp.
Have you tried experimenting with shutter speeds during different bird activities? Notice how your images improve when you tailor your settings to the bird’s behavior. Small adjustments can make your photos stand out.
Aperture Settings
Aperture settings play a crucial role in bird photography by controlling the amount of light entering your camera and shaping how much of the image appears sharp. Choosing the right aperture affects both your exposure and the depth of field, which determines how much of the scene is in focus. Getting this balance right can make your bird photos stand out with crisp details and beautiful backgrounds.
Balancing Depth Of Field
Depth of field (DoF) is the zone of sharpness in your photo, and adjusting your aperture changes its size. A smaller aperture (higher f-number like f/8 or f/11) increases DoF, keeping more of the bird and its surroundings in focus. This is helpful when you want to show the bird in its habitat, but it can reduce the light entering your lens, so you might need to compensate with shutter speed or ISO.
On the other hand, a wider aperture (lower f-number such as f/2.8 or f/4) creates a shallow DoF, which can blur the background dramatically. This effect helps your subject stand out but means only a small part of the bird will be razor-sharp. Have you tried adjusting the aperture to see how much background blur your lens can create without losing focus on the bird’s eyes?
Isolating The Subject
Using a wide aperture is a common technique to isolate your bird from distracting backgrounds. When the background blurs out, your viewer’s attention goes straight to the bird, making your photo more powerful. This is especially useful in busy environments like forests or urban parks where clutter can overwhelm the image.
Choosing an aperture between f/2.8 and f/5.6 often works well for isolation. However, be careful not to go too wide if your bird is moving or if it has intricate details like feathers that need to stay sharp. Have you noticed how a slightly narrower aperture can help keep the bird’s head and eyes in crisp focus while still softening the background?

Credit: digital-photography-school.com
Iso Considerations
ISO is a crucial setting in bird photography that directly affects your image quality and exposure. It controls your camera sensor’s sensitivity to light. Balancing ISO with other settings like shutter speed and aperture can make or break your shot, especially when capturing fast-moving birds or shooting in varying light conditions.
Maintaining Image Quality
Keeping your ISO as low as possible helps preserve the sharpness and detail of your photos. Higher ISO settings introduce noise—those unwanted grainy specks—that can obscure fine feathers and vibrant colors.
Try to stick around ISO 100 to 400 during bright daylight. This range keeps your images clean and detailed, allowing you to zoom in on birds without losing quality. I once shot a rare hummingbird at ISO 800 and noticed visible grain that distracted from its iridescent feathers. That experience taught me to prioritize low ISO whenever light allows.
Handling Low Light Conditions
Birds are often most active during dawn or dusk when light is limited. Raising your ISO becomes necessary to maintain a fast shutter speed and avoid motion blur.
Don’t be afraid to increase ISO to 800 or even 1600 in these moments. Modern cameras handle noise better than ever, and a slightly grainy image is better than a blurry one. If your camera struggles at high ISO, consider using noise reduction tools during post-processing.
Ask yourself: Would you rather have a sharp, slightly noisy image or a blurry one that misses the action? Adjust your ISO with that in mind to capture those fleeting bird moments perfectly.
Focus Modes And Techniques
Getting the focus right is crucial in bird photography. Birds move fast, and their unpredictable actions demand precise focus settings and techniques. Mastering these can dramatically improve your chances of capturing sharp, stunning images.
Continuous Autofocus
Continuous autofocus (often called AF-C or AI Servo) keeps your camera locked onto a moving bird. This mode tracks your subject as it flies or hops around, adjusting focus constantly without you needing to refocus manually.
Imagine a hummingbird darting from flower to flower. Using continuous autofocus lets you follow that rapid movement effortlessly. It reduces the frustration of blurry shots and lets you concentrate on timing your capture perfectly.
However, continuous autofocus can sometimes struggle in low light or when the background is busy. You may need to test your camera’s tracking sensitivity settings to avoid focus hunting or slipping off the bird.
Using Focus Points Effectively
Your camera offers multiple focus points, but using them wisely makes all the difference. Instead of letting the camera choose automatically, select a focus point that matches the bird’s eye or head. This ensures the sharpest detail where it matters most.
Try using a single focus point or a small group of points rather than a wide cluster. This prevents the camera from locking onto the background or other distractions. It also helps when photographing small or camouflaged birds.
Have you noticed how some birds blend perfectly with their surroundings? Manually choosing focus points helps you isolate them in your frame. Play around with your focus point selection to find what works best in different scenarios.
White Balance Choices
Choosing the right white balance is vital in bird photography. It affects how colors appear in your photos. Proper white balance enhances natural hues and captures lifelike details. This guide explores white balance choices for stunning bird images.
Natural Lighting Adjustments
Natural lighting varies throughout the day. Early mornings and late afternoons offer soft light. Midday light can be harsh and bright. Adjust your camera’s white balance to match these changes. Use the daylight setting for a natural look in direct sunlight. Cloudy settings work well during overcast conditions. These settings help maintain natural colors in your bird photos.
Custom White Balance Tips
Sometimes, preset white balance isn’t enough. Create a custom white balance for tricky lighting. Use a white or gray card for reference. Place it in the same light as your subject. Set your camera to custom white balance. Follow your camera’s instructions to capture the card. This method ensures accurate colors in unusual lighting situations. It gives you more control over your photo’s color temperature.
Shooting In Raw Vs Jpeg
Choosing RAW captures more detail and allows better editing for bird photos. JPEG files save space but limit adjustments after shooting. Selecting RAW is best for sharp, high-quality bird images.
Choosing between shooting in RAW or JPEG is crucial in bird photography. Each format has its unique benefits and limitations. Understanding these can enhance your bird photography experience.Benefits Of Raw Format
RAW files capture more detail than JPEGs. They store unprocessed data from the camera sensor. This means higher quality images. RAW format retains more color information. This is vital for capturing vibrant birds. Shooting in RAW provides greater detail in shadows and highlights. This is essential for birds with intricate patterns.Post-processing Flexibility
RAW files offer extensive post-processing options. You can adjust exposure, contrast, and white balance without quality loss. This flexibility is useful for correcting challenging lighting conditions. With RAW, recover lost details in bright or dark areas. It provides a better chance to save imperfect shots. JPEGs limit editing possibilities, leading to potential quality loss.
Credit: digital-photography-school.com
Using Exposure Compensation
Using exposure compensation is a powerful way to fine-tune your camera’s exposure settings, especially when photographing birds. Birds often appear against bright skies or dark foliage, and your camera’s meter can be easily fooled. Adjusting exposure compensation helps you get the right brightness without losing important details.
Handling Bright And Dark Scenes
Bright scenes, like a bird perched against a clear blue sky, can trick your camera into underexposing the image. You might find your bird looking too dark or shadowy. Adding positive exposure compensation (+1 or +2 stops) brightens the bird and reveals more details.
On the other hand, dark scenes such as birds in dense shade can cause overexposure, washing out highlights. Dialing in negative exposure compensation (-1 or -2 stops) helps preserve those subtle shadows and textures. Have you noticed how a small adjustment can completely change the mood of your shot?
Avoiding Overexposure
Overexposure is a common problem when shooting white or light-colored birds. Their feathers reflect a lot of light, causing loss of detail. Using negative exposure compensation is essential to keep the feathers from turning into bright, featureless spots.
Try to review your histogram after each shot. It’s a great tool to spot overexposure before you finish the session. Adjust your exposure compensation accordingly to protect those delicate highlights and maintain texture in the feathers.
Additional Camera Settings
Additional camera settings can greatly improve bird photography results. These settings help capture sharp, clear images, especially of fast-moving birds. Adjusting these features allows better control over motion and stability during shooting.
Burst Mode For Action Shots
Burst mode captures many photos in quick succession. This increases the chance of getting the perfect shot. Birds move fast, so single shots might miss key moments. With burst mode, you get multiple frames to choose from.
Use burst mode to capture takeoffs, flights, and feeding actions. It helps freeze motion and shows different bird poses. Remember to check your camera’s buffer size to avoid slowdowns.
Image Stabilization Tips
Image stabilization reduces blur caused by camera shake. It is crucial when using long lenses for bird photography. Turn on stabilization for handheld shots or when the shutter speed is slow.
For tripod use, turn off stabilization to prevent conflicts. Some cameras or lenses offer different stabilization modes. Test them to find what works best for your setup.

Credit: digital-photography-school.com
Frequently Asked Questions
What Is The Ideal Shutter Speed For Bird Photography?
A shutter speed of 1/1000s or faster freezes bird motion sharply. Faster speeds prevent blur from wing flaps and quick movements. Adjust shutter speed based on bird size and activity for best results.
Which Aperture Works Best For Bird Photos?
Use a wide aperture (f/4 to f/6. 3) to isolate birds from the background. It creates a pleasing blur, highlighting your subject. Narrow apertures increase depth but may reduce shutter speed and light.
How To Set Iso For Bird Photography In Daylight?
Keep ISO low (100-400) in bright light to minimize noise. Increase ISO in low light or fast action to maintain sharpness and proper exposure. Modern cameras handle higher ISO well with less grain.
Should I Use Continuous Or Single Autofocus Mode?
Continuous autofocus (AI Servo/AF-C) tracks moving birds efficiently, keeping them sharp. Single autofocus suits stationary birds but struggles with movement. Use continuous mode for flying or active subjects.
Conclusion
Choosing the right camera settings helps capture stunning bird photos. Fast shutter speeds freeze quick movements clearly. A wide aperture creates a soft background, making birds stand out. Use a higher ISO in low light to keep images bright. Don’t forget to focus on the bird’s eye for sharpness.
Practice these tips often to improve your shots. Enjoy nature and be patient. Good settings make your bird photography more rewarding and fun. Keep experimenting to find what works best for you.